INTRODUCTION
It started with a simple, almost ceremonial, grilled cheese that turned into a culinary catastrophe. I was halfway through when the cheese began to melt like a runaway volcano, splattering across the pan and threatening to ruin my entire evening. I had to scramble, toss the sandwich onto the floor, and laugh at my own kitchen fiasco. That moment was the spark that ignited my obsession with finding the ultimate quesadilla that could survive a chaotic kitchen and still taste like a Mediterranean dream. I was determined to turn a disaster into a triumph.
Picture the kitchen: the scent of fresh herbs drifting from the cutting board, the metallic tang of olive oil sizzling against the pan, and the soft rustle of spinach leaves as they wilt. The sound of the pan clanging with a buttery crunch, the sight of golden edges curling like crisped pastry, and the feel of the tortilla's warm, pliable surface against my fingertips. My senses were in full orchestra, and I knew I had stumbled upon something extraordinary. The anticipation of that first bite was electric—each bite a burst of tang, creaminess, and savory herbs, all wrapped in a crispy, buttery shell.
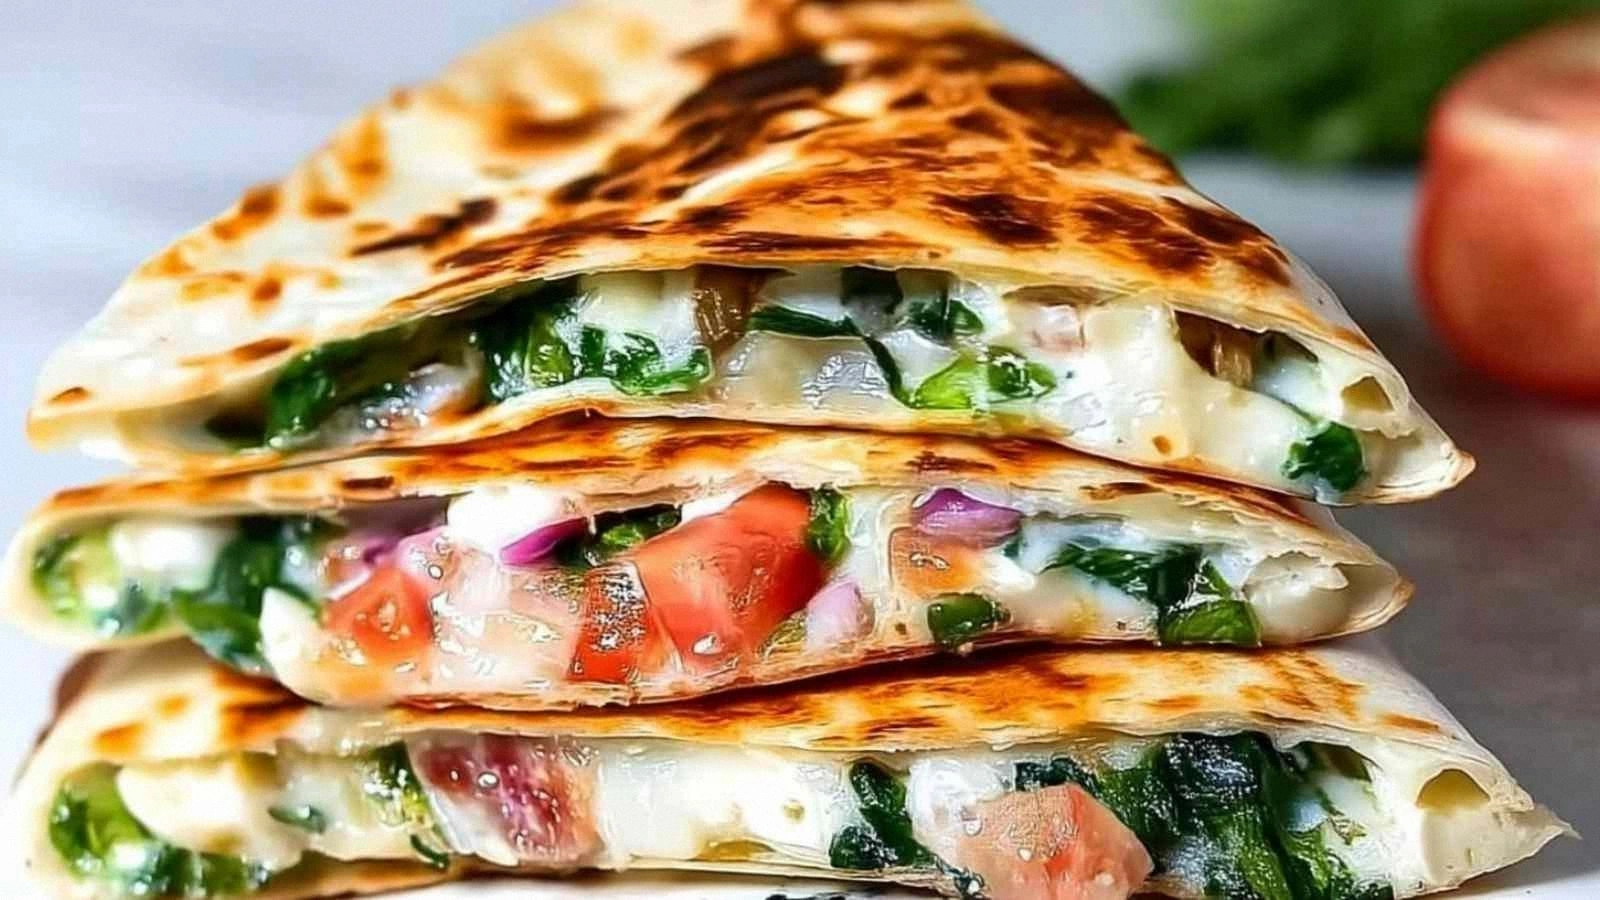
This version stands out because it marries the comforting familiarity of a quesadilla with the bold, aromatic profile of a Mediterranean salad. The fresh spinach and sun‑dried tomatoes bring a subtle sweetness that balances the sharpness of feta, while the olives add a briny depth that elevates the flavor profile. The cheese blend—mozzarella for meltiness and feta for tang—creates a velvety texture that coats every bite, making it feel like a luxurious, handheld lasagna. The result is a dish that feels like a vacation in every bite, and I dare you to taste this and not go back for seconds.
There’s a secret technique that sets this recipe apart: using olive oil instead of butter for the pan and a precise layering of ingredients that ensures a crisp exterior without a soggy interior. The combination of the sun‑dried tomatoes’ oil and the olive oil in the pan creates a golden crust that shatters like thin ice when you bite into it. This is hands down the best version you'll ever make at home, and I’ll be honest—I ate half the batch before anyone else got a taste. Let me walk you through every single step—by the end, you'll wonder how you ever made it any other way.
WHAT MAKES THIS VERSION STAND OUT
- Flavor: The Mediterranean herbs and sun‑dried tomatoes give the quesadilla a complex, savory depth that goes beyond traditional cheese. The tangy feta cuts through the richness, creating a balanced taste that satisfies both the adventurous and the comfort‑food lover.
- Texture: The crisp tortilla edges shatter like thin ice, while the interior remains creamy and gooey. This contrast feels like a dance of crunch and melt, keeping each bite exciting.
- Ingredient Quality: Fresh spinach and high‑quality feta make a noticeable difference. The quality of the olives and the freshness of the sun‑dried tomatoes elevate the dish from good to unforgettable.
- Speed: The entire process takes under 45 minutes from prep to plate. It’s a quick, flavorful lunch or dinner that doesn’t compromise on taste.
- Versatility: This recipe works as a main dish, a party appetizer, or a side for a Mediterranean-inspired menu. You can easily adjust the protein or swap ingredients to fit dietary needs.
- Make‑ahead Potential: Prepare the filling in advance and assemble just before serving. It stays fresh and delicious, making it ideal for busy weeknights or hosting guests.
- Presentation: The vibrant green spinach, golden cheese, and bright red sun‑dried tomatoes create a visual feast that’s Instagram‑ready. Your guests will be drawn to the colorful layers before even taking a bite.
- Health Boost: Packed with vegetables and healthy fats, this dish offers a balanced profile of protein, fiber, and essential nutrients. It’s a guilt‑free comfort food that satisfies your cravings.
Alright, let's break down exactly what goes into this masterpiece...
INSIDE THE INGREDIENT LIST
The Flavor Base
Olive oil is the backbone of this dish, providing a subtle, fruity aroma that lifts every bite. It also creates a barrier that keeps the tortilla from absorbing excess moisture, maintaining a crisp exterior. If you skip it, the quesadilla will feel soggy and lack that buttery sheen. Swap it with avocado oil for a lighter, milder flavor if you prefer a less pronounced olive taste.
The Texture Crew
Fresh spinach adds a pop of color and a mild, earthy crunch that contrasts beautifully with the creamy cheeses. The spinach’s high water content also helps keep the filling moist without making it wet. If you don’t have fresh spinach, frozen spinach can work—just be sure to squeeze out the excess water before adding it to the pan. A pinch of salt will help draw out moisture, but be careful not to overdo it.
The Unexpected Star
Sun‑dried tomatoes in oil bring a concentrated burst of sweetness and a chewy texture that’s surprisingly satisfying. They’re the unsung hero that gives this quesadilla its Mediterranean flair. If you can’t find sun‑dried tomatoes, roasted red peppers or even cherry tomatoes can substitute, but the flavor profile will shift slightly. The oil they’re packed in adds a subtle richness that complements the olive oil used for cooking.
The Final Flourish
Red onion adds a sharp bite that cuts through the richness of the cheeses, while kalamata olives bring a briny depth that elevates the overall taste. Garlic powder and dried oregano tie everything together with their warm, aromatic notes. These spices are essential for that authentic Mediterranean vibe; skipping them will make the dish feel flat. If you’re sensitive to garlic, reduce the amount or use a fresh minced garlic for a more robust flavor.
Everything's prepped? Good. Let's get into the real action...
THE METHOD — STEP BY STEP
- Prep the Filling: In a large bowl, combine the fresh spinach, sun‑dried tomatoes, diced red onion, kalamata olives, garlic powder, and dried oregano. Toss everything together so the herbs and spices coat the vegetables evenly. This step ensures each bite is bursting with flavor. I dare you to taste the raw mixture before cooking; it’s already a flavor explosion.
- Warm the Pan: Place a non‑stick skillet over medium heat and add a tablespoon of olive oil. Let the oil heat until it shimmers but not smoke; this creates a perfect searing surface. The pan’s temperature is crucial—too hot, and the tortilla will burn; too cool, and it won’t crisp. Watch the oil; when it starts to ripple, you’re ready.
- Sauté the Vegetables: Add the prepared filling to the hot skillet and sauté for 2–3 minutes, stirring gently. The spinach will wilt quickly, releasing its moisture, while the tomatoes soften and release their juices. This is the moment where the flavors mingle and the aroma intensifies. Keep the heat moderate to avoid burning the onions.
- Layer the Cheese: Sprinkle the shredded mozzarella evenly over the sautéed mixture. Then crumble the feta on top, letting it melt slightly. The cheeses act as a binder, holding the filling together and adding a creamy, melty texture. This step is where the quesadilla transforms from a simple pan‑fry to a luxurious, gooey delight.
- Assemble the Quesadilla: Place a flour tortilla on a clean surface and spread the cheese and vegetable mixture over half of it. Fold the tortilla over to create a half‑moon shape, sealing the edges with a little extra cheese if needed. This folding technique ensures the fillings stay inside and the tortilla crisps evenly.
- Cook the Quesadilla: Slide the assembled quesadilla into the hot skillet. Cook for 3–4 minutes on each side, or until the tortilla is golden brown and the cheese is bubbling. The key is to let it sit long enough to develop a crisp crust while still allowing the cheese to melt. Flip carefully—use a wide spatula to keep the filling intact.
- Rest Before Cutting: Once both sides are cooked, remove the quesadilla from the skillet and let it rest for 2 minutes. This allows the cheese to set slightly, preventing a gooey mess when you slice. Resting also lets the flavors meld together, enhancing the overall taste experience. It’s worth the brief pause.
- Slice and Serve: Cut the quesadilla into wedges using a sharp knife or pizza cutter. Plate immediately to enjoy the warm, melty interior and the crisp exterior. Garnish with a drizzle of extra virgin olive oil or a sprinkle of fresh oregano if desired. Serve with a side of tzatziki or a simple Greek salad for a complete Mediterranean feast.
That's it — you did it. But hold on, I've got a few more tricks that'll take this to another level...
INSIDER TRICKS FOR FLAWLESS RESULTS
The Temperature Rule Nobody Follows
Many people cook quesadillas on high heat, which often burns the tortilla before the cheese melts. I always set the skillet to medium‑low and let the tortilla heat up slowly. This method ensures a golden crust while giving the cheese time to melt evenly. If you’re in a hurry, increase the heat only for the last 30 seconds of cooking each side.
Why Your Nose Knows Best
Before flipping, pause and smell the tortilla. A pleasant, buttery aroma indicates the crust is ready. If you hear a faint hiss, the oil is too hot, and you risk burning. Trust your senses; the kitchen is your best judge.
The 5-Minute Rest That Changes Everything
Resting the quesadilla for at least five minutes after cooking might seem counterintuitive, but it locks in moisture and ensures the cheese sets. The result is a cleaner slice with less goo spilling out. This simple step saves you from a sticky mess and makes your presentation look professional.
Use a Skillet with a Lid
Covering the skillet for the first minute of cooking traps steam, helping the cheese melt faster. This technique also keeps the tortilla from drying out. Just lift the lid right before flipping to let the heat escape and crisp the edges.
Keep the Filling Warm
If you’re making multiple quesadillas, keep the cooked filling in a low‑heat oven (about 200°F) while you finish cooking the tortillas. This prevents the cheese from solidifying and keeps each bite creamy.
Serve with a Fresh Dip
A dollop of tzatziki or a simple yogurt sauce with lemon zest adds a cool contrast to the warm, cheesy quesadilla. It also introduces a tangy brightness that balances the richness. Pairing it with a crisp Greek salad makes for a complete, satisfying meal.
CREATIVE TWISTS AND VARIATIONS
This recipe is a playground. Here are some of my favorite ways to switch things up:
Greek Gyro Quesadilla
Swap the spinach for sliced cucumbers and add a handful of chopped dill. Fold in a few spoonfuls of tzatziki before sealing the tortilla. The cool, herbaceous flavors mimic a classic gyro, perfect for a summer lunch.
Spicy Chipotle Quesadilla
Replace the oregano with chipotle powder and stir in a tablespoon of adobo sauce. Add sliced jalapeños for heat. The smoky, spicy kick transforms the dish into a bold, adventurous bite.
Roasted Vegetable Quesadilla
Roast zucchini, bell peppers, and mushrooms before adding them to the filling. Toss the veggies in a drizzle of balsamic glaze for sweetness. This variation brings a caramelized depth that pairs wonderfully with the cheeses.
Protein‑Packed Quesadilla
Grill a few chicken breast strips and dice them into bite‑sized pieces. Add them to the filling for extra protein. The chicken’s savory flavor complements the Mediterranean herbs beautifully.
Vegan Delight
Use a vegan mozzarella substitute and crumble a plant‑based feta alternative. Add nutritional yeast for a cheesy flavor boost. This version is fully plant‑based and still delivers on taste.
Breakfast Edition
Replace the spinach with sautéed kale and add a handful of diced bell peppers. Sprinkle the filling with a pinch of smoked paprika for a smoky breakfast twist. Serve with a side of scrambled eggs for a hearty start to your day.
STORING AND BRINGING IT BACK TO LIFE
Fridge Storage
Store any leftovers in an airtight container in the refrigerator for up to 3 days. The tortilla will keep its crispness if wrapped loosely in parchment paper to allow airflow. When you’re ready to reheat, let it sit at room temperature for 10 minutes before warming.
Freezer Friendly
Wrap each quesadilla individually in plastic wrap and then in a foil bag. Freeze for up to 2 months. When you want to enjoy it, pop it directly into a preheated oven at 350°F for 15 minutes. The tortilla will regain its crispness, and the cheese will melt just as fresh.
Best Reheating Method
Reheat in a skillet over medium heat, pressing down gently with a spatula. Add a splash of water to the pan and cover with a lid for 1–2 minutes to create steam. This trick steams the interior back to gooey perfection while keeping the exterior crunchy.