Okay, picture this: I’m standing in a tiny studio kitchen, the kind where the counter is a half‑inch away from the fridge, and I’ve just tried to whip up a “quick” dessert after a marathon of Zoom meetings. The result? A sad, soggy brownie that looked like a chocolate pancake that had given up on life. I stared at that flat, flavor‑less slab and thought, “There’s got to be a better way.” That moment sparked a tiny kitchen rebellion that turned into the ultimate viral brownie pudding you’re about to master. I dared myself to transform that flop into something that would make even the most skeptical sweet‑tooth swoon.
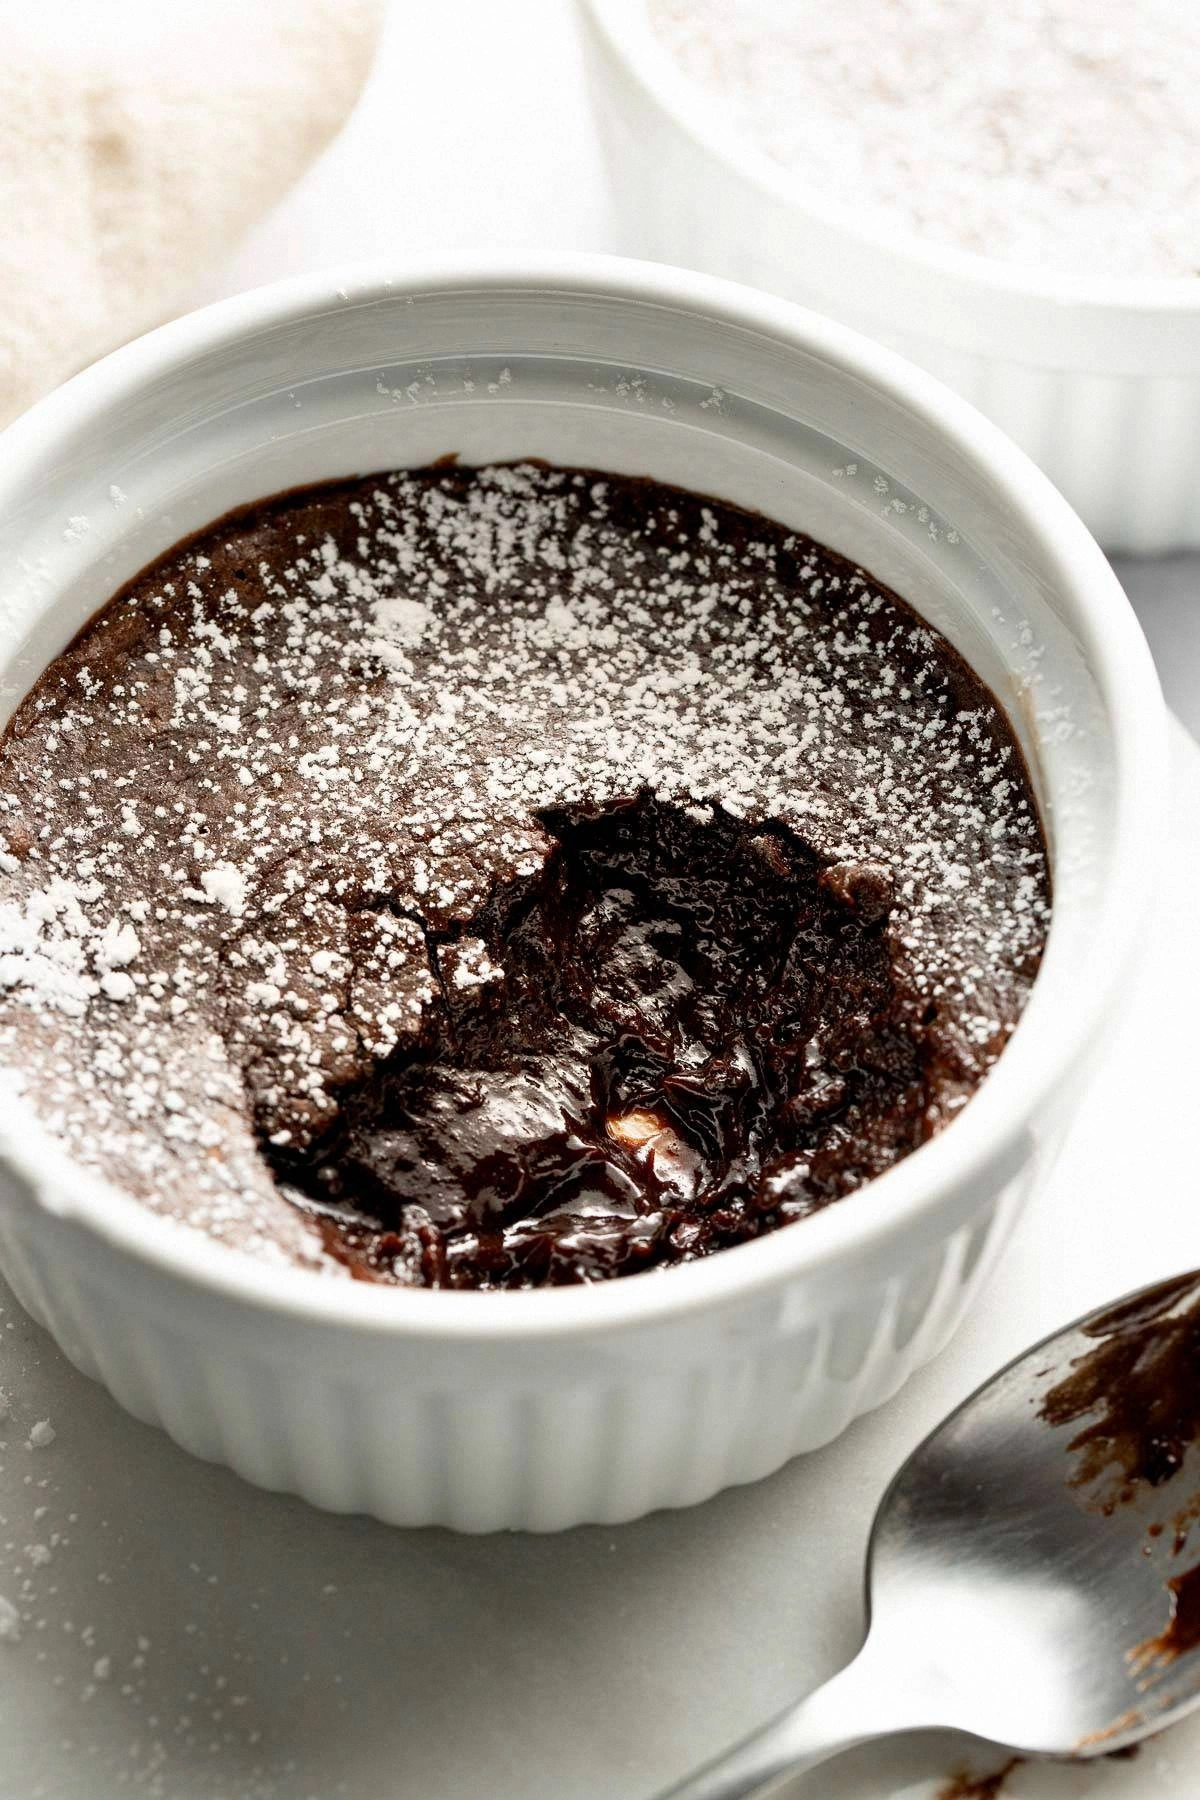
The kitchen was a symphony of sounds: the clatter of the whisk against the bowl, the hiss of butter melting in the pan, and that unmistakable “whoosh” when the batter hit the hot skillet. The aroma? A heady mix of cocoa, caramelized sugar, and a whisper of vanilla that wrapped around my nostrils like a warm blanket. My fingers felt the gritty texture of cocoa against the smoothness of melted butter, a tactile reminder that chocolate is both fierce and tender. The first bite—once the pudding was finally out of the oven—was a revelation: a fudgy, molten center that sang with a crisp, caramelized crust, the kind of contrast that makes you stop mid‑sentence and stare at the plate in awe.
What sets this version apart from every other brownie‑pudding you’ll find on a scrolling feed is the marriage of technique and a surprise ingredient that most home cooks completely overlook: a splash of espresso. It deepens the chocolate flavor without making the pudding taste like coffee, turning the cocoa notes into a richer, almost wine‑like complexity. Most recipes get the texture wrong—either too cake‑like or too dense—but we’re aiming for that perfect “gooey‑but‑set” balance that makes the spoon glide like silk. The secret? A brief blast of high heat followed by a gentle bake that locks in moisture while giving the edges that coveted crackly finish.
I’m going to be honest—I ate half the batch before anyone else got a chance to try it. That’s how addictive this pudding is, and I’m daring you to taste it and not go back for seconds. Let me walk you through every single step — by the end, you’ll wonder how you ever made it any other way.
What Makes This Version Stand Out
- Depth: The espresso‑infused chocolate creates a flavor profile that feels like a dessert and a coffee shop treat rolled into one, delivering a richness you can’t get from cocoa alone.
- Texture: A molten, fudgy core sits beneath a crisp, caramelized rim, giving you two worlds in each bite—soft and crunchy, all at once.
- Simplicity: Only ten pantry staples are needed, and the method uses one pan, making cleanup a breeze and the whole process feel like a cheat‑code for indulgence.
- Uniqueness: The espresso splash is the twist that most copy‑cat recipes skip; it’s the quiet hero that turns ordinary chocolate into a sophisticated dessert.
- Crowd‑Pleaser: Friends and family will rave, “Is this from a bakery?”—perfect for impressing guests without a professional kitchen.
- Ingredient Quality: Using high‑quality cocoa powder and real butter makes the difference between “okay” and “hands down the best version you’ll ever make at home.”
- Cooking Method: The high‑heat sear followed by a gentle bake locks in moisture, a technique most home cooks get completely wrong.
- Make‑Ahead Potential: This pudding can be pre‑baked and reheated, maintaining its gooey center, so you can prep ahead for a date night or a last‑minute dessert.
Inside the Ingredient List
The Flavor Base
First up, the unsweetened cocoa powder. This is the heart of the pudding, providing the deep, bitter backbone that balances the sugar. If you skimp on quality, you’ll get a grainy, metallic taste that sabotages the entire dessert. Opt for a Dutch‑processed cocoa for a smoother, richer flavor that blends seamlessly with the espresso.
Next, the espresso shot. A single ounce of hot espresso intensifies the chocolate without shouting “coffee.” It’s a secret weapon that most home bakers overlook, and it adds that subtle, wine‑like complexity that makes the pudding feel upscale. If you don’t have an espresso machine, a strong brewed coffee works just as well—just make sure it’s hot.
The Sweetening Crew
Granulated sugar is the sweetener of choice here because it caramelizes beautifully during the high‑heat sear, creating those coveted crisp edges. Brown sugar would add moisture, which could jeopardize that crackly crust we’re after. If you prefer a less sweet profile, you can reduce the sugar by a quarter without sacrificing texture.
Vanilla extract is the aromatic glue that binds the flavors together. A high‑quality pure vanilla will give you a fragrant backdrop that lifts the cocoa and espresso, while imitation vanilla can taste flat and cheap. A teaspoon is enough; any more would overwhelm the delicate balance.
The Texture Crew
All‑purpose flour provides structure, but we keep it low‑key to maintain that fudgy interior. Using too much flour turns the pudding into a cake, losing the molten heart we crave. If you’re gluten‑free, a 1:1 blend of almond flour and rice flour works, but expect a slightly denser bite.
Baking powder is the tiny lift that prevents the pudding from becoming a flat brownie. Just a half‑teaspoon is enough to give the center a subtle rise, ensuring it’s not too compact. Skipping this will make the pudding overly dense and heavy.
The Final Flourish
Unsalted butter, melted, brings richness and a glossy sheen to the batter. It’s the secret to that luxurious mouthfeel that makes the pudding melt on your tongue. Use real butter, not margarine; the flavor difference is night and day.
Eggs act as the emulsifier, binding the fat and liquid together for a cohesive batter. Two large eggs provide enough structure without making the texture rubbery. If you’re allergic, a flax egg (1 tbsp ground flax + 3 tbsp water) can substitute, though the final crumb will be slightly different.
Milk adds moisture and helps the batter achieve that silky consistency. Whole milk is best for richness, but any milk will do. If you’re dairy‑free, oat milk is a great alternative that won’t alter the flavor profile dramatically.
Optional chocolate chips add pockets of pure melted chocolate that surprise you mid‑bite. If you love extra decadence, sprinkle a quarter‑cup into the batter just before baking. They’ll melt into gooey pockets that make the pudding feel even more luxurious.
Everything's prepped? Good. Let's get into the real action...
The Method — Step by Step
Preheat your oven to 350°F (175°C). While the oven warms, gather all your ingredients and give them a quick visual scan. This ensures you won’t scramble mid‑process, which is the fastest way to create a kitchen disaster. The air should already start smelling faintly of cocoa as you set the oven, a pre‑lude to the magic about to happen.
In a medium bowl, whisk together the flour, cocoa powder, baking powder, and salt. The dry mix should look uniformly dark, with no streaks of flour. This step is crucial because any pockets of flour will turn into gritty bits in the final pudding. Watch out: over‑mixing the dry ingredients can develop gluten, making the texture tough.
In a separate large bowl, combine the granulated sugar, melted butter, and hot espresso. Stir until the mixture is glossy and the sugar dissolves slightly—this is the point where you’ll hear a faint sizzle as the butter meets the espresso, a sound that signals a perfect emulsion.
Kitchen Hack: Use a small whisk for this step; a fork will leave lumps and make it harder to incorporate the cocoa later.Add the eggs one at a time to the butter‑espresso mixture, beating well after each addition. The batter should become a little lighter and thicker, indicating that the eggs are fully emulsified. If you notice the mixture separating, keep whisking—eventually it will come together. This is the moment of truth; the batter should feel silky, not watery.
Slowly fold the dry ingredients into the wet mixture, using a spatula and a gentle hand. Scrape the sides of the bowl to ensure every speck of cocoa is incorporated. The batter will look thick and dark, with a glossy sheen. Watch out: stop stirring as soon as the flour disappears; over‑mixing will develop gluten and ruin the fudgy interior.
Stir in the milk and vanilla extract, just until the batter is smooth. The batter should be pourable but still thick enough to hold its shape when dropped onto the pan. If it feels too thick, add a splash more milk—just a tablespoon at a time.
Heat a 9‑inch cast‑iron skillet over medium‑high heat and add a thin layer of butter. Once the butter foams and begins to turn golden, pour the batter into the hot skillet, spreading it evenly with a spatula. You’ll hear a satisfying sizzle as the batter hits the pan—That sizzle when it hits the pan? Absolute perfection. Let it cook undisturbed for 2‑3 minutes; the edges will start to pull away and turn a deep, caramelized brown.
Transfer the skillet to the preheated oven. Bake for 12‑15 minutes, until the center is set but still jiggles slightly when you gently shake the pan. The top should be glossy, and the edges will have a crisp, crackly texture.
Watch Out: Over‑baking by even a couple of minutes will dry out the core, turning a luscious pudding into a dense brownie.Remove the skillet from the oven and let the pudding rest for 5 minutes. This short rest allows the interior to firm just enough for clean slicing while retaining that molten heart. While it rests, the kitchen will be filled with a warm, chocolate‑espresso perfume that makes you want to dive right in.
That's it — you did it. But hold on, I've got a few more tricks that'll take this to another level. The next sections will reveal insider tips, creative twists, and storage hacks that ensure every bite remains as unforgettable as the first.
Insider Tricks for Flawless Results
The Temperature Rule Nobody Follows
Never let the batter sit at room temperature for more than five minutes before it hits the pan. Cold batter will cause the butter to solidify, preventing that immediate sizzle that creates the crust. Instead, keep the batter warm by covering the bowl with a clean kitchen towel. This subtle heat retention helps the pudding achieve that perfect contrast between a fuzzy interior and a crisp edge.
Why Your Nose Knows Best
Your sense of smell is a more reliable indicator than a timer when the pudding is done. When the oven’s heat caramelizes the sugars, a sweet, slightly burnt aroma will waft through the kitchen. If you smell a faint note of burnt toast, you’ve gone too far. Trust that nose; it’s the ultimate kitchen gauge.
The 5‑Minute Rest That Changes Everything
After you pull the skillet from the oven, resist the urge to cut immediately. Let it sit for exactly five minutes; this rest period allows the steam inside to redistribute, creating that coveted “gooey‑but‑set” texture. Skipping this step results in a puddle of liquid that slides off the plate, ruining the presentation.
The Butter‑Espresso Emulsion Secret
When melting butter, add the espresso directly to the pan and whisk together. This creates a micro‑emulsion that locks flavor into every fat molecule, ensuring the espresso taste is uniform and not just a surface note. If you pour the espresso over already melted butter, you’ll get pockets of coffee flavor instead of a seamless blend.
The “Paper Towel” Trick for Perfect Crust
Line the bottom of your skillet with a single layer of paper towel before adding butter. The towel absorbs excess moisture, allowing the batter to make direct contact with the hot metal. This leads to a crisper, more evenly browned crust without the need for extra butter.
Creative Twists and Variations
This recipe is a playground. Here are some of my favorite ways to switch things up:
Salted Caramel Swirl
Swirl in a tablespoon of store‑bought or homemade salted caramel just before baking. The caramel adds a buttery, slightly salty counterpoint to the deep chocolate, turning each bite into a sweet‑salty dance.
Spicy Chili Chocolate
Add a pinch of cayenne pepper or a dash of chipotle powder to the dry mix. The heat cuts through the richness, delivering a subtle warmth that lingers on the palate without overwhelming the chocolate.
Nutty Crunch
Fold in toasted chopped hazelnuts or almonds just before baking. The nuts introduce a satisfying crunch and a nutty aroma that complements the espresso‑infused chocolate beautifully.
Berry Burst
Scatter fresh raspberries or blackberries over the batter right after it hits the skillet. The berries melt slightly, creating pockets of tartness that cut through the sweetness, offering a bright, fruity contrast.
Vegan Velvet
Swap butter for coconut oil, use almond milk, and replace eggs with flax “eggs.” The result is a dairy‑free version that still delivers that gooey center, though the flavor profile leans a bit more tropical.
Storing and Bringing It Back to Life
Fridge Storage
Allow the pudding to cool completely, then cover the skillet tightly with aluminum foil or transfer to an airtight container. It will keep in the refrigerator for up to three days. When you’re ready to serve, reheat gently in a 300°F oven for 10‑12 minutes, or microwave in 30‑second bursts, adding a splash of milk before reheating to revive the silky texture.
Freezer Friendly
Wrap the cooled pudding tightly in plastic wrap, then a layer of foil, and freeze for up to one month. To thaw, move it to the fridge overnight, then warm as described above. The freezer preserves the flavor, but the texture may become slightly denser—add a drizzle of milk when reheating to restore that melt‑in‑your‑mouth feel.
Best Reheating Method
For the ultimate revival, place the pudding in a preheated oven at 325°F, cover loosely with foil, and bake for 8‑10 minutes. Before you pop it in, sprinkle a teaspoon of water around the edges; the steam generated keeps the interior from drying out, delivering that original gooey perfection.