Picture this: you’re standing in a kitchen that smells like burnt sugar and melted chocolate, the kind of chaos that only happens when you’re trying to outdo your own cookie bar obsession. I had just finished a batch of the most mediocre, chewy, soggy bars that looked like a cross between a doughnut and a crumbled cookie. The moment I took the first bite, my taste buds did a double-take, and I knew I was about to unleash a culinary revelation that would forever change how we think about “trash” cookie bars. I’ve always loved the idea of mixing sweet and salty in a single bite, but this version? It’s a symphony of crunch and melt, a texture that shatters like thin ice when you bite, and a flavor that lingers like a holiday memory.
We’re talking about more than just a treat. This is a sensory experience: the first crackle of the potato chips as they mingle with the pretzels, the sudden burst of chocolate that coats your tongue like velvet, the pop of M&M candy that adds a festive jolt of color and flavor. The aroma is a heady blend of toasty pretzels and sweet white chocolate, the kind of scent that makes you forget you’re in a kitchen and feel like you’re in a holiday wonderland. The texture is layered—crunchy, chewy, and gooey all at once—so each bite feels like a new adventure. The heat from the oven caramelizes the sugar in the marshmallows, creating a subtle caramelized crust that adds depth. The result is a bar that is as fun to eat as it is to create.
Why does this recipe stand out? Because it takes the classic “trash” cookie bar and pushes it to the extreme, turning it from a simple snack into a showstopper. I’ve seen countless versions that fall flat, either too sweet or too salty, but this one strikes a perfect balance that makes every bite a revelation. The secret? A precise blend of ingredients that work together like a well-rehearsed orchestra, a baking technique that locks in moisture, and a sprinkle of holiday flair that turns ordinary into extraordinary. I dare you to taste this and not go back for seconds—once you bite, you’ll be hooked.
Picture yourself pulling these bars out of the oven. The kitchen fills with the scent of melted chocolate and toasted pretzels, the heat radiating off the pan, and the anticipation of that first bite. The surface is golden and slightly blistered, hinting at the crunch inside. The moment you break off a piece, the sound is a satisfying crack, the texture releases a burst of chocolate, and the salty pretzels give a satisfying snap. It’s a moment of pure joy, a moment that makes you feel like Santa himself has visited your kitchen.
Let me walk you through every single step. By the end, you’ll wonder how you ever made it any other way. I’ve already gathered all the ingredients, prepped everything, and I’m ready to share the magic. If you’re ready to dive into the ultimate salty-sweet holiday treat, let’s get started.
What Makes This Version Stand Out
- Flavor: The combination of white chocolate and holiday M&Ms creates a sweet base that is balanced by the salty pretzels and potato chips. The result is a complex flavor profile that satisfies both sweet and savory cravings. The M&Ms add a pop of color and a subtle candy crunch.
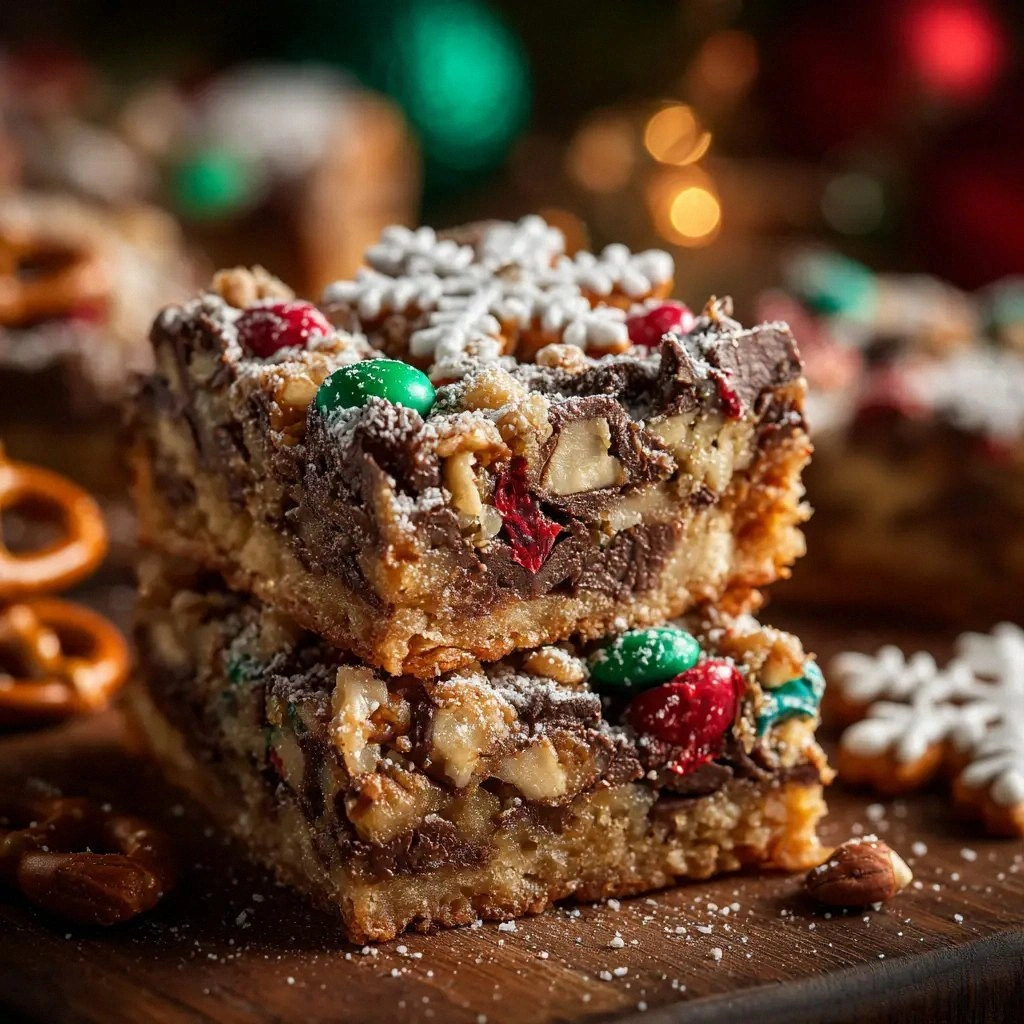
- Texture: Each bar has a multi-layered texture—crunchy pretzels, crispy potato chips, chewy marshmallows, and a smooth chocolate coating. The contrast between the crunchy and chewy components keeps the mouth moving and adds excitement. The bars hold together well, yet each bite offers a different sensation.
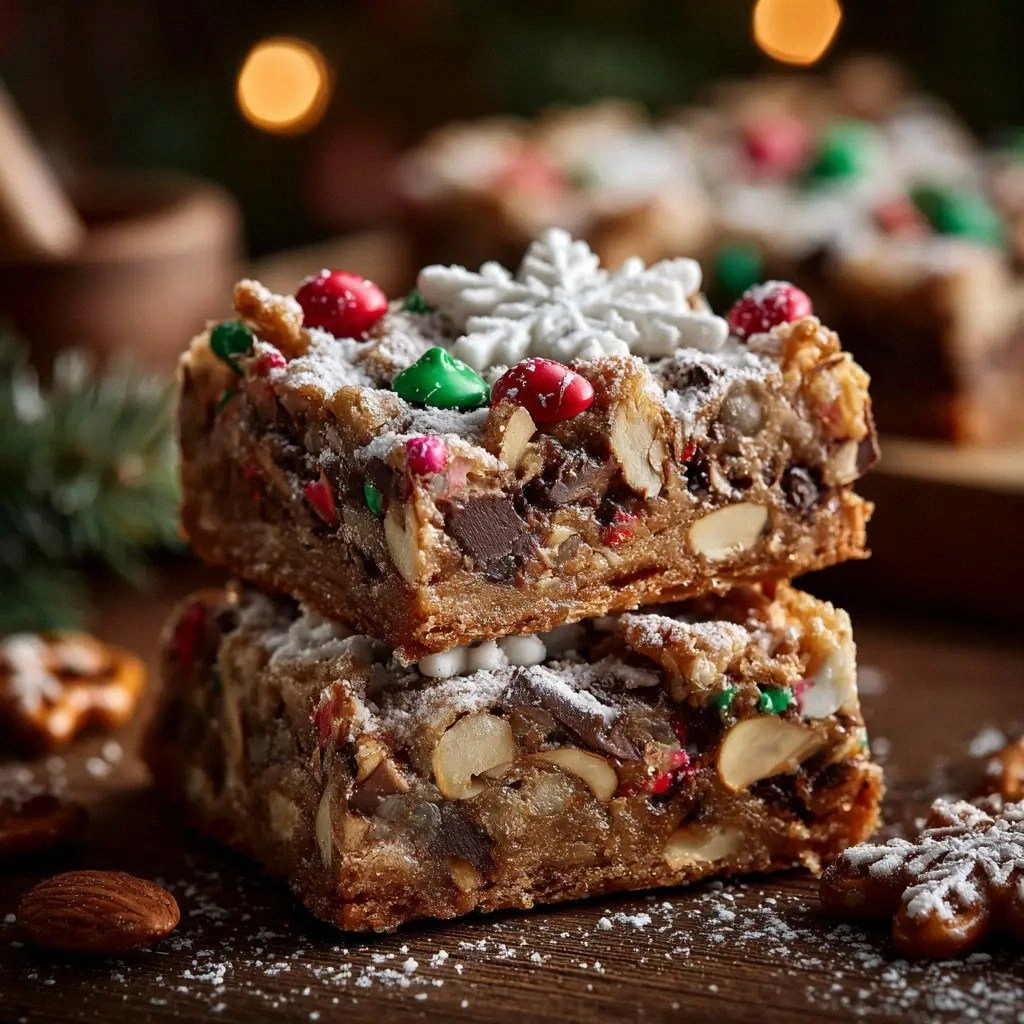
- Visual Appeal: The bars look like a festive snowstorm with M&M snowflakes and sprinkles, making them perfect for holiday tables or gift baskets. The color contrast between the white chocolate, chocolate chips, and bright M&M candies is eye-catching. The bars can be cut into squares or bars, allowing for creative presentation.
- Ease of Preparation: No complicated dough or baking process—just combine ingredients, bake, and cool. This recipe is ideal for busy holiday seasons or last-minute dessert needs. All the ingredients are pantry staples or easy to find at a grocery store.
- Make-Ahead Potential: Once baked, these bars stay fresh for up to a week in an airtight container. They’re also freezer-friendly, making them a convenient option for large gatherings or holiday parties. The bars maintain their texture and flavor even after freezing.
- Ingredient Quality: Using high-quality white chocolate chips and holiday M&Ms ensures a richer flavor and better texture. The pretzels and potato chips add a satisfying crunch that pairs well with the melted chocolate. The sprinkles provide a festive touch that enhances the holiday vibe.
- Audience Appeal: These bars are a crowd-pleaser at any gathering—kids love the crunch, adults appreciate the balance of sweet and salty, and anyone who loves holiday treats will find this recipe irresistible. The bars can be served at parties, potlucks, or as a sweet snack for movie nights.
- Versatility: The recipe can be easily adjusted for dietary restrictions—use dairy-free chocolate chips for a vegan version, or use gluten-free pretzels for a gluten-free version. The recipe can also be scaled up or down with the serving adjuster in the recipe card. This flexibility makes it a go-to recipe for any occasion.
Alright, let's break down exactly what goes into this masterpiece.
Inside the Ingredient List
The Flavor Base
White Chocolate Chips: These are the heart of the sweet component, providing a creamy, mellow sweetness that melts into a silky coating. The white chocolate’s subtle vanilla undertone elevates the overall flavor profile, preventing the bars from feeling too sugary. If you skip this ingredient, the bars will lack the luxurious, melt-in-your-mouth quality that makes them stand out.
Holiday M&Ms: The M&Ms add a festive burst of color and a crunchy candy texture that contrasts beautifully with the soft chocolate. They also introduce a hint of chocolatey sweetness that balances the salty elements. If you’re allergic to peanuts, look for the peanut-free version or substitute with chocolate-coated raisins.
The Texture Crew
Mini Pretzels: Pretzels bring a savory, slightly salty crunch that anchors the bars. Their shape and texture allow them to hold their bite even after the chocolate coating sets. If you prefer a softer crunch, you can crush the pretzels slightly before adding them.
Crinkle-Cut Potato Chips: These chips add an extra layer of crunch and a buttery flavor that complements the pretzels. The crinkle cut increases surface area, ensuring each bite has a satisfying snap. If you’re watching sodium, choose a reduced-sodium version or rinse them lightly to cut down on salt.
The Unexpected Star
Mini Marshmallows: Marshmallows introduce a chewy texture that melts into a soft, gooey center when baked. They also help bind the ingredients together, giving the bars a cohesive structure. Skipping marshmallows would make the bars less chewy and more crumbly.
The Final Flourish
Festive Sprinkles: Sprinkles add a playful, colorful topping that makes the bars look like a holiday snowstorm. They also add a subtle crunch and a sweet, sugary finish that balances the salty pretzels. If you’re looking for a more refined look, you can replace sprinkles with edible glitter or a dusting of powdered sugar.
Everything's prepped? Good. Let's get into the real action.
The Method — Step by Step
- Preheat your oven to 350°F (175°C). Line a 9x13-inch baking pan with parchment paper, making sure the edges are tucked in to keep the bars from sliding. The parchment creates a non-stick surface that ensures the bars stay together. This step also helps the bars bake evenly. Keep the oven rack in the middle to avoid over-browning.
- Melt the white chocolate chips. Use a double boiler or microwave in 30-second bursts, stirring after each burst until smooth. The chocolate should be glossy and free of lumps. Avoid overheating; otherwise, the chocolate can seize. A smooth chocolate coating is key to a silky finish.
- Combine the mini pretzels, potato chips, and marshmallows. Toss them in a large bowl to ensure an even distribution. The pretzels and chips should be fully coated with chocolate, but the marshmallows will hold their shape. This mixture will become the core of the bars. The crunch from the chips and pretzels is what makes each bite memorable.
- Add the holiday M&Ms. Gently fold them into the mixture, ensuring they’re evenly distributed. The M&Ms add a burst of color and a sweet crunch. They also help to keep the chocolate from clumping. Be careful not to break the M&Ms; the whole candy piece adds to the texture.
- Pour the chocolate mixture over the core. Use a spatula to spread it evenly, making sure every piece of pretzel, chip, marshmallow, and M&M is coated. The chocolate should be thick enough to cling but thin enough to spread. This layer seals the ingredients and creates a glossy finish. Let the chocolate set for a few minutes before adding the sprinkles.
- Sprinkle the festive sprinkles. Gently tap the pan to distribute them evenly across the surface. The sprinkles will add a sweet, crunchy topping and a festive look. They also help to keep the bars from sticking together. If you prefer a more subtle look, use a dusting of powdered sugar instead.
- Bake the bars. Place the pan in the preheated oven and bake for 15 minutes, or until the chocolate is set and the edges start to pull away from the pan. The bars should smell toasty, and the chocolate should have a slight sheen. Keep an eye on them; overbaking will make the bars too hard. The 15-minute bake time ensures the marshmallows soften without burning.
- Cool the bars. Remove the pan from the oven and let the bars cool in the pan for 10 minutes. Then transfer them to a wire rack to cool completely. Cooling is crucial for the chocolate to set firmly. Once cooled, cut the bars into squares or bars using a sharp knife. This will create clean, even pieces that hold their shape.
- Store or serve. Place the bars in an airtight container and refrigerate for up to a week. For longer storage, freeze them for up to two months. When you’re ready to serve, let them sit at room temperature for a few minutes to soften. The bars will taste best when they’re slightly warm and the chocolate is glossy.
That's it — you did it. But hold on, I've got a few more tricks that'll take this to another level.
Insider Tricks for Flawless Results
The Temperature Rule Nobody Follows
Maintain a steady oven temperature. Even a slight dip can cause uneven baking, resulting in a chocolate that’s either too soft or too hard. I use an oven thermometer to monitor the temperature and keep it within 5°F of the set point. This ensures consistent results every time.
Why Your Nose Knows Best
Smell the chocolate as it sets. A pleasant, toasty aroma indicates the bars are baking perfectly. If you notice a burnt smell, reduce the temperature or check the oven rack position. Your nose is a reliable guide for perfect texture.
The 5-Minute Rest That Changes Everything
Let the bars rest on the pan for 5 minutes. This short rest allows the chocolate to firm up just enough to hold the bars together but still remain slightly soft. It also lets the flavors meld, creating a richer taste. Skipping this step can leave the bars too sticky.
Avoiding the Sticky Mess
Use parchment paper with a slight elevation. This ensures that the bars don’t stick to the pan and makes cleanup effortless. It also gives you a clean edge for cutting the bars. A clean cut is essential for presentation.
Quick Chill Trick
Place the bars in the fridge for 10 minutes after cooling. This step sets the chocolate firmly and prevents the bars from becoming too soft when stored. The fridge also helps keep the bars fresh for longer. A quick chill also enhances the crunch of the chips.
Creative Twists and Variations
This recipe is a playground. Here are some of my favorite ways to switch things up:
Caramel Crunch Edition
Add a swirl of caramel sauce. Drizzle caramel over the top before baking, or fold it into the chocolate mixture for a sweet, buttery layer. The caramel pairs beautifully with the salty pretzels. This version is perfect for those who love a deep, caramelized flavor.
Nutty Delight
Replace mini pretzels with chopped nuts. Almonds or pecans add a nutty crunch that complements the chocolate. The nuts also bring a richer, buttery flavor. This variation is great for those who want a more sophisticated treat.
Spiced Holiday Twist
Stir in a pinch of ground cinnamon or nutmeg. The spices give the bars a warm, aromatic flavor that’s reminiscent of holiday spices. They also add a subtle depth to the chocolate. This version is ideal for a cozy winter gathering.
Vegan Version
Use dairy-free white chocolate chips and vegan M&Ms. The texture remains the same, and the bars stay creamy. Vegan M&Ms are available in many flavors, so you can customize the taste. This version is perfect for plant-based diets.
Gluten-Free Adaptation
Swap pretzels and potato chips for gluten-free versions. Many brands offer gluten-free pretzels and chips that still provide the same crunch. The bars will still hold together and taste great. This adaptation allows everyone to enjoy the treat.
Mini Bar Miniature
Use a muffin tin to create bite-sized bars. Bake each mini bar in a muffin tin for 12 minutes. These are perfect for portion control or for serving at parties. The small size makes them easy to handle and share.
Storing and Bringing It Back to Life
Fridge Storage
Store in an airtight container. The bars stay fresh for up to a week when kept in the refrigerator. The airtight seal prevents the bars from absorbing fridge odors. Keep them on a shelf away from strong-smelling foods.
Freezer Friendly
Freeze in a single layer. Place the bars on a parchment-lined tray and freeze until solid. Then transfer them to a freezer bag. This method prevents the bars from sticking together. Frozen bars can be kept for up to two months.
Best Reheating Method
Reheat in the microwave. Place a bar on a microwave-safe plate and heat for 10-15 seconds. The brief heat restores the chocolate’s glossy sheen and softens the marshmallows. Add a tiny splash of water before reheating to create steam, which keeps the bars moist.
That’s the end of the recipe. I hope you’re as excited to try these bars as I am to share them with you. The next time you need a holiday treat that’s both sweet and salty, remember this recipe. It’s a game-changer, a crowd-pleaser, and a testament to the magic that happens when you mix flavors, textures, and a dash of holiday spirit.