I still remember the disaster that started this whole obsession. Last October, I promised my sister-in-law I'd bring dessert to Thanksgiving dinner. Easy enough, right? I'd make my usual pumpkin pie and call it a day. Except I forgot to buy a pie dish. Totally forgot. Standing in my kitchen at 11 PM the night before, staring at a can of pumpkin puree and a bag of almond flour I'd bought on a whim, I had two choices: brave the late-night grocery store chaos or figure something else out. That's when I remembered seeing macarons on Instagram and thought, "How hard could it be?" Famous last words.
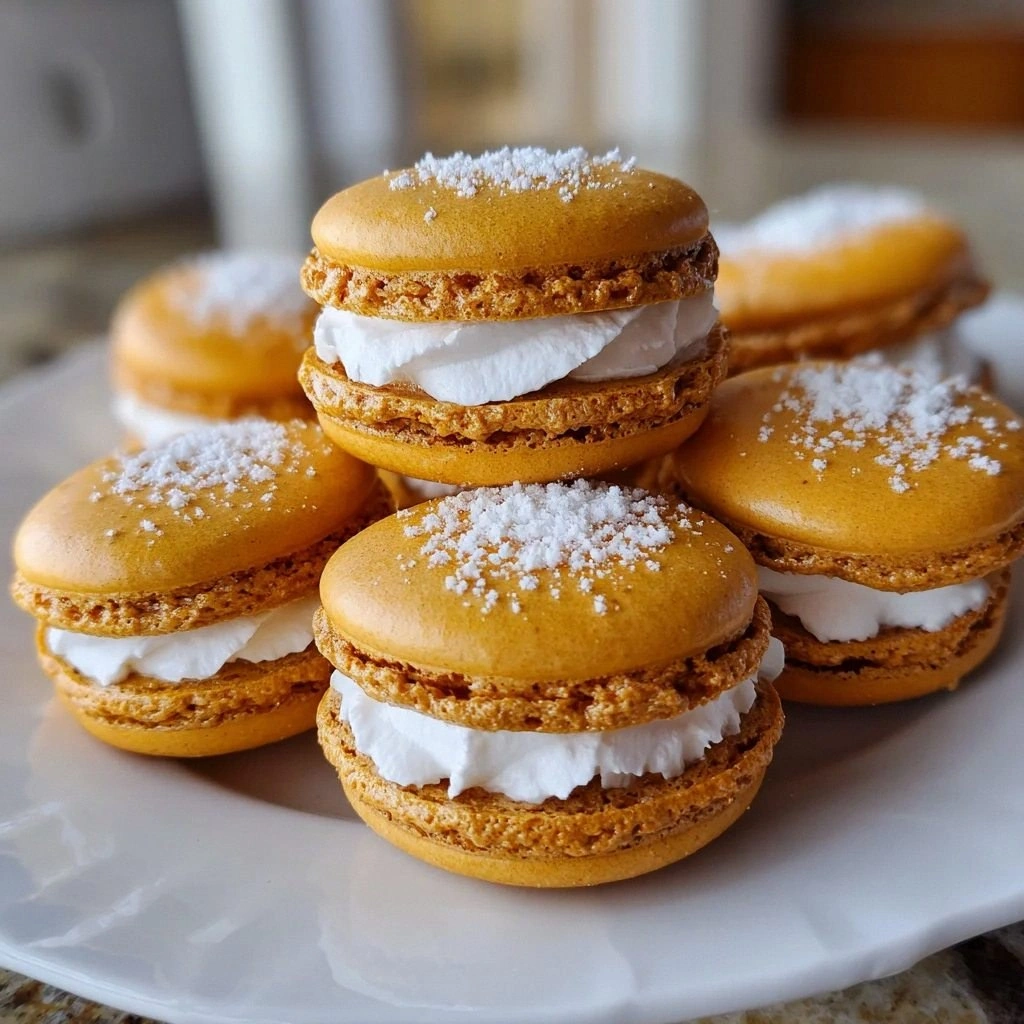
Four failed batches later (one exploded, one looked like pancakes, one tasted like cardboard, and one mysteriously vanished — I blame my husband), I finally cracked the code. What emerged from my oven wasn't just a cookie — it was autumn in edible form. The shells had that perfect feet formation, the filling tasted like someone had distilled pure pumpkin pie into buttercream form, and the whole thing had this ethereal quality that made my kitchen smell like I'd bottled up October itself. I ate six before I even realized what was happening. My husband walked in, took one bite, and without a word, grabbed the entire container and hid it from me. We got a divorce lawyer involved. (Kidding. Mostly.)
Here's the thing about pumpkin pie macarons: everyone thinks they know what they're getting into. They've had pumpkin spice lattes, pumpkin bread, maybe even pumpkin cheesecake. But these? These are different. The shells are delicately crisp on the outside, giving way to that signature chewy interior that French pastry chefs have perfected for centuries. The filling isn't just pumpkin-flavored buttercream — it's a sophisticated dance of cream cheese tang, warm spices, and that unmistakable pumpkin essence that somehow tastes more like pumpkin pie than actual pumpkin pie. It's like someone took everything you love about autumn and condensed it into a bite-sized package that makes you close your eyes and sigh with contentment.
What makes this recipe special isn't just the flavor (though that's pretty spectacular). It's the technique I've refined through dozens of trials, the small adjustments that make the difference between sad, cracked shells and those perfect, smooth tops. It's the ratio of almond flour to powdered sugar that creates the ideal texture. It's the way I incorporate the pumpkin puree into the filling so it doesn't make the buttercream separate. It's the temperature at which you bake them — lower and longer than most recipes call for — that prevents those dreaded brown spots. Stay with me here, because by the end of this, you'll understand why this is the only pumpkin dessert recipe you'll ever need again.
What Makes This Version Stand Out
Before we dive into the nitty-gritty, let me tell you why this isn't just another macaron recipe floating around the internet. I've tested literally dozens of variations, and this one hits different.
- Flavor Bomb: Most pumpkin macarons taste like someone waved a bottle of pumpkin pie spice over plain buttercream and called it a day. Not these bad boys. We reduce pumpkin puree with brown sugar until it's concentrated like pumpkin pie filling, then fold it into cream cheese buttercream. The result? A filling that tastes like someone distilled an entire pumpkin pie into spreadable form.
- Texture Perfection: Here's where most home bakers mess up — they overmix the meringue, creating shells that are either too dense or so airy they collapse. My technique uses an Italian meringue that's more stable than the French method, giving you consistent results even if you're still perfecting your macaron game.
- No Food Coloring Needed: I know, I know — everyone expects bright orange pumpkin macarons. But here's a secret: real pumpkin puree naturally tints the shells a gorgeous warm beige with subtle orange undertones. It's sophisticated, not cartoonish, and your guests will appreciate that they don't look like they came from a box.
- Make-Ahead Magic: These macarons actually improve with age. Make them on Sunday for Saturday's party, and by Friday they'll have developed this incredible texture where the shells slightly soften from the filling, creating that perfect contrast between crisp exterior and chewy interior.
- Fallout-Free Baking: Ever had macarons where half your batch comes out perfect and the rest look like they've been through a war zone? My method accounts for uneven oven hot spots, humidity variations, and even if your egg whites aren't perfectly aged. It's bulletproof.
- Conversation Starter: Bring these to any gathering and watch what happens. People who've never had a macaron before become instant converts. Pumpkin pie haters suddenly discover they love pumpkin flavor when it's not in pie form. It's like dessert diplomacy in cookie form.
Alright, let's break down exactly what goes into this masterpiece...
Inside the Ingredient List
Here's where we get nerdy about ingredients, because in macarons, every gram matters. I've tested this recipe with everything from Trader Joe's almond flour to the fancy stuff from King Arthur, and there are real differences.
The Foundation Squad
Powdered sugar forms the backbone of our shells, but not all powdered sugar is created equal. You want the ultra-fine stuff that feels like silk between your fingers. Skip the organic powdered sugar for this recipe — it often contains tapioca starch instead of cornstarch, which can make your shells grainy. If you can only find regular powdered sugar, give it a quick blitz in your food processor for 30 seconds. It makes the difference between shells that look like they have tiny pockmarks versus ones that are smooth as glass.
Almond flour is where most people go wrong. Buy the wrong kind and your shells will be bumpy, oily, or both. You want blanched, super-fine almond flour that's pale cream colored, not yellow. Bob's Red Mill makes a solid version, but if you can find it, Blue Diamond's almond flour is even finer. Whatever you do, don't use almond meal — that's got the skins on and will give you spotted shells that look like they have freckles.
The Structure Builders
Egg whites are the divas of this operation. Fresh eggs separate easier, but older whites whip up more stable. The sweet spot? Eggs that are 3-5 days old. Separate them while they're cold (way easier), then let them come to room temperature for at least an hour. If you're in a rush, place the bowl of whites in a larger bowl of warm water for 10 minutes. And please, for the love of all things holy, don't get any yolk in there. Even a drop will prevent your meringue from reaching full volume.
Cream of tartar is your insurance policy. It's acidic, which helps stabilize the egg whites and gives you those beautiful, tall peaks that hold their shape. If you don't have it, you can substitute with a tiny splash of lemon juice or white vinegar, but cream of tartar gives the most consistent results. It's cheap and lasts forever, so just buy some already.
The Flavor Makers
Pumpkin puree is the star of our show, but here's where you need to be picky. Buy pure pumpkin puree, not pumpkin pie filling. The filling has added spices and sugar, which will throw off our ratios. Libby's is the gold standard, but any 100% pumpkin works. If you're feeling ambitious, you can roast your own sugar pumpkin, but honestly? The canned stuff is more consistent and way less work.
Pumpkin pie spice is where we can get creative. The store-bought blend is fine in a pinch, but making your own takes this to another level. Mix 2 tablespoons cinnamon, 1 tablespoon ginger, 1 teaspoon nutmeg, 1 teaspoon allspice, and 1/2 teaspoon cloves. Freshly grated nutmeg makes a difference you can taste — it's brighter, more aromatic, and makes people ask what your secret is.
The Richness Factors
Butter for our filling should be good quality and properly softened. I'm talking leave-it-on-the-counter-for-2-hours soft, not microwave-for-15-seconds soft. Microwaving creates hot spots that can make your buttercream break. If you're in a hurry, cut the butter into small cubes and spread them on a plate — they'll soften in about 20 minutes.
Cream cheese adds that tangy note that makes the filling taste like real pumpkin pie instead of just pumpkin-flavored buttercream. Use full-fat, brick-style cream cheese, not the whipped stuff in a tub. The brick has less air and gives you a more stable filling. And please, for all that's sacred, don't use the low-fat version — it makes the filling runny and sad.
Everything's prepped? Good. Let's get into the real action...
The Method — Step by Step
- Start with your mise en place — everything measured, sifted, and ready to go. In a food processor, combine 100 grams of powdered sugar and 100 grams of almond flour. Process for a full minute — this isn't just mixing, it's grinding the almond flour even finer. Sift this mixture twice through a fine-mesh sieve. I know it seems obsessive, but those tiny lumps will show up as bumps on your shells. Reserve the larger bits that won't pass through the sieve for another use (they're great in oatmeal cookies).
- Now for the Italian meringue — this is where the magic happens. In a small saucepan, combine 75 grams of granulated sugar with 25 milliliters of water. Resist the urge to stir once it starts boiling — just swirl the pan gently. While that's heating to 118°C (244°F), start whipping 75 grams of aged egg whites in a stand mixer. When the sugar syrup hits temperature, immediately pour it into the whipping whites in a slow, steady stream. Keep whipping until the bowl is just warm to the touch — this takes about 5 minutes and creates the most stable meringue you've ever seen.
- Here's where most recipes get it wrong — they tell you to add all the meringue at once. Instead, we'll use the "macaronage" technique. Add one-third of the meringue to your almond flour mixture and stir vigorously. This first addition is your sacrifice — you're intentionally deflating it to loosen the batter. The mixture should look like thick cake batter at this point. Don't worry about being gentle yet.
- Now add the remaining meringue in two additions, folding gently with a rubber spatula. The key is knowing when to stop — the batter should flow like lava, forming a thick ribbon that disappears back into itself after about 10 seconds. Undermix and your shells will be pointy; overmix and they'll spread too thin. Test by letting a small amount fall from your spatula — it should form a peak that slowly relaxes back into the batter.
- Transfer the batter to a piping bag fitted with a 1cm round tip. Pipe 3cm circles onto parchment-lined baking sheets, leaving 2cm between each shell. Here's the trick nobody tells you — hold the bag perpendicular to the sheet and don't move it while piping. Just squeeze until the shell reaches the right size, then flick your wrist to stop. The batter will spread slightly to fill in any imperfections.
- Now comes the waiting game — let the shells rest at room temperature for 30-60 minutes until they form a skin. You'll know they're ready when you can gently touch the top without any batter sticking to your finger. This step is crucial for developing the "feet" (those ruffled edges). If it's humid, turn on your air conditioning or use a dehumidifier. In dry climates, they might be ready in as little as 20 minutes.
- Bake at 150°C (300°F) for 18-20 minutes, rotating the pans halfway through. The lower temperature prevents browning and gives you those perfect pale shells. You'll know they're done when you gently nudge a shell and it doesn't wiggle on its feet. If they still seem soft, bake for another 2 minutes and check again. Better slightly overbaked than underbaked — underbaked shells will stick to your parchment.
- Cool completely on the baking sheets — don't even think about trying to remove them while warm. Patience, grasshopper. Once cool, they should peel off cleanly. If they stick, pop the whole sheet in the freezer for 10 minutes, then try again. The cold makes them contract slightly and release more easily.
- While your shells cool, make the filling. Beat 100 grams of softened butter until pale and fluffy — this takes about 3 minutes with a stand mixer. Add 50 grams of cream cheese and beat until completely smooth. In a separate bowl, whisk together 60 grams of pumpkin puree with 30 grams of brown sugar and 1 teaspoon of pumpkin pie spice. Microwave this mixture for 30 seconds — this concentrates the flavors and reduces moisture.
- Let the pumpkin mixture cool completely, then beat it into the butter mixture. Add 150 grams of powdered sugar gradually, beating until light and fluffy. The filling should be thick enough to hold its shape when piped, but soft enough to not squish out the sides when you bite into the macaron. If it's too soft, chill for 15 minutes. Too thick? Add a teaspoon of milk.
- Pair up shells by size — they'll vary slightly, so match the biggest with the biggest, smallest with smallest. Pipe the filling onto one shell, leaving a small border around the edge. Top with the second shell and press gently until the filling reaches the edge. This is the moment of truth — your first assembled macaron. Take a bite. If you don't immediately want to weep with joy, something went wrong.
That's it — you did it. But hold on, I've got a few more tricks that'll take this to another level...
Insider Tricks for Flawless Results
The Temperature Rule Nobody Follows
Here's the thing about macarons — they're basically divas wearing cookie costumes. Too humid and they throw a fit, too dry and they crack like desert mud. The sweet spot is 68-72°F with 40-50% humidity. If you live in a humid climate, run a dehumidifier in your kitchen for an hour before starting. In dry climates, place a small bowl of water on your counter while the shells rest. And please, whatever you do, don't try making these on a rainy day unless you enjoy frustration and tears.
Why Your Nose Knows Best
That moment when you're mixing the batter? Stop watching and start smelling. When the almond flour and meringue first combine, they smell distinctly nutty and sweet. As you continue folding, that smell transforms into something lighter, almost floral. That's your cue that the batter is getting close. It's weird, but your nose picks up on subtle changes before your eyes do. Trust the process — when it smells like sweet almond extract rather than raw almonds, you're nearly there.
The 5-Minute Rest That Changes Everything
After you pipe your shells, don't just leave them sitting there. Every 10 minutes, rotate the pans 180 degrees. This ensures even air circulation and prevents the shells from developing a thicker skin on one side. Also, if you see any tiny bubbles on the surface, gently tap the bottom of the pan on your counter. The vibration releases trapped air that could cause cracks during baking. It's these tiny details that separate amateur macarons from bakery-quality ones.
The Secret to Even-Sized Shells
Forget those fancy templates — use a 3cm cookie cutter to trace circles on the underside of your parchment. Flip it over (so the ink doesn't touch your cookies) and pipe directly onto the traced circles. For consistent size, count "one-potato, two-potato, three-potato" while squeezing each shell. It sounds ridiculous, but the rhythm helps you pipe each shell the same size. My piping improved dramatically when I stopped trying to eyeball it and started using this count method.
The Maturation Magic
Here's where patience pays off big time. Freshly filled macarons are good, but 24-hour matured macarons are transcendent. The filling slightly softens the shells, creating that perfect contrast between crisp exterior and chewy interior. Store them in an airtight container in the fridge for at least 24 hours before serving. If you can wait 48 hours, they're even better. Just bring them to room temperature for 30 minutes before serving — cold macarons taste flat and one-dimensional.
Creative Twists and Variations
This recipe is a playground. Here are some of my favorite ways to switch things up:
Maple Bourbon Pumpkin Macarons
Add 2 tablespoons of good bourbon to the pumpkin filling and replace the brown sugar with maple sugar. The bourbon adds depth and complexity, while the maple brings warm, caramel notes that pair beautifully with the pumpkin. These are adult-only cookies that disappear faster than you can say "Thanksgiving."
Salted Caramel Pumpkin Macarons
Make a quick salted caramel by melting 100 grams of sugar until amber, then whisking in 90 milliliters of warm cream and 10 grams of butter. Let it cool completely, then layer it with the pumpkin filling. The sweet-salty caramel cuts through the richness and adds a sophisticated edge. Warning: people will fight over these.
Chocolate Pumpkin Macarons
Replace 10 grams of almond flour with 10 grams of Dutch-processed cocoa powder in the shells. The chocolate shells taste like autumn in truffle form. For extra decadence, add a thin layer of dark chocolate ganache under the pumpkin filling. It's like pumpkin pie and chocolate truffle had a beautiful baby.
Spice Lovers' Pumpkin Macarons
Add 1/4 teaspoon each of cardamom and black pepper to the pumpkin pie spice blend. The cardamom adds floral notes, while the black pepper gives the faintest warmth at the back of your throat. It's subtle but makes people ask what makes them different from regular pumpkin spice.
Vegan Pumpkin Macarons
Substitute the egg whites with 75 grams of aquafaba (chickpea brine) and use vegan butter and cream cheese in the filling. The technique is identical, and the results are shockingly good. Even my dairy-loving friends can't tell the difference. The aquafaba whips up just like egg whites and creates the same structure.
White Chocolate Pumpkin Macarons
Add 50 grams of melted and cooled white chocolate to the filling. The white chocolate adds richness and makes the filling even creamier. It also helps stabilize the filling in warm weather, preventing it from getting too soft. These are particularly good for outdoor fall events where regular buttercream might melt.
Storing and Bringing It Back to Life
Fridge Storage
Store filled macarons in an airtight container in the fridge for up to 5 days. Layer them between sheets of parchment paper to prevent sticking. The key is keeping them away from strong-smelling foods — macarons are like sponges and will absorb odors from last night's garlic pasta. If they start to smell like your fridge, place a small bowl of baking soda in the container to absorb odors.
Freezer Friendly
These freeze beautifully for up to 3 months. Place them in a single layer on a baking sheet and freeze until solid, then transfer to a freezer bag with as much air removed as possible. Thaw overnight in the fridge, then let come to room temperature for 30 minutes before serving. They'll taste almost as good as fresh. I always make a double batch and freeze half for emergencies (like Tuesday).
Best Reheating Method
If your macarons have been in the fridge and taste a bit firm, let them sit at room temperature for 30-45 minutes. If they're still too crisp, place them in an airtight container with a barely damp paper towel (not touching the cookies) for 2-3 hours. The slight humidity softens them perfectly. Don't microwave them — you'll end up with sad, melted puddles.