I was halfway through a disastrous batch of store‑bought chicken nuggets when my roommate shouted, “Dude, I dare you to taste this and not go back for seconds.” That dare turned into an obsession, and I spent the next three nights tweaking batter, seasoning, and oil temperature until the result was a golden, crunchy marvel that made my apartment smell like a gourmet kitchen. The moment the first bite hit, the coating cracked like brittle ice, revealing tender, juicy meat that melted in your mouth while the buttery crust clung to your tongue. The aroma was a symphony of garlic, paprika, and a whisper of cayenne that promised heat without overwhelming the palate. I could almost hear the kitchen timer tick, counting the seconds until the next batch was ready. If you’ve ever watched a cooking show and felt the urge to replicate that perfect crunch, you’re in the right place.
Picture the kitchen: a bright counter, a sizzling pan, and the rhythmic clatter of a wooden spoon against a bowl. The air is thick with the scent of frying oil, but it’s the subtle undertone of sour cream that lingers, hinting at the creamy finish that awaits. When the first piece is lifted, the crunch is audible—sharp, satisfying, like a tiny drumbeat that invites the next bite. Your eyes catch the sheen of the golden crust, the way light dances across its surface, promising a texture that will stay crisp even after a few minutes. The anticipation builds as you watch the oil bubble, the batter bubble, the chicken transform from raw to golden. Every sense is engaged, turning a simple snack into a sensory adventure.
What makes this version stand out is not just the crunch; it’s the balance of flavors and the meticulous attention to each component. The batter’s thickness is engineered to hold the seasoning in place, while the panko breadcrumbs add an extra layer of crunch that doesn’t become soggy. The sour cream infusion gives the coating a velvety richness that offsets the heat from cayenne, creating a harmonious bite that satisfies both comfort and adventure seekers. I’ve spent years experimenting with ratios, and this recipe is the culmination of that research—each ingredient has a purpose, and every step is designed to elevate the experience. The result is a dish that feels indulgent yet approachable, perfect for game day, family dinners, or a quick snack on a busy evening. It’s a testament to how a few simple tweaks can transform an ordinary recipe into a culinary highlight.
A key technique that most recipes overlook is the use of a sour cream and milk slurry before coating the chicken. This step not only adds moisture but also creates a silky coating that clings to the meat, preventing the batter from separating during frying. The secret lies in the timing: whisk the mixture just before coating to keep it fresh and light. I dare you to taste this and not go back for seconds because once you experience the buttery, slightly tangy finish, you’ll crave that exact bite again and again. The trick is simple, but its impact is profound, turning each nugget into a masterpiece of texture and flavor.
I’ll be honest—my first batch was a mess, and I almost gave up. But the moment the first piece was crisp and the aroma filled the kitchen, I knew I was onto something. I’ve refined the process, adding subtle tweaks like a splash of milk for extra fluffiness and a pinch of cayenne for that just‑right heat. The result is hands down the best version you’ll ever make at home, and it’s so simple you can’t afford to miss out. If you’ve ever struggled with chicken that turns out dry or batter that sticks, you’re not alone—this recipe has the fix you’ve been searching for.
Picture yourself pulling this out of the oven, the whole kitchen smelling incredible, and the family’s eyes lighting up with anticipation. The anticipation is not just about the taste; it’s the ritual of dipping a perfectly crisp bite into a sauce, watching the coating crackle, and feeling that satisfying crunch. The experience is more than a meal—it’s a moment that turns an ordinary evening into a memorable one. I’ve spent countless hours perfecting this recipe, and I’m excited to share every detail so you can replicate the magic at home. Let me walk you through every single step—by the end, you’ll wonder how you ever made it any other way.
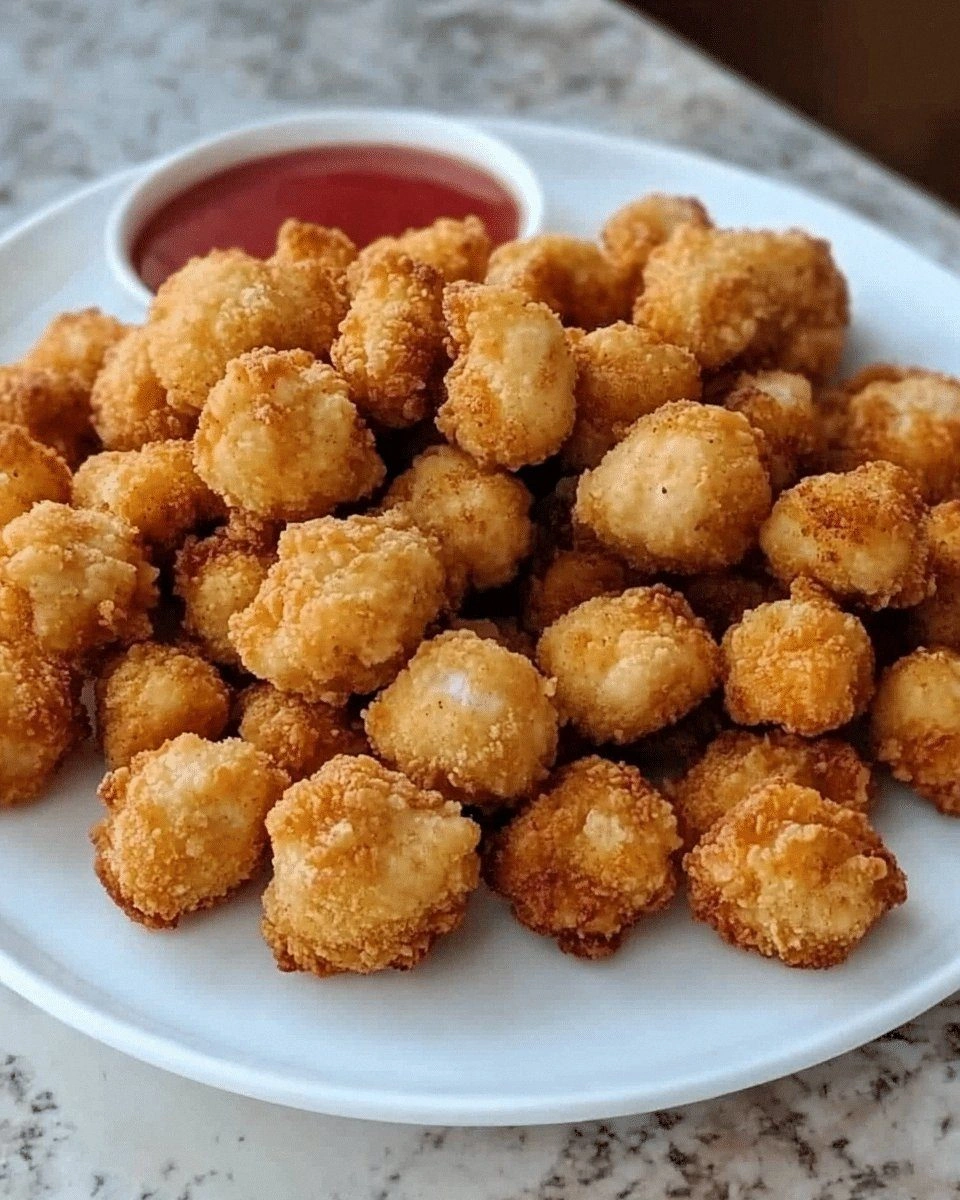
So grab your apron, set your timer, and let’s dive into the world of Popcorn Chicken that will redefine your snack game. I’m not just sharing a recipe; I’m sharing a culinary adventure that will bring joy, comfort, and a touch of indulgence to your table. Get ready to taste, crunch, and savor each bite as we build the ultimate popcorn chicken from scratch. The journey begins now, and trust me, you won’t want to stop.
What Makes This Version Stand Out
- Texture: The double coating of flour and panko creates a multi‑layered crunch that remains crisp even after reheating. The batter’s thickness keeps the seasoning embedded, so each bite delivers a burst of flavor. It’s the kind of crunch that satisfies both the craving for something crispy and the desire for a satisfying bite.
- Flavor: A subtle tang from sour cream balances the heat from cayenne, while seasoned salt and paprika add depth without overpowering. The garlic and onion powders give a savory undertone that complements the chicken’s natural taste. The result is a complex flavor profile that feels both comforting and adventurous.
- Simplicity: Despite its gourmet result, the recipe requires only a handful of pantry staples. The process is straightforward, with no complicated steps or exotic ingredients. You can whip up this dish in under an hour, making it ideal for busy weeknights.
- Make‑Ahead Potential: The coated pieces can be fried in advance and reheated with minimal loss of crispness. This feature makes it a perfect candidate for meal prep, potlucks, or family gatherings. The batter’s structure holds up well, ensuring a consistent experience.
- Visual Appeal: The golden, glossy coating catches the eye, making it a showstopper on any plate. The bright yellow of the panko contrasts beautifully with the white chicken, creating an inviting presentation. It’s a dish that looks as good as it tastes.
- Health‑Friendly Twist: By using a sour cream slurry, you reduce the overall fat content while adding moisture and flavor. The choice of vegetable oil and the use of panko keep the dish lighter than traditional fried chicken. It’s a healthier option that doesn’t compromise on taste.
- Versatility: The seasoning blend can be adjusted to suit any palate, from mild to spicy. You can swap the panko for breadcrumbs or add herbs for a different flavor profile. The base recipe is a canvas for culinary creativity.
- Audience Appeal: Whether you’re cooking for kids, adults, or a mixed crowd, this dish satisfies all ages. The bite‑size pieces are perfect for dipping, and the flavor is universally loved. It’s a crowd‑pleaser that guarantees smiles.
- Time Efficiency: From prep to plate, the entire process takes under 45 minutes, making it a quick yet impressive meal. The method is efficient, with minimal cleanup and a streamlined cooking sequence. You’ll spend less time cooking and more time enjoying.
- Authentic Crunch: The combination of flour, panko, and a well‑timed batter ensures a crunchy exterior that doesn’t become soggy. The oil temperature is crucial, and this recipe includes precise guidance to maintain the ideal heat. The result is a crunch that’s both audible and satisfying.
Inside the Ingredient List
The Flavor Base
The sour cream and milk slurry is the heart of the coating, delivering a creamy, tangy backdrop that balances the heat from cayenne. This combination also keeps the batter moist, preventing it from drying out and cracking during frying. Skipping it would result in a drier, less flavorful coating, and the chicken would lack that buttery finish that makes each bite memorable. If you’re vegan, a dairy‑free yogurt works well as a substitute, maintaining the same creamy texture and tang.
The Texture Crew
All-purpose flour and panko breadcrumbs form the double layer that gives the chicken its signature crunch. The flour creates a base that holds the seasoning, while the panko adds a light, airy texture that doesn’t become soggy. If you prefer a lighter coating, swap the panko for fine breadcrumbs, but be prepared for a slightly different crunch profile. The ratio of flour to panko is crucial; too much flour can make the coating heavy, while too much panko can cause it to break apart.
The Unexpected Star
Seasoned salt, black pepper, garlic powder, onion powder, paprika, and cayenne are the flavor architects that give each nugget depth and complexity. Each spice is measured to create a balanced flavor profile that isn’t overwhelming but still has a kick. If you’re sensitive to heat, reduce the cayenne or replace it with smoked paprika for a milder, smoky note. The seasoning blend can be adjusted to match your taste preferences, making the recipe highly customizable.
The Final Flourish
The pinch of cayenne is the secret sauce that adds a subtle heat without dominating the dish. It’s the finishing touch that elevates the flavor profile from good to unforgettable. If you’re a spice enthusiast, you can increase the amount slightly, but be careful not to overpower the other spices. This small addition makes a big difference, turning each bite into a flavorful adventure.
Everything's prepped? Good. Let's get into the real action and bring this dish to life with precision and flair. The method is straightforward, but each step is designed to maximize flavor and texture, ensuring a result that will impress even the most discerning palate.
The Method — Step by Step
- Begin by cutting the chicken breasts into bite‑size cubes, roughly 1½ inches each. Pat the pieces dry with paper towels to remove excess moisture; this step ensures the coating adheres properly. Place the cubes in a shallow dish and season lightly with salt and pepper, tossing gently to coat. The seasoning will serve as the base flavor that permeates every bite. This preliminary seasoning sets the tone for the final dish.
- Whisk together the sour cream, milk, and a pinch of cayenne in a small bowl until smooth. This slurry will act as the glue that binds the flour and panko to the chicken. Keep the mixture at room temperature until you’re ready to coat; a cold mixture can cause the batter to seize. The sour cream’s acidity also helps tenderize the chicken slightly, adding a subtle depth. This step is critical for achieving that buttery finish.
- In a separate bowl, combine flour, seasoned salt, garlic powder, onion powder, paprika, and black pepper. Stir until the spices are evenly distributed, ensuring each coating has consistent flavor. This dry mix will provide the first protective layer that locks in moisture. The flour also helps the batter adhere to the chicken. A well‑mixed dry blend is essential for a uniform coating.
- Dip each chicken cube first into the flour mixture, shaking off any excess, then into the sour cream slurry, and finally coat with panko breadcrumbs. The double coating process creates a multi‑layered crunch that stays crisp even after reheating. Make sure each piece is fully coated; the panko should cling to the surface without gaps. The batter will form a protective shell that locks in juices. This meticulous coating is what sets this recipe apart.
- Heat the vegetable oil in a deep skillet or pot to 350°F (175°C). Use a thermometer to monitor the temperature; too hot will burn the coating before the chicken cooks through. If you don’t have a thermometer, drop a small breadcrumb into the oil; it should sizzle and brown within 30 seconds. Maintaining the correct temperature ensures a crispy exterior and juicy interior. This step is pivotal for the final texture.
- Carefully add the coated chicken pieces to the hot oil in batches, ensuring you don’t overcrowd the pan. Overcrowding lowers the oil temperature and causes uneven cooking. Fry each batch for 4–5 minutes, turning occasionally, until the coating turns golden brown and the internal temperature reaches 165°F (74°C). The aroma will fill the kitchen, signaling that the dish is nearing perfection. Keep an eye on the oil level; add more if it drops significantly.
- Once the chicken is cooked, transfer it to a wire rack set over a baking sheet to drain excess oil. This allows air circulation around each piece, preventing sogginess. Let the chicken rest for a couple of minutes; the juices redistribute, ensuring a moist interior. The final bite should be crisp on the outside and tender on the inside. This resting period is essential for the perfect texture.
- Serve immediately with your favorite dipping sauce—ranch, honey mustard, or a spicy aioli. The sauces complement the buttery coating and add a contrasting flavor that elevates each bite. If you prefer a healthier option, try a yogurt‑based dip with fresh herbs. The combination of crispy chicken and creamy sauce creates a balanced, satisfying meal. Enjoy the moment of pure culinary bliss.
- If you’re preparing in advance, cool the fried pieces completely before storing. Keep them in an airtight container in the refrigerator for up to 3 days. When reheating, place them in a preheated oven at 400°F (200°C) for 5–7 minutes, or until the coating is crisp again. This method preserves the crunch better than a microwave. The result will still taste like freshly fried chicken, making it a convenient option for busy days.
That's it—you did it. But hold on, I've got a few more tricks that'll take this to another level. These insider tips will help you achieve the perfect crunch, the ideal flavor balance, and a hassle‑free cleanup. Let’s dive into the nuances that separate a good batch from an unforgettable one.
Insider Tricks for Flawless Results
The Temperature Rule Nobody Follows
Oil temperature is the most critical factor for achieving a golden, crisp coating. Use a deep‑fry thermometer to keep the oil between 350°F and 360°F; this range ensures the batter cooks evenly without burning. A quick test is to drop a small breadcrumb into the oil; if it sizzles and browns in about 30 seconds, you’re in the sweet spot. If the oil is too hot, the coating will char on the outside while the inside remains undercooked. If it’s too cool, the coating will absorb excess oil and become soggy. Mastering this balance is key to consistent results.
Why Your Nose Knows Best
The aroma is your best indicator of progress. As the coating browns, it releases a nutty, buttery scent that signals the crunch is forming. When you smell the first hint of caramelization, it’s time to flip the pieces. If the scent is metallic or burnt, you’re overcooking. Trust your nose; it’s a reliable, low‑tech tool that ensures every bite is perfect.
The 5‑Minute Rest That Changes Everything
Letting the chicken rest on a wire rack after frying is more than a courtesy—it’s a game changer. During this brief pause, the residual heat continues to cook the interior while the excess oil drains away. The result is a juicier interior and a crisper exterior. Skipping this step can leave the chicken greasy and less flavorful. A short rest is a small investment for a big payoff.
The Subtle Sauce Trick
Adding a splash of lemon juice or vinegar to the sour cream slurry before coating brightens the flavor and cuts through the richness. It also helps keep the coating light and prevents the chicken from becoming too heavy. This simple addition can transform the dish from good to great. The acidity balances the buttery coating, giving each bite a fresh kick.
The Double‑Dipping Method
Dipping the chicken first in the flour, then in the sour cream, and finally in panko ensures each layer adheres properly. Skipping any step can result in a coating that flakes off during frying. This method also allows the spices to embed deeply into the coating, enhancing flavor. The extra time spent coating pays off in a more uniform, flavorful result.
Creative Twists and Variations
Spicy Buffalo Popcorn
Swap the cayenne for a generous amount of hot sauce and toss the fried pieces in a mixture of melted butter and buffalo sauce. This version delivers a bold, fiery kick that pairs wonderfully with a cool blue cheese dip. The buttery coating still shines through, providing balance against the heat. It’s a crowd‑pleaser for game day or a spicy dinner.
Herb‑Infused Mediterranean
Add dried oregano and thyme to the dry spice mix, and finish with a drizzle of olive oil and a sprinkle of grated Parmesan after frying. The herbs give the coating an aromatic, Mediterranean flair, while the Parmesan adds a savory depth. Serve with a side of tzatziki or a lemon‑yogurt dip for a complete meal. This variation brings a fresh, herbaceous twist to the classic recipe.
Sweet & Smoky
Incorporate a teaspoon of smoked paprika and a tablespoon of brown sugar into the flour mix. The sweet sugar caramelizes during frying, creating a glossy, caramelized crust. The smoke flavor adds a deep, savory undertone that complements the sweetness. Pair with a honey mustard sauce for an irresistible flavor combo.
Cajun Kick
Replace the paprika with Cajun seasoning, and add a splash of buttermilk to the sour cream slurry for extra tang. The buttermilk tenderizes the chicken while the Cajun spices provide a robust, spicy flavor. This version is perfect for those who love a bit of heat and bold seasoning. Serve with a cool, creamy ranch to balance the spiciness.
Asian Fusion
Stir in a tablespoon of soy sauce and a pinch of sesame seeds into the flour mixture, then finish with a drizzle of sesame oil after frying. The soy sauce adds umami, while the sesame seeds provide a pleasant crunch and nutty aroma. This variation offers a quick, Asian-inspired twist that’s both flavorful and easy to prepare. Pair with a sweet chili dipping sauce for a complete experience.
Cheesy Delight
Fold shredded cheddar into the panko before coating, and top each piece with a sprinkle of mozzarella after frying. The cheeses melt slightly, creating a gooey, cheesy center that contrasts with the crunchy exterior. This indulgent version is ideal for a family movie night or a special treat. Serve with a side of marinara for dipping.
Vegan Version
Use a plant‑based sour cream alternative and replace the chicken with bite‑size tofu cubes. Coat the tofu in the same flour and panko mixture, then fry until golden. The tofu absorbs the spices beautifully, offering a protein‑rich, dairy‑free alternative. Pair with a vegan ranch or tahini dip for a satisfying meal.
Storing and Bringing It Back to Life
Fridge Storage
Store cooked popcorn chicken in an airtight container in the refrigerator for up to 3 days. The airtight seal prevents the coating from drying out and maintains crispness. Before serving, let the pieces sit at room temperature for 5 minutes to regain some crunch. If you notice any moisture build‑up, pat the pieces dry with paper towels before reheating. This method keeps the chicken fresh and ready for a quick snack.
Freezer Friendly
For longer storage, freeze the fried pieces in a single layer on a parchment‑lined tray, then transfer to a freezer bag. They can be kept for up to 3 months without losing quality. When ready to eat, reheat in a preheated oven at 400°F (200°C) for 5–7 minutes until hot and crisp. The parchment prevents sticking, ensuring each piece stays intact. Freezing is a great way to prep for busy weeks.
Best Reheating Method
Reheat in a skillet over medium heat, adding a splash of water to create steam, then cover for 2 minutes. This technique restores moisture to the chicken while preserving the crisp coating. Avoid microwaving, as it tends to make the coating soggy. If you’re in a hurry, a quick oven blast at 400°F (200°C) works well, but keep a close eye to prevent over‑browning. The goal is to achieve the same mouth‑watering crunch as fresh.
Reheat with a Twist
Add a tablespoon of olive oil to the skillet before reheating; this adds a subtle richness and helps the coating regain its golden hue. The oil also helps distribute heat evenly, preventing hot spots that could burn the coating. Stir occasionally to ensure all pieces are evenly heated. This simple addition elevates the reheated chicken to a restaurant‑quality experience.
Final Touch
Before serving reheated pieces, sprinkle a pinch of freshly ground black pepper and a dash of smoked paprika for an extra flavor punch. The pepper adds a subtle heat, while the paprika brings a smoky undertone that complements the fried coating. These finishing touches bring the dish back to life, making it feel freshly prepared. Enjoy the aroma and the crisp bite that follows.