Love this? Pin it for later! 📌
I still remember the first time I served these loaded nachos during the AFC Championship game back in 2019. My husband's college buddies had descended upon our living room, each claiming their spot on the couch like territorial lions. The energy was electric, the commentary loud, and the anticipation palpable. But when I carried out that massive sheet pan of sizzling beef and cheese-laden nachos? The room went silent for exactly three seconds before erupting into what I can only describe as a nacho-induced frenzy. Those three seconds of awed silence—that's when I knew this recipe was a game-changer.
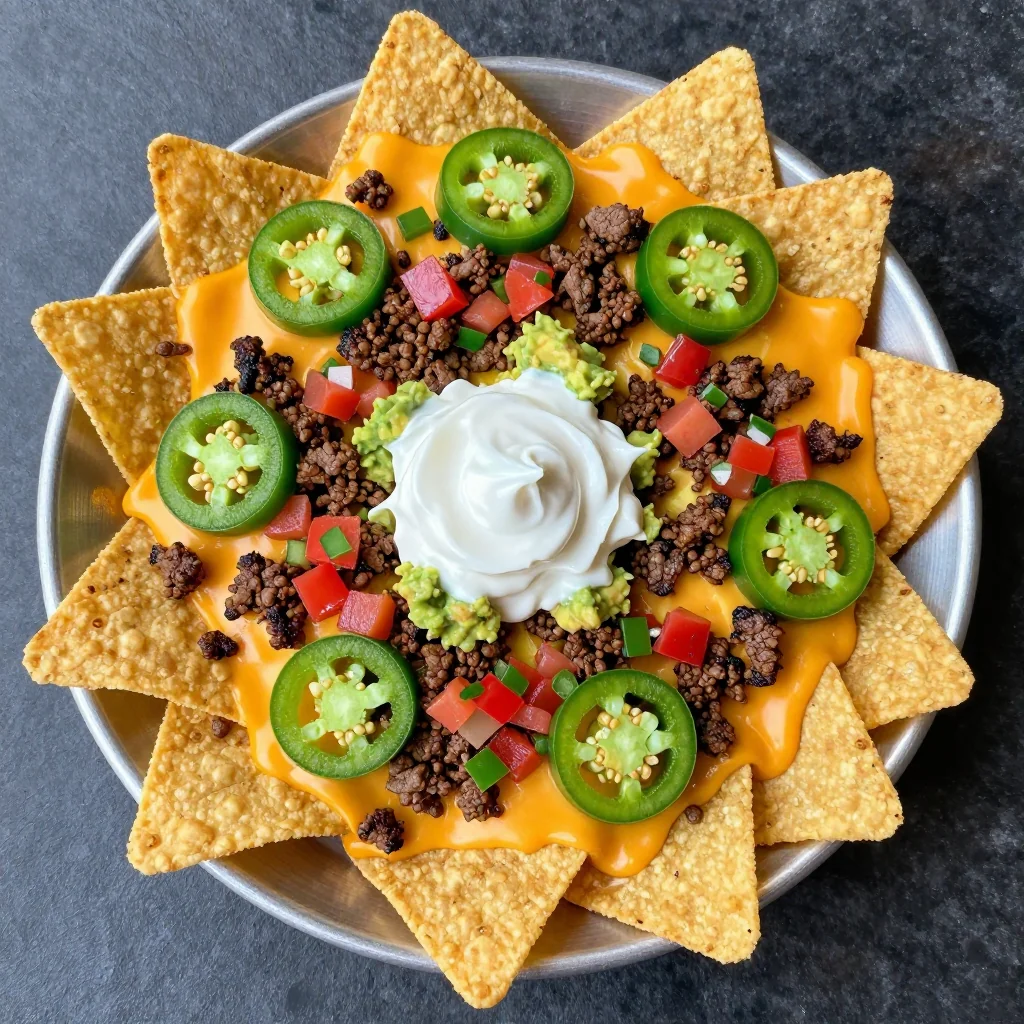
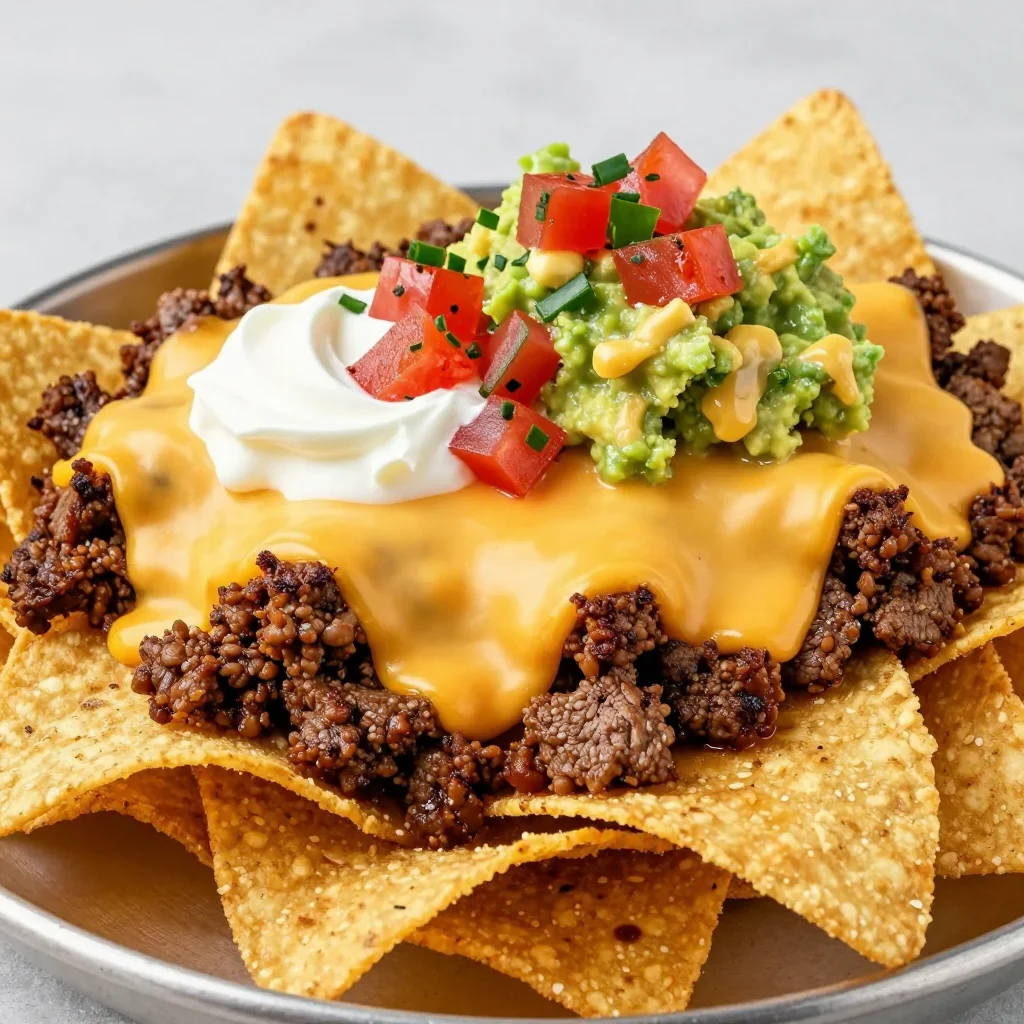
Since then, these NFL Playoff Loaded Nachos have become our household's most-requested game day recipe. They're not just nachos; they're a conversation starter, a memory maker, and quite frankly, the reason why our friends now plan their playoff viewing schedule around our house. The combination of perfectly seasoned ground beef, three types of melty cheese, fresh toppings, and homemade tortilla chips creates a mountain of crispy, gooey perfection that disappears faster than a 40-yard dash.
Why This Recipe Works
- Triple-Threat Cheese Blend: A strategic combination of sharp cheddar for bite, Monterey Jack for meltability, and queso fresco for authentic Mexican flavor
- Restaurant-Quality Beef: My secret seasoning blend creates taco-shop worthy meat that's never dry or greasy
- Layered Construction: Strategic layering ensures every chip gets its fair share of toppings—no more fighting over the "good" chips!
- Fresh vs. Hot Components: Cold toppings are added after baking to maintain their texture and temperature contrast
- Feed-a-Crowd Size: One sheet pan serves 8-10 hungry football fans as a main dish or 12-15 as an appetizer
- 30-Minute Magic: From pantry to table in half an hour, perfect for those last-minute game day gatherings
Ingredients You'll Need
The magic of these nachos lies not just in the quantity of ingredients, but in their quality and how they work together. Let's break down each component so you understand why each one matters:
The Beef Foundation: I use 80/20 ground beef because it has enough fat for flavor but won't make your nachos greasy. You could use 85/15 if you prefer leaner, but avoid anything labeled "extra lean"—your nachos will taste dry. For those who want to splurge, ground chuck or even ground brisket takes this to another level. If you're feeding a crowd with dietary restrictions, ground turkey works, but add an extra tablespoon of oil to compensate for the leanness.
The Chip Selection: Here's where I'm picky. Thick-cut restaurant-style tortilla chips are non-negotiable. Thin chips will collapse under the weight of our generous toppings. Look for brands that specifically say "restaurant style" or "thick cut." Yellow corn chips have better structural integrity than white corn. Pro tip: buy two bags because someone always steals chips while you're assembling.
The Three-Cheese Strategy: Sharp cheddar provides that nostalgic nacho flavor and gorgeous color. Monterey Jack melts like a dream, creating those Instagram-worthy cheese pulls. Queso fresco adds authentic Mexican character and a pleasant saltiness. Pre-shredded cheese contains anti-caking agents that prevent smooth melting, so buy blocks and shred yourself—it takes two extra minutes but makes a world of difference.
Fresh Toppings: Roma tomatoes are my go-to because they're less watery than other varieties. When selecting avocados for guacamole, choose ones that yield slightly to gentle pressure but aren't mushy. For the pico de gallo, firm plum tomatoes work best. Fresh cilantro is worth seeking out; the dried stuff tastes like soap flakes. And please, please use real limes—not that bottled juice that sits in your fridge door.
How to Make NFL Playoff Loaded Nachos with Beef and Cheese
Season the Beef
In a small bowl, combine 2 teaspoons chili powder, 1 teaspoon cumin, 1 teaspoon smoked paprika, 1/2 teaspoon oregano, 1/2 teaspoon garlic powder, 1/2 teaspoon onion powder, 1/4 teaspoon cayenne pepper, and 1 teaspoon salt. Heat 1 tablespoon vegetable oil in a large skillet over medium-high heat. Add 1.5 pounds ground beef and cook, breaking it up with a wooden spoon, until no longer pink, about 5-6 minutes. Drain excess fat, then sprinkle the seasoning mixture over the beef. Add 1/4 cup water and simmer for 2-3 minutes until the sauce thickens and coats the meat. Keep warm on lowest heat.
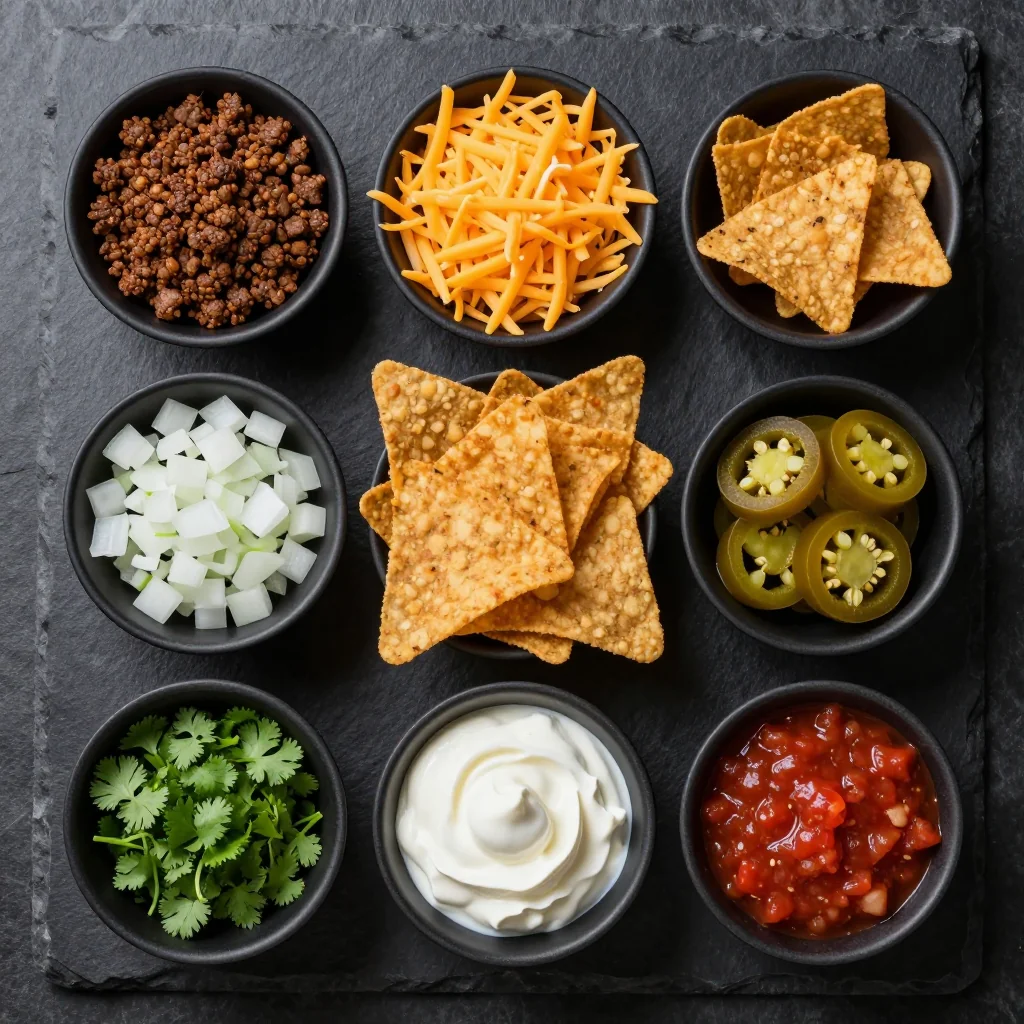
Prepare Your Toppings
While the beef cooks, dice 3 Roma tomatoes, finely chop 1/2 red onion, mince 2 jalapeños (remove seeds for less heat), chop 1/2 cup fresh cilantro, and crumble 4 ounces queso fresco. For the guacamole, mash 2 ripe avocados with 1 tablespoon lime juice, 1/4 cup minced red onion, 2 tablespoons chopped cilantro, and 1/2 teaspoon salt. Cover with plastic wrap pressed directly onto the surface to prevent browning. Having all toppings prepped before assembly is crucial—nachos wait for no one.
Preheat and Prep Pan
Position oven rack in center position and preheat to 425°F (220°C). Line a rimmed baking sheet (13x18-inch works perfectly) with parchment paper or a silicone mat for easy cleanup. If you don't have parchment, lightly grease the pan with cooking spray. This prevents the chips from sticking and makes cleanup a breeze when you're in your post-game food coma.
Create the Base Layer
Spread half of a 16-ounce bag of tortilla chips in a single layer on the prepared sheet pan. Slightly overlap the chips—think of it as creating a delicious mosaic where every piece gets its moment in the cheese spotlight. Avoid stacking chips directly on top of each other; we're building a foundation, not a tower. The base layer should cover about 75% of the pan surface.
Add the First Cheese Layer
Sprinkle 1 cup of the shredded sharp cheddar and 1 cup of the shredded Monterey Jack evenly over the chips. This initial cheese layer acts like delicious glue, adhering the chips to each other and creating a stable base for our mountain of toppings. Don't be stingy—this is not the time for restraint. Every chip should have cheese within a 1-inch radius.
Distribute the Beef
Using a slotted spoon to drain excess liquid, distribute the seasoned ground beef evenly over the cheese layer. Aim for small clusters rather than one massive beef blanket—this ensures that every bite gets the perfect meat-to-chip ratio. Any large pieces should be broken up with your spoon. The beef should cover about 60-70% of the surface area.
Create the Final Layer
Scatter the remaining chips over the beef, creating little mountain peaks and valleys. This second chip layer provides structural integrity and creates those coveted "fully loaded" chips that everyone fights over. Sprinkle the remaining 1 cup each of cheddar and Monterey Jack over everything, making sure to tuck cheese into all the nooks and crannies.
Bake to Perfection
Slide the sheet pan into your preheated oven and bake for 8-10 minutes. You're looking for the cheese to be fully melted and just starting to bubble, with the edges of the chips turning golden brown. Keep a close eye after 7 minutes—ovens vary and nachos can go from perfect to burnt in under 60 seconds. The cheese should be melted but not crispy.
Add Fresh Toppings
Remove the nachos from the oven and immediately sprinkle with the crumbled queso fresco. The residual heat will soften it slightly while maintaining its character. Working quickly (nachos are best hot!), scatter the diced tomatoes, red onion, jalapeños, and half the cilantro over the top. The contrast between the hot, melty base and the cool, fresh toppings is what elevates these from good to legendary.
Final Touches and Serve
Dollop the guacamole in several places across the nachos, or serve it on the side if you have guac purists in your crowd. Squeeze fresh lime juice over everything, scatter the remaining cilantro, and serve immediately with plenty of napkins and cold beverages. Place the sheet pan on a heat-safe trivet in the center of your viewing area and watch the magic happen.
Expert Tips
Control the Heat
If you're serving a crowd with varying spice tolerances, keep jalapeños as a side topping rather than mixing them in. Pickled jalapeños offer milder heat with a pleasant tang, while fresh ones bring the fire. Always provide cooling elements like sour cream or Greek yogurt on the side.
Prevent Soggy Nachos
The enemy of great nachos is moisture. Drain your tomatoes in a fine-mesh sieve for 5 minutes before dicing. Pat pickled jalapeños dry with paper towels. If using canned beans, rinse and drain thoroughly. Consider serving particularly wet toppings like salsa on the side.
Layer Strategically
Think of nacho assembly like building a house. Your chips are the foundation, cheese is the mortar, and toppings are the finishing touches. Don't overload any single area, and leave some "escape routes" for steam to prevent sogginess. The best nachos have architectural integrity.
Timing is Everything
Nachos wait for no one. Have your beers open, your viewing spot claimed, and your guests ready before you pull them from the oven. They start declining in quality after about 10 minutes. If you need to make multiple batches, keep them warm in a 200°F oven for up to 15 minutes.
Cut with Confidence
Don't be afraid to use kitchen shears or a pizza cutter to pre-slice your nachos into manageable sections. This prevents the dreaded "nacho collapse" when guests try to grab a portion. Cut them like you would a pizza, creating 12-16 wedges that hold together.
Revive Leftovers
While nachos are best fresh, you can revive day-old nachos in a 400°F oven for 5-7 minutes. Spread them on a wire rack set over a sheet pan to allow air circulation. Never microwave—they'll become rubbery and sad. Better yet, transform leftovers into breakfast by topping with fried eggs.
Variations to Try
Buffalo Chicken Version
Swap the ground beef for shredded rotisserie chicken tossed with buffalo sauce. Replace the cheddar with blue cheese crumbles and serve with ranch dressing on the side. Add diced celery for crunch and authenticity. Perfect for Bills Mafia gatherings.
Vegetarian Victory
Replace beef with a mixture of black beans and corn seasoned with the same spice blend. Add roasted bell peppers and zucchini for substance. Use smoked paprika to maintain that deep, complex flavor. Even meat-lovers won't miss the beef.
Midnight Breakfast Nachos
For those late playoff games that run past midnight, create breakfast nachos with tater tots instead of tortilla chips. Top with breakfast sausage, scrambled eggs, cheese, and country gravy. Serve with hot sauce and coffee for the ultimate crowd-pleaser.
International Fusion
Transform your nachos with global flavors: Korean BBQ beef with kimchi and gochujang, Greek-style with lamb and tzatziki, or Italian-inspired with sausage, marinara, and mozzarella. The nacho format is a blank canvas for culinary creativity.
Storage Tips
The Reality Check
Let's be honest—nachos are best served immediately and rarely last long enough to require storage. However, if you somehow end up with leftovers (did someone invite the vegetarian?), here's how to handle them like a pro.
Component Storage: Store leftover beef in an airtight container in the refrigerator for up to 4 days. Keep shredded cheese in a zip-top bag with as much air removed as possible. Fresh toppings like diced tomatoes, onions, and jalapeños should be stored separately in small containers—they'll keep for 3-4 days. Guacamole is best consumed within 24 hours, though you can extend its life by pressing plastic wrap directly onto the surface.
Reheating Strategy: The microwave is nacho enemy #1. Instead, spread leftovers on a wire rack set over a baking sheet and reheat in a 400°F oven for 5-7 minutes. The wire rack allows hot air to circulate, preventing soggy bottoms. For smaller portions, use your air fryer at 375°F for 3-4 minutes. If you must microwave, place a paper towel underneath to absorb moisture and use 50% power in 30-second bursts.
Make-Ahead Components: The seasoned ground beef can be made up to 3 days ahead and reheated with a splash of water or broth. Shred your cheese up to 5 days in advance and store in the refrigerator. Chop onions and jalapeños the morning of game day, storing them in separate containers. Wait to dice tomatoes until just before assembly to prevent them from becoming watery.
Freezing Options: While assembled nachos don't freeze well, you can freeze the cooked beef for up to 3 months. Let it cool completely, then store in freezer bags with as much air removed as possible. Thaw overnight in the refrigerator and reheat with a bit of water or broth. Cheese can be frozen for up to 2 months, though it may become slightly crumbly when thawed—still perfect for nachos.
Frequently Asked Questions
NFL Playoff Loaded Nachos with Beef and Cheese
Ingredients
Instructions
- Season the beef: Combine all spices in a small bowl. Heat oil in a large skillet over medium-high heat. Cook ground beef until no longer pink, about 5-6 minutes. Drain fat, add spices and 1/4 cup water. Simmer 2-3 minutes until thickened.
- Prep toppings: While beef cooks, dice tomatoes, chop onion and jalapeños, mince cilantro, and crumble queso fresco. Make guacamole by mashing avocados with lime juice, 1/4 cup minced onion, 2 tablespoons cilantro, and 1/2 teaspoon salt.
- Preheat oven: Position rack in center and preheat to 425°F. Line a rimmed baking sheet with parchment paper.
- Build base layer: Spread half the chips in a single layer on prepared pan. Sprinkle with 1 cup each of cheddar and Monterey Jack.
- Add beef: Distribute seasoned ground beef evenly over cheese layer.
- Final layer: Top with remaining chips and remaining cheese, ensuring good coverage.
- Bake: Bake 8-10 minutes until cheese is melted and bubbling, watching closely after 7 minutes.
- Finish and serve: Remove from oven, immediately top with queso fresco, tomatoes, onion, jalapeños, and half the cilantro. Add guacamole, squeeze lime juice over all, and serve hot with remaining cilantro.
Recipe Notes
For the best results, shred your own cheese from blocks rather than using pre-shredded cheese, which contains anti-caking agents that prevent smooth melting. If making ahead, prep all components but don't assemble until ready to bake and serve.