I still remember the night I tried to make a dessert that could rival my favorite ice cream shop’s signature scoop. The kitchen was a battlefield of mismatched spoons, a blender that sputtered, and a can of condensed milk that looked like it had been in a war zone. I was armed with a handful of extracts, a splash of red food coloring, and a daring belief that I could craft a creamy, vibrant treat without a fancy churn. The aroma that filled the room was a mix of sweetened milk, vanilla, and the faint tang of raspberry—an olfactory promise of something extraordinary. That moment, that chaotic swirl of flavors, became the spark that led me to this version of Superman Ice Cream You.
Picture this: you’re halfway through a hectic day, the fridge is a chaotic maze of leftovers, and you’re craving a dessert that feels like a hug in a cone. You reach for the ingredients that you know are the building blocks of happiness: heavy cream, powdered sugar, and that one can of sweetened condensed milk that sits in the back of your pantry like a secret weapon. You add a dash of red food coloring, a whisper of raspberry extract, and a playful splash of banana and strawberry to create a rainbow of flavors that will make your taste buds sing. The sound of the spoon stirring is like a drumbeat, the visual of the mixture thickening into a glossy, almost liquid texture feels like a promise of indulgence. You can almost hear the faint hiss of the ice crystals forming in the freezer—an almost cinematic moment that turns a simple recipe into an experience.
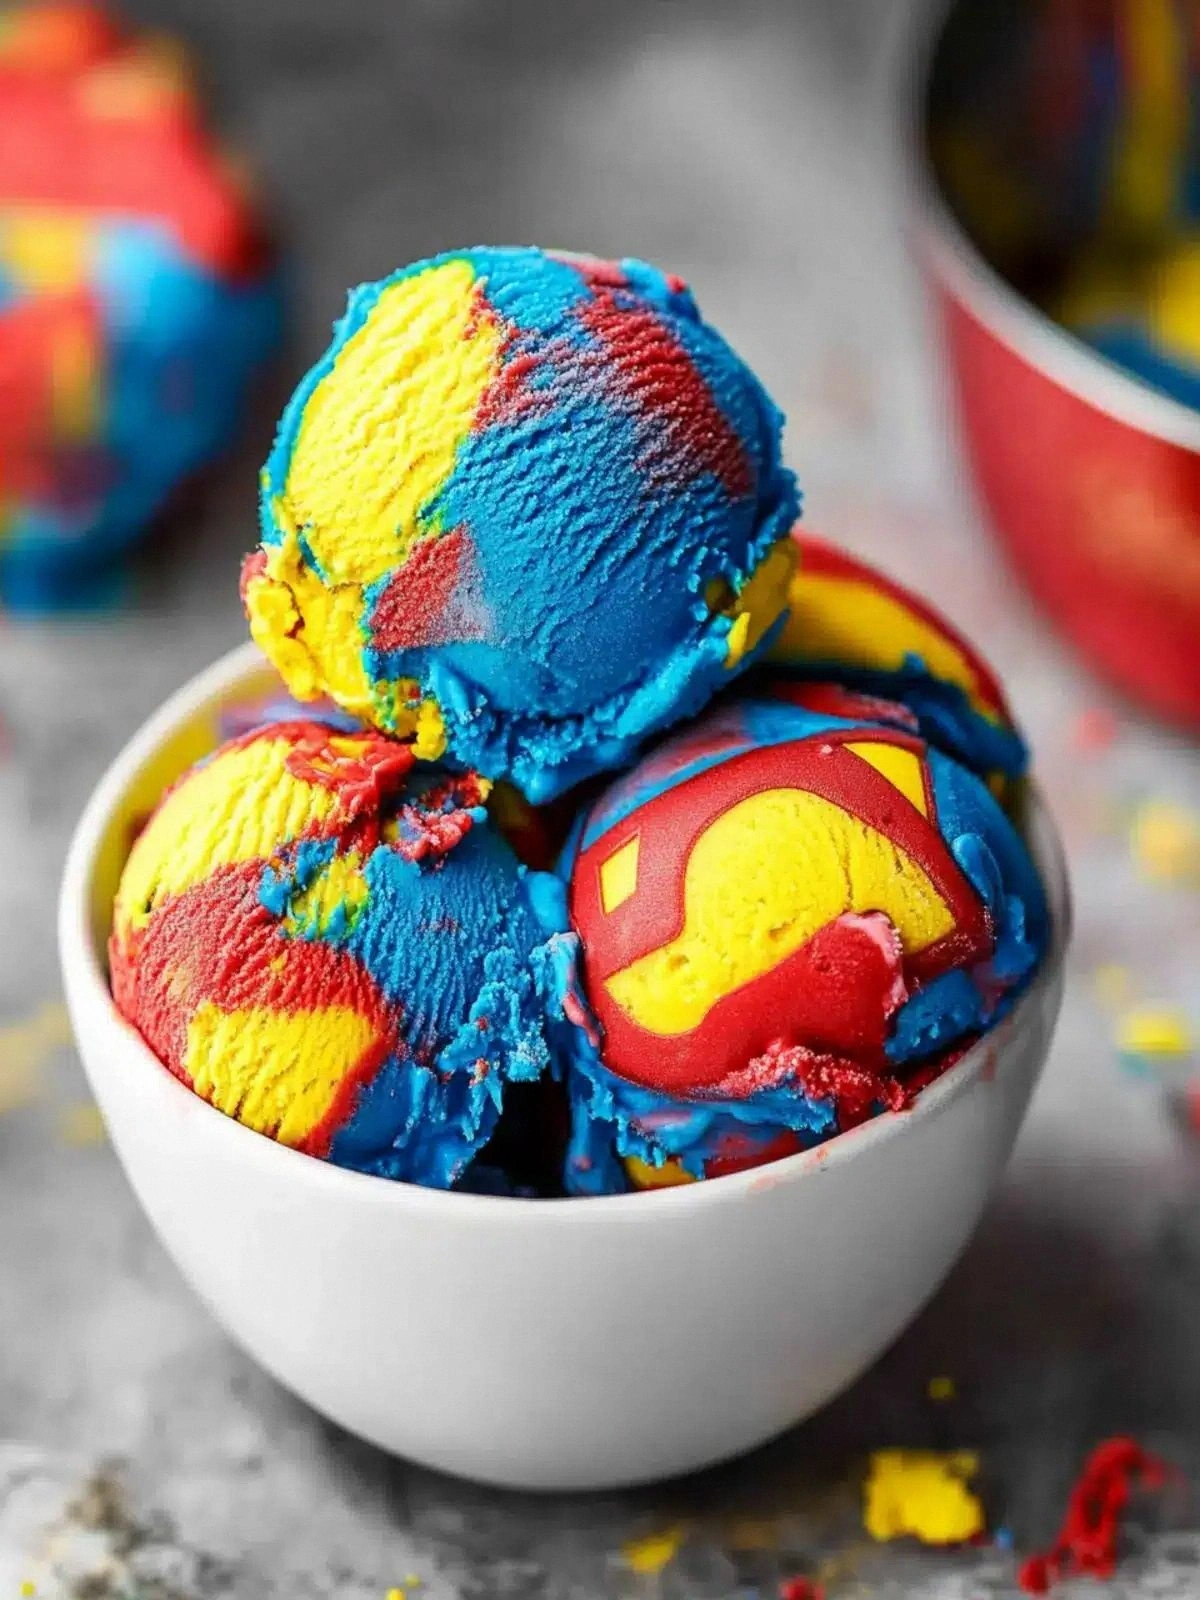
What sets this version apart isn’t just the vibrant color or the creamy texture; it’s the philosophy behind it. I’m not just tossing ingredients together; I’m orchestrating a symphony where each element has a role. The heavy cream provides the luxurious base, the powdered sugar sweetens without overpowering, and the condensed milk adds a rich, caramelized depth that you’d expect from a high-end patisserie. The extracts and food coloring work in harmony to create layers of flavor that dance on the tongue, while the color gives it that iconic “Superman” flair that turns any dessert into a showstopper. And the best part? You can make it without a churn, so even a kitchen novice can feel like a superhero in the kitchen.
I dare you to taste this and not go back for seconds. The first bite should feel like a creamy, velvety splash that melts in your mouth, leaving behind a lingering sweetness that’s both comforting and adventurous. The texture is a paradoxical blend of smoothness and subtle crunch from the frozen crystals, while the flavor profile is a sweet, fruity bouquet that’s unmistakably nostalgic yet fresh. If you’ve ever struggled with making ice cream that’s too icy or too dense, you’ll feel a wave of relief wash over you. This is hands down the best version you’ll ever make at home, and I promise you’ll wonder how you ever made it any other way.
What Makes This Version Stand Out
- Flavor: The combination of raspberry, vanilla, banana, and strawberry extracts creates a multi-dimensional taste that feels like a summer picnic in a spoon. The extracts blend seamlessly, ensuring that no single flavor overpowers the others.
- Texture: The heavy cream and condensed milk lock in air, producing a silky mouthfeel that’s lighter than traditional ice cream yet richer than frozen yogurt.
- Color: A splash of red food coloring gives it that unmistakable “Superman” hue, turning an ordinary dessert into a visual spectacle.
- Ease: No churn required—just whisk, chill, and serve. This makes it accessible for anyone, regardless of kitchen equipment.
- Versatility: The base can be customized with additional fruit purees, nuts, or chocolate swirls, making it a canvas for creative expression.
- Make‑Ahead: It freezes well and can be stored for up to a week, allowing you to prepare it ahead of a busy day or event.
- Ingredient Quality: Using premium heavy cream and high-quality extracts ensures that each spoonful feels indulgent.
- Social Appeal: The vibrant look and delicious taste guarantee rave reviews at family gatherings or parties.
Alright, let’s break down exactly what goes into this masterpiece…
Inside the Ingredient List
The Flavor Base
The heavy cream is the heart of this recipe, providing the rich, velvety texture that defines premium ice cream. It’s essential for achieving that silky mouthfeel; if you skip it, the result becomes thin and watery. When selecting heavy cream, look for a fat content of at least 30% to ensure the right balance of richness and stability. A higher fat percentage also helps the ice cream hold its shape during freezing and prevents it from becoming icy.
Powdered sugar is the sweetener that dissolves quickly, avoiding the gritty texture that can come from granulated sugar. It also helps create a smoother, more consistent ice cream body. If you prefer a lower sugar content, you can substitute a portion of powdered sugar with a natural sweetener like stevia or erythritol, but keep in mind that the texture may change slightly. A good rule of thumb is to use no more than 25% of a sugar substitute to maintain the right balance.
The Texture Crew
Sweetened condensed milk is the secret sauce that brings depth and a caramelized nuance to the ice cream. It’s packed with lactose and sugars that create a subtle caramel flavor when combined with the extracts. Skipping this ingredient will make the ice cream taste flat and lack the luxurious mouthfeel that condenses into a buttery finish. If you’re lactose intolerant, consider using a lactose-free condensed milk alternative, though the flavor profile may differ slightly.
Red food coloring is not just for the visual appeal; it also helps to mask the slight grayish hue that can appear in dairy-based desserts when frozen. The color should be added gradually until you achieve the desired intensity, ensuring that the ice cream remains natural-looking. If you prefer a more subtle hue, you can use a natural dye like beet juice, but be prepared for a slight shift in flavor.
The Unexpected Star
Raspberry extract is the star that brings a bright, tart note, cutting through the sweetness of the condensed milk. It’s a powerful flavor that doesn’t require large quantities, so a teaspoon is more than enough to lift the entire dish. If you can’t find raspberry extract, fresh raspberries can be pureed and strained, but the texture will be slightly different. The key is to keep the extract at room temperature so it blends smoothly into the base.
Banana extract adds a subtle, sweet undertone that mimics the natural fruitiness of bananas without the need for actual fruit. It’s especially useful if you want to avoid adding banana puree, which could alter the consistency. A teaspoon of banana extract provides a mellow, comforting flavor that pairs perfectly with vanilla and strawberry. If you’re vegan, look for a plant-based banana extract to maintain the flavor profile.
The Final Flourish
Vanilla extract is the classic backbone of any dessert, providing warmth and depth. Even though it’s a small component, vanilla balances the bright fruit extracts, creating a harmonious flavor profile. The quality of vanilla matters—a high-quality extract will give you a cleaner, more refined taste. For a richer flavor, you can use vanilla bean paste, which adds a subtle hint of the bean’s natural aroma.
Strawberry extract rounds out the flavor palette with a sweet, slightly tart finish that echoes the freshness of summer berries. It also adds a subtle color cue that enhances the overall visual appeal. If you’re looking to make the ice cream more fruit-forward, consider adding a few fresh strawberry slices after the mixture has partially frozen. The key is to keep the extracts balanced; too much of one can overpower the others.
Everything’s prepped? Good. Let’s get into the real action…
The Method — Step by Step
- Begin by whisking the heavy cream in a large bowl until it reaches soft peaks. This process incorporates air, which is crucial for a light, fluffy texture. Keep an eye on the mixture; when it starts to thicken slightly, you’re ready to move on. This step ensures that the ice cream will have a smooth mouthfeel.
- Add the powdered sugar to the cream and continue whisking until it’s fully dissolved. The sugar should feel silky, not gritty. If any clumps remain, a fine sieve will help. A smooth base is the foundation for a perfect final product.
- Pour in the sweetened condensed milk and stir until the mixture is uniform. The condensed milk adds body and a caramel-like sweetness that elevates the flavor. Ensure that the mixture is well-blended to prevent any separation during freezing.
- Introduce the extracts—vanilla, raspberry, banana, and strawberry—one by one, stirring after each addition. This gradual incorporation allows each flavor to meld without overwhelming the palate. The extracts should be at room temperature to blend smoothly.
- Add a few drops of red food coloring to achieve the desired hue. Stir gently, watching the color spread evenly. If the mixture appears too light, add a couple more drops, but be careful not to overdo it. The color should be vibrant yet natural.
- Transfer the mixture to a heat‑proof bowl and place it over a pot of simmering water. Gently heat the mixture, stirring constantly, until it reaches 85°C (185°F). This step is crucial for stabilizing the mixture and ensuring a smooth freeze.
- Once the mixture reaches the target temperature, remove it from heat and let it cool to room temperature. Then refrigerate for at least 2 hours, or until it’s completely chilled. Cooling the mixture before freezing helps prevent ice crystals from forming.
- Pour the chilled mixture into a shallow, freezer‑safe container. Cover it with a lid or plastic wrap, pressing the wrap directly onto the surface to avoid ice crystals forming on top. Place the container in the freezer for 30 minutes.
- After 30 minutes, remove the container and stir vigorously with a whisk or a fork to break up any forming ice crystals. This manual churning mimics the action of a commercial ice cream maker. Repeat this process every 30 minutes for 2-3 hours.
- Once the ice cream has reached a firm, scoopable consistency, transfer it to an airtight container. Store it in the freezer for up to a week. When ready to serve, let it sit at room temperature for 5-10 minutes to soften slightly before scooping.
That’s it — you did it. But hold on, I’ve got a few more tricks that will take this to another level…
Insider Tricks for Flawless Results
The Temperature Rule Nobody Follows
Temperature control is the unsung hero of homemade ice cream. Even a minor deviation can lead to a texture that’s either too hard or too soft. I always keep a digital thermometer handy, and I set a strict 85°C target. If the mixture lingers above this point, it can separate and create a grainy finish. The trick? Use a double boiler to maintain steady, gentle heat, and stir constantly to distribute warmth evenly.
Why Your Nose Knows Best
You might think you’re only tasting flavors, but your nose is a powerful ally in the kitchen. As the mixture heats, you’ll notice subtle changes in aroma that signal the right moment to remove it from heat. A sweet, caramelized scent indicates that the condensed milk has melded perfectly. If it smells overly sweet or burnt, you’re overcooking it. Trust your senses; they’re more reliable than any timer.
The 5‑Minute Rest That Changes Everything
After the final stir, let the ice cream rest for five minutes before scooping. This brief pause allows the mixture to settle and the ice crystals to firm up. Skipping this step can result in a slushy consistency that feels unfinished. The rest period also helps the flavors marry, creating a more cohesive taste experience.
Freeze‑First, Chill‑Later
Some people believe you must chill the mixture before freezing. In reality, freezing first and then chilling can produce a smoother texture. This method reduces the chance of ice crystals forming on the surface, which can lead to a gritty mouthfeel. Experiment with both techniques to see which works best for your freezer and personal preference.
The Swirl Secret
If you want a marbled effect, swirl a little chocolate or fruit puree into the mixture before the final freeze. Use a knife or skewer to create gentle waves, allowing the colors to blend without fully mixing. The result is a visually stunning dessert that offers a burst of flavor with each bite. This trick is perfect for special occasions or a festive twist.
The Finish Line
Before serving, let the ice cream sit at room temperature for 5 minutes. This short softening period makes scooping easier and enhances the creamy texture. If you’re serving it immediately after the final freeze, it may feel too firm and resist scooping. A quick 5‑minute rest is all you need to achieve that silky, scoop‑friendly consistency.
Creative Twists and Variations
This recipe is a playground. Here are some of my favorite ways to switch things up:
Berry Burst
Add a handful of fresh blueberries or raspberries to the base before freezing. The berries will release natural juices, giving the ice cream a subtle burst of fruit. Pair it with a drizzle of honey for an extra sweet touch. This variation works wonderfully for summer gatherings.
Chocolate Superhero
Swirl in a tablespoon of melted dark chocolate during the final stir. The chocolate adds depth and a slight bitterness that balances the sweetness. Sprinkle a pinch of sea salt on top to enhance the chocolate flavor. This version is perfect for chocolate lovers.
Nutty Power
Fold in toasted almond slivers or chopped pistachios before the final freeze. The nuts add a delightful crunch and a nutty aroma that complements the fruit extracts. Be careful not to add too many nuts, or the ice cream may become overly dense. This twist is ideal for a sophisticated palate.
Minty Fresh
Replace the vanilla extract with a teaspoon of peppermint extract. The mint will give the ice cream a refreshing, cooling sensation. Pair it with crushed peppermint candies for a festive touch. This version is a holiday favorite.
Citrus Splash
Add a splash of orange or lemon zest to the base. The citrus will brighten the flavor profile and add a subtle zing. Use a fine grater to ensure the zest is finely chopped. This variation is ideal for those who love a tangy contrast.
Caramel Swirl
Stir in a tablespoon of caramel sauce during the final freeze. The caramel will create a luxurious, sweet swirl that’s visually appealing. Add a pinch of sea salt to balance the sweetness. This version is perfect for a decadent dessert.
Storing and Bringing It Back to Life
Fridge Storage
If you need to store the ice cream for a few days, keep it in an airtight container. The container should be freezer‑safe and have a tight seal to prevent freezer burn. Label the container with the date to keep track of freshness. Store it at the back of the freezer where the temperature is most consistent.
Freezer Friendly
For longer storage, keep the ice cream in a large, freezer‑safe bag. Remove as much air as possible before sealing to avoid ice crystals from forming. This method extends the shelf life to up to a month. When you’re ready to serve, let it sit at room temperature for 5 minutes to soften.
Best Reheating Method
Reheating ice cream can be tricky, but a simple trick works wonders. Add a tiny splash of water to the container and give it a quick stir. The water steams, bringing the ice cream back to a creamy consistency. Avoid microwaving, as it can melt the ice crystals and ruin the texture. This method keeps the ice cream silky and delicious.