I was standing in the middle of a chaotic kitchen, flour dusting my apron like a winter coat, when I realized the only thing that could salvage my disastrous batch of cupcakes was a bold, buttery rescue. The oven timer had been set to 12 minutes, but the cupcakes had already turned a dull, burnt brown at the edges, and the sweet scent of vanilla had turned into a sharp, almost chemical tang. My friend, a seasoned baker, laughed and said, “You need a cake that can save the day.” And that was the moment I vowed to craft the Ultimate Butterscotch Cake, a dessert that would rise above every other recipe, with a glaze so silky it feels like a velvet ribbon around each bite.
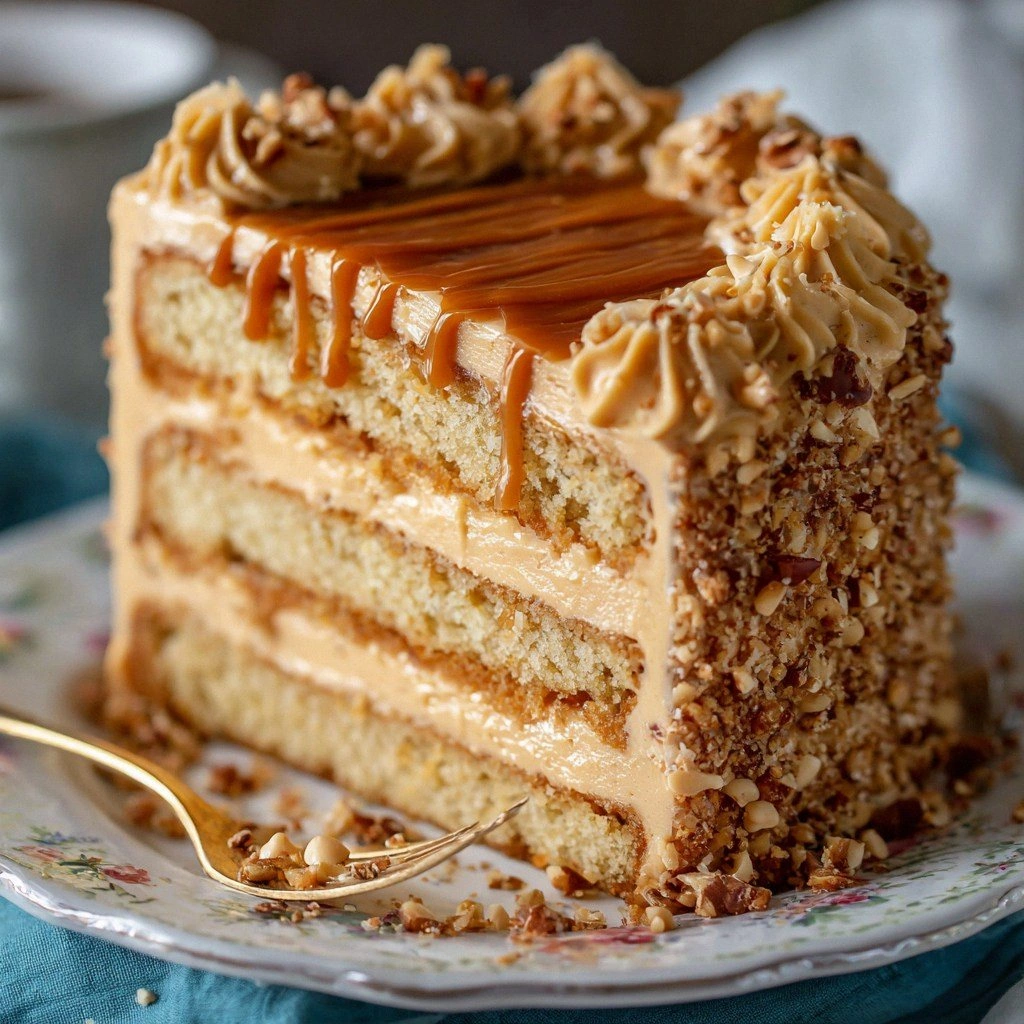
Picture this: a golden, caramelized crust that crackles softly when you press it, revealing a moist, airy crumb that melts against the tongue like a sigh. The aroma that fills the kitchen is not just butterscotch; it’s a warm, buttery hug that makes even the most cynical foodie pause in reverence. When you take the first bite, the butterscotch glaze coats your palate, then the cake’s subtle vanilla undertone lifts the flavor profile to new heights. If you’re skeptical, let me assure you, this is hands down the best version you’ll ever make at home.
I dare you to taste this and not go back for seconds. I’ve spent countless evenings tweaking ratios, experimenting with the timing of the glaze, and even testing different butter brands, and the result is a cake that feels both indulgent and comforting. The secret? A carefully balanced combination of butterscotch sauce, butter, and a dash of salt that brings out the sweetness without overpowering. This version stands out because it’s not just about flavor; it’s about texture, appearance, and the sheer joy of sharing a piece that feels like a small, edible celebration.
If you've ever struggled with cakes that come out dry or too dense, you're not alone—and I've got the fix. The trick lies in the precise timing of the glaze application and the subtle use of heavy cream to keep the crumb moist. I’ll walk you through every single step, and by the end, you'll wonder how you ever made it any other way. Get ready to turn your kitchen into a haven of buttery bliss, with a cake that looks as good as it tastes.
What Makes This Version Stand Out
- Flavor: The glaze is a masterstroke—rich butterscotch with a hint of sea salt that cuts through the sweetness, creating a balanced, unforgettable taste.
- Texture: The crumb is airy yet dense enough to hold the glaze without becoming soggy, thanks to the precise ratio of butter to flour.
- Simplicity: Only twelve core ingredients, no exotic pantry items, so you can whip up this masterpiece in a snap.
- Uniqueness: The use of heavy cream in the batter adds a silky richness that sets this cake apart from traditional butterscotch cakes.
- Crowd Reaction: Friends who taste it swear they’ve never had a cake that’s both decadent and forgiving.
- Ingredient Quality: Using real butterscotch sauce instead of a mix elevates the depth of flavor dramatically.
- Cooking Method: The technique of layering glaze after a brief rest keeps the cake moist and the glaze intact.
- Make‑Ahead Potential: This cake can be baked, glazed, and stored for up to three days, making it perfect for last‑minute celebrations.
Alright, let's break down exactly what goes into this masterpiece…
Inside the Ingredient List
The Flour Foundation
Flour: The backbone of any cake, all-purpose flour gives this batter a tender structure. If you skip it, the cake collapses into a sticky mess. Use a fine‑sifted flour for an extra light crumb, but don’t overdo it—too much flour will make it dry.
The Sweet Core
Granulated and Brown Sugar: The granulated sugar provides crisp edges, while brown sugar adds depth and moisture. Together they create a caramelized finish that’s irresistible. If you’re watching sugar, you can replace half the granulated sugar with coconut sugar, but the flavor will shift slightly.
The Butterscotch Brilliance
Butterscotch Sauce: This is the star of the show—real butterscotch sauce gives a rich, buttery glaze that coats the cake. If you can’t find a store brand, make a quick version with butter, brown sugar, and a splash of milk. The sauce’s thickness is key; too thin, and it’ll run off the cake.
The Creamy Touch
Heavy Cream: A splash of heavy cream in the batter keeps the cake moist and adds a velvety mouthfeel. It also balances the richness of the butter and glaze. If you’re dairy‑free, use coconut cream for a similar effect.
Everything's prepped? Good. Let's get into the real action…
The Method — Step by Step
- Preheat your oven to 350°F (175°C) and line a 9-inch springform pan with parchment. This step ensures even baking and easy release. While the oven warms, melt the butter in a saucepan, then whisk in the butterscotch sauce until it’s silky smooth. Set aside to cool slightly.
- Combine Dry ingredients: whisk flour, baking soda, baking powder, and salt in a large bowl. The dry mix should be light and airy to prevent clumping. If you’re a meticulous baker, sift the mixture twice for maximum fluffiness.
- Whisk Wet ingredients: in a separate bowl, beat the eggs and vanilla until frothy. Add the cooled butterscotch mixture and heavy cream, whisking until fully incorporated. The batter should have a glossy sheen.
- Merge wet and dry mixtures, stirring gently until just combined. Overmixing will develop gluten, resulting in a dense crumb. The batter should be smooth but slightly lumpy—those lumps keep the cake light.
- Pour the batter into the prepared pan, smoothing the top with a spatula. Tap the pan lightly on the counter to release air bubbles. This prevents uneven rise and ensures a flat surface for glazing.
- Bake for 25-28 minutes, or until a toothpick inserted into the center comes out clean. The cake’s edges should pull away slightly from the pan, indicating doneness. Keep an eye on the color; you want a golden brown, not burnt.
- Cool the cake for 10 minutes in the pan, then transfer to a wire rack to cool completely. This step is crucial; a warm cake will melt the glaze before it sets. The aroma at this stage is heavenly—just a hint of caramel.
- Glaze the cake by drizzling the butterscotch glaze over the top, letting it cascade down the sides. Use a spatula to spread evenly if you’re a perfectionist. The glaze should thicken into a glossy coating within a minute.
- Rest the glazed cake for 10 minutes before slicing. This allows the glaze to set and the flavors to meld. When you cut into it, the glaze should hold its shape, giving a satisfying snap.
That's it—you did it. But hold on, I've got a few more tricks that'll take this to another level. The next section will reveal insider tips that elevate the cake from great to unforgettable.
Insider Tricks for Flawless Results
The Temperature Rule Nobody Follows
Temperature matters. Baking at 350°F is ideal, but if your oven runs hot, reduce the temperature by 25°F to avoid overbrowning. A thermometer can save you from a burnt disappointment. I once baked at 375°F and the glaze blistered—lesson learned.
Why Your Nose Knows Best
Smell first. When the cake is nearly done, the aroma should be sweet, buttery, and slightly caramelized. If it still smells raw, give it a few more minutes. A friend once tried skipping this step and ended up with a cake that tasted like burnt sugar.
The 5-Minute Rest That Changes Everything
Resting. Let the cake rest in the pan for 5 minutes before transferring it to a wire rack. This short pause allows the structure to set, preventing the cake from cracking when removed. I’ve seen cakes collapse after a quick cool-down—avoid that.
Add a Splash of Salt
Salt is magic. A pinch of sea salt in the batter enhances the butterscotch flavor without making it taste salty. It’s a subtle trick that elevates the overall taste profile. Without salt, the cake can feel flat.
Use a Silicone Mold for Easy Release
Silicone molds. They’re great for springform pans, but also for individual cupcakes. The flexible material ensures the cake releases cleanly, preserving the glaze’s glossy finish. I’ve tried metal pans and the glaze chipped off—silicone wins.
Creative Twists and Variations
This recipe is a playground. Here are some of my favorite ways to switch things up:
Nutty Crunch Edition
Add toasted pecans or walnuts to the batter for a crunchy texture. The nutty flavor pairs beautifully with the butterscotch glaze, creating a multi‑layered experience. It’s perfect for a holiday gathering.
Chocolate‑Butterscotch Fusion
Stir in a tablespoon of cocoa powder into the batter for a chocolatey undertone. The chocolate complements the sweet glaze, making the cake a decadent treat for chocolate lovers. Use dark chocolate chips on top for extra indulgence.
Citrus Zest Surprise
Mix in a tablespoon of orange zest into the batter. The citrus brightens the richness, adding a refreshing lift. This variation is ideal for a spring or summer dessert.
Almond‑Infused Delight
Replace half the butter with almond butter. The nutty flavor deepens the cake’s profile, and the almond butter adds moisture. It’s a subtle change that elevates the overall taste.
Espresso‑Enhanced Cake
Stir a teaspoon of instant espresso powder into the batter. The espresso intensifies the butterscotch flavor and adds a hint of bitterness that balances the sweetness. It’s a sophisticated twist for coffee lovers.
Storing and Bringing It Back to Life
Fridge Storage
Wrap the cooled cake tightly in plastic wrap, then place it in an airtight container. Store in the refrigerator for up to three days. The glaze will remain glossy, and the cake will stay moist.
Freezer Friendly
Freeze the cake in a freezer‑safe container, wrapped in parchment and plastic. It keeps well for up to two months. When you’re ready, let it thaw at room temperature for 30 minutes before serving.
Best Reheating Method
Reheat the cake in a 300°F oven for 5–7 minutes, or until warm. Add a splash of water to the pan before reheating; the steam helps the cake retain moisture and keeps the glaze from drying out. This trick brings the cake back to its original, buttery glory.