Picture this: a Saturday morning, the kind of lazy weekend where the only thing you’re seriously considering is whether to binge‑watch another series or finally tackle that pastry recipe you bookmarked three months ago. I was in the middle of a cereal‑only breakfast when a sudden craving for something buttery, crisp, and utterly addictive hit me like a plot twist in a thriller. I rummaged through my pantry, only to discover my gluten‑free puff pastry was looking at me with a smug, “I’m here, but you’ll never get that perfect crunch.” I laughed, I panicked, and then I decided to turn that panic into a challenge – a dare to myself that I would create the most ridiculously crunchy gluten‑free palmier the internet has ever seen.
The kitchen quickly transformed into a battlefield of aromas and textures. The scent of butter melting in the pan was like a warm hug from an old friend, while the faint whisper of cinnamon teased my nostrils, promising a sweet surprise. I could hear the faint crackle of the pastry as it hit the hot sheet pan, a sound that reminded me of fireworks on the Fourth of July – short, sharp, and impossibly satisfying. My hands felt the cool, buttery layers of the puff pastry, each sheet a delicate promise of the flaky layers to come, while my eyes watched the sugar crystals glisten like tiny snowflakes ready to melt into caramelized bliss.
Most palmier recipes out there either ignore the gluten‑free factor or sacrifice the iconic crunch for ease, leaving you with a soggy, disappointing bite that feels more like a sad, wilted leaf than a golden‑brown pastry. I’ve tried a handful of “gluten‑free” versions that turned out flatter than a pancake on a hot griddle, and I’m not about to let that happen again. This version stands out because it marries the structural integrity of a high‑quality gluten‑free puff pastry with a secret technique: a quick, buttery sugar‑cinnamon glaze that locks in moisture before the oven even gets a chance to work its magic, resulting in a crisp that shatters like thin ice under a light footfall.
But here’s the kicker – I’m going to reveal a trick that most chefs keep to themselves: a brief blast of high heat at the start, followed by a lower, steady temperature that ensures the layers separate perfectly without burning. It’s the difference between a pastry that whispers “delicious” and one that shouts “wow!” I dare you to taste this and not go back for seconds. Let me walk you through every single step — by the end, you’ll wonder how you ever made it any other way.
What Makes This Version Stand Out
- Crunch Factor: The double‑temperature bake creates a crackle that feels like stepping on fresh snow – each bite releases a burst of buttery, caramelized sugar that snaps delightfully against your teeth.
- Gluten‑Free Confidence: Using a premium gluten‑free puff pastry ensures the layers stay distinct without the gummy texture many gluten‑free doughs suffer from.
- Simplicity: Only three ingredients are required, making it a perfect go‑to for last‑minute gatherings or spontaneous cravings.
- Flavor Depth: A pinch of cinnamon elevates the sugar into a warm, aromatic companion that lingers on the palate long after the last crumb.
- Crowd Reaction: Guests often proclaim this the best “cookie‑like” pastry they’ve ever tasted, sparking endless requests for the recipe.
- Make‑Ahead Potential: These palms keep their crunch for days when stored properly, and they re‑crisp beautifully with a quick oven blast.
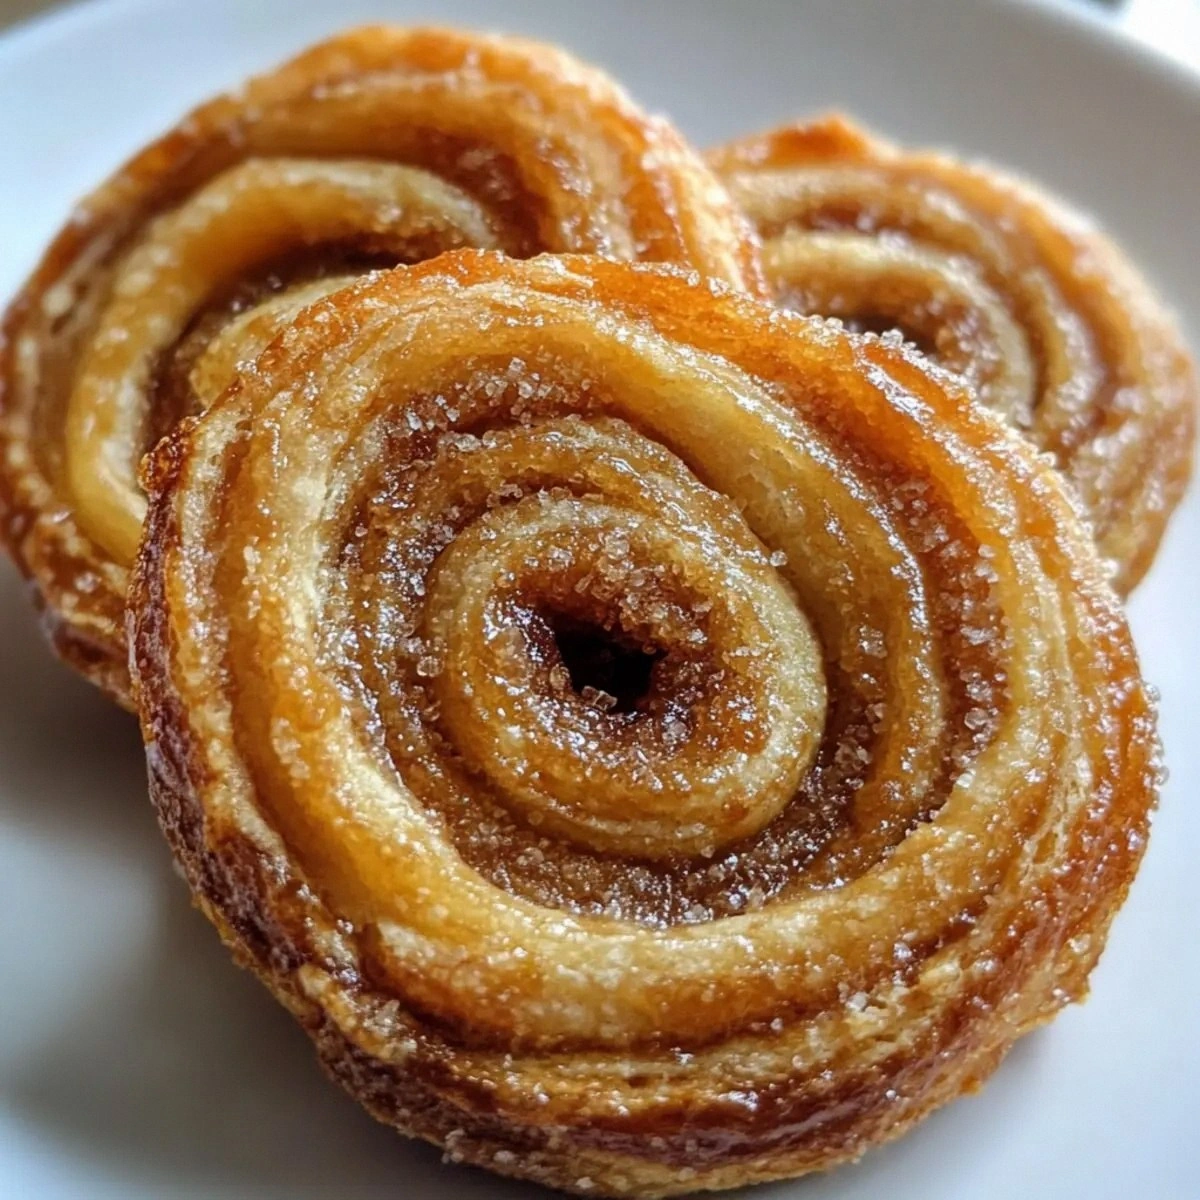
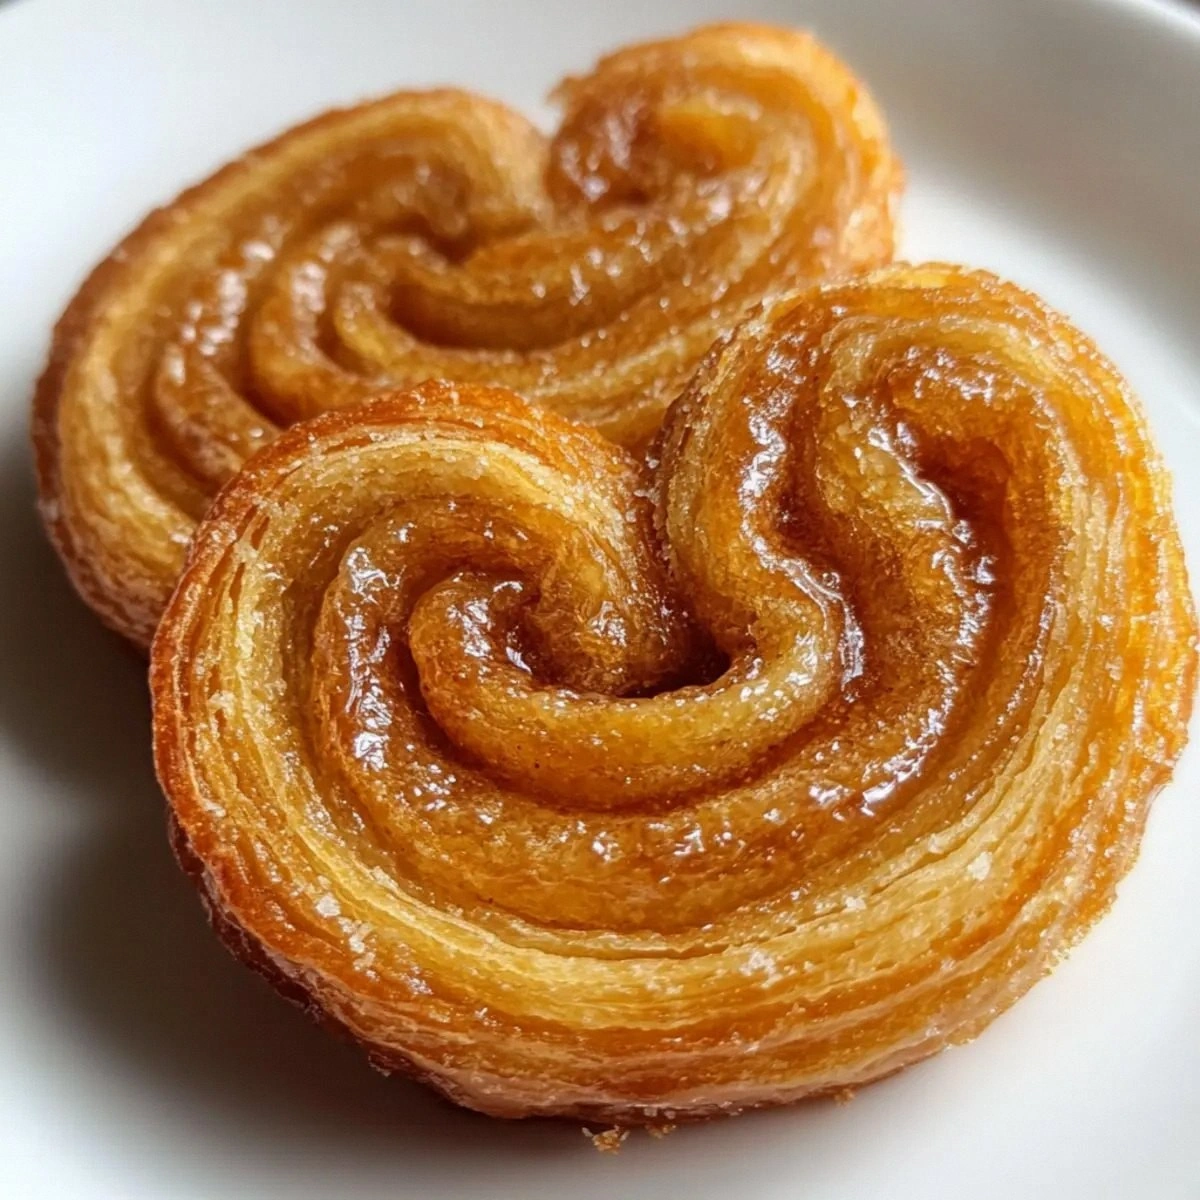
- Visual Appeal: The elegant, heart‑shaped swirl looks as impressive on a platter as it tastes, making it a show‑stopper for brunch spreads.
- Versatility: The base can be dressed up with chocolate drizzle, toasted nuts, or a dusting of powdered sugar for endless variations.
Inside the Ingredient List
The Flavor Base
The star of this recipe is the Gluten‑Free Puff Pastry. This isn’t just any dough; it’s a carefully laminated sheet that contains layers of butter trapped between gluten‑free flour, starches, and a touch of xanthan gum for elasticity. If you skip this, you’ll end up with a flat, dense cookie that lacks the airy lift we crave. Look for a brand that lists butter as the first ingredient and avoids excessive additives – the better the butter, the more pronounced the flavor and the flakier the final product. Pro tip: store the pastry in the freezer until you’re ready to roll; it makes the dough easier to handle and keeps the butter from melting prematurely.
The Texture Crew
The Granulated Sugar does more than just sweeten; it caramelizes during baking, forming a thin, glossy crust that snaps like a fresh twig. If you substitute brown sugar, you’ll get a moister, chewier result, which is lovely but not the signature crunch we’re after. The sugar crystals also help to draw out a thin layer of moisture from the pastry, creating that delicate steam pocket that separates the layers. For the best crunch, use fine granulated sugar – it melts evenly and creates a uniform glaze.
The Unexpected Star
A pinch of Cinnamon might seem insignificant, but it’s the aromatic secret that elevates the palmier from good to unforgettable. Cinnamon’s warm, sweet notes complement the butter’s richness and add a subtle depth that makes the palate linger. If you’re feeling adventurous, a dash of nutmeg or cardamom can add an exotic twist, but be careful not to overpower the delicate balance. Skipping the cinnamon altogether would leave the pastry tasting flat, like a story without a climax.
Everything's prepped? Good. Let's get into the real action, where butter meets heat and magic happens.
The Method — Step by Step
- Preheat your oven to a scorching 425°F (220°C). This initial blast of heat is the secret weapon that sets the stage for the layers to puff dramatically. As the oven warms, you’ll hear the faint hum of the fan, a reminder that the environment is primed for a perfect rise. Power transition: Okay, ready for the game‑changer?
- While the oven heats, lay the gluten‑free puff pastry on a lightly floured surface. Sprinkle the granulated sugar evenly over the entire sheet, then dust the pinch of cinnamon across the sugar. Use a rolling pin to gently press the sugar and cinnamon into the dough – you want the crystals to adhere without crushing them. Kitchen Hack: If the sugar slides off, lightly mist the dough with water – just enough to make it tacky.
- Fold the pastry in thirds, like a traditional palmier fold: bring the left edge to the center, then the right edge over the left, creating a compact rectangle. This folding technique creates the iconic “heart” shape once rolled out. Press gently to seal the edges, ensuring no sugar spills out during baking. Watch Out: If you don’t press the seams, the layers can separate, resulting in a messy, uneven bake.
- Rotate the folded rectangle 90 degrees and repeat the folding process, creating a second set of layers. This double‑fold is what gives the palmier its buttery, multi‑layered structure. After the second fold, you should have a compact, square‑shaped dough block that looks like a miniature book.
- Wrap the folded dough in plastic wrap and chill in the refrigerator for at least 15 minutes. This chilling step solidifies the butter, preventing it from melting too quickly in the oven, which would otherwise cause sogginess. While it chills, you can prep your baking sheet – line it with parchment paper for easy release.
- After chilling, place the dough on the parchment‑lined sheet and, using a sharp serrated knife, slice the block into ½‑inch thick slices. Each slice should reveal a beautiful, concentric swirl of dough and sugar. Watch Out: A dull knife will compress the layers, ruining the airy texture. Use a sharp blade and wipe it clean between cuts.
- Arrange the slices on the baking sheet, leaving a small gap between each to allow for expansion. Lightly brush the tops with a whisper of melted butter – this extra glaze will turn the sugar into a caramelized crust. Slide the sheet into the preheated oven and bake for 8 minutes.
- After 8 minutes, reduce the oven temperature to 350°F (175°C) and continue baking for another 12‑15 minutes, or until the edges are golden‑brown and the sugar has formed a glossy, crackling surface. The scent at this stage is pure bliss – a buttery, caramel‑cinnamon perfume that fills the kitchen. This next part? Pure magic. Keep an eye on the edges; they should start pulling away from the parchment, a sign they’re perfectly crisp.
- Remove the palms from the oven and let them cool on a wire rack for at least 10 minutes. As they cool, the sugar hardens, giving each bite that satisfying snap. If you’re impatient (like me), resist the urge to dive in immediately – the cooling phase is essential for texture.
- Once cooled, serve them plain, dusted with a hint more cinnamon, or drizzle with melted dark chocolate for an indulgent finish. Store any leftovers in an airtight container, and remember the kitchen hack from earlier: a quick 2‑minute reheating at 300°F restores the crunch as if they were fresh out of the oven. That's it — you did it. But hold on, I've got a few more tricks that'll take this to another level...
Insider Tricks for Flawless Results
The Temperature Rule Nobody Follows
Most bakers recommend a single temperature, but the two‑stage bake is a game‑changer. The initial high heat creates steam that puffs the layers, while the lower finish ensures the sugar caramelizes without burning. I once tried baking at a steady 375°F and ended up with soggy centers – a clear reminder that temperature modulation is the key to that perfect snap.
Why Your Nose Knows Best
Never underestimate the power of scent as a doneness indicator. When the kitchen fills with a buttery, caramel‑cinnamon aroma, you’re just minutes away from perfection. If the smell turns slightly nutty, you’re edging toward over‑caramelization, so pull the tray out a minute early and let residual heat finish the job.
The 5‑Minute Rest That Changes Everything
After the oven, let the palms rest on a wire rack for exactly five minutes before moving them. This short pause allows the sugar to set, preventing the delicate crust from cracking unevenly. I’ve seen impatient bakers try to stack them while still warm, only to end up with a mushy mess – trust the rest period, and the texture will thank you.
Butter Brush Precision
When brushing melted butter on top, use a pastry brush and apply a thin, even coat. Too much butter makes the sugar soggy; too little leaves the surface dull. A light hand ensures a glossy finish that hardens into that coveted crackle.
Freezing for Future Feasts
These palms freeze like a dream. After they’ve cooled completely, arrange them on a baking sheet and freeze solid, then transfer to a zip‑top bag. When you’re ready to serve, bake at 350°F for 5‑7 minutes – the crust revives instantly, and the flavor remains unchanged.
Creative Twists and Variations
This recipe is a playground. Here are some of my favorite ways to switch things up:
Chocolate‑Dipped Delight
After the palms have cooled, dip half of each into melted dark chocolate and sprinkle with sea salt. The bitterness of the chocolate balances the sweet caramel, while the salt adds a sophisticated crunch. Perfect for a dinner‑party after‑dessert.
Nutty Caramel Swirl
Stir toasted chopped almonds or pistachios into the sugar‑cinnamon mixture before folding. The nuts add a buttery richness and a surprise textural contrast that makes each bite feel new.
Maple‑Brown Sugar Bliss
Swap half of the granulated sugar for brown sugar and add a drizzle of pure maple syrup to the butter brush. The result is a deeper, molasses‑like flavor that pairs beautifully with a cup of coffee.
Spiced Autumn Edition
Replace cinnamon with a blend of pumpkin spice (cinnamon, nutmeg, ginger, clove) and add a teaspoon of pumpkin puree to the butter brush. This version screams fall and is perfect for Thanksgiving brunches.
Savory Herb Twist
Omit the sugar entirely and instead brush the pastry with melted butter mixed with rosemary, thyme, and a sprinkle of flaky sea salt. The result is a crisp, herb‑infused snack that works as an appetizer or a sophisticated cheese board accompaniment.
Storing and Bringing It Back to Life
Fridge Storage
Place the cooled palms in an airtight container lined with a paper towel to absorb any excess humidity. They’ll stay crisp for up to three days, though the texture is best within the first 24 hours. If you notice any soft spots, a quick 2‑minute reheating in a preheated 300°F oven restores the crunch.
Freezer Friendly
Arrange the palms in a single layer on a baking sheet and freeze until solid (about 2 hours). Transfer them to a zip‑top freezer bag, squeezing out as much air as possible. They’ll keep for up to two months without losing flavor. When you’re ready, bake straight from frozen at 350°F for 7‑10 minutes.
Best Reheating Method
Preheat your oven to 300°F, place the palms on a wire rack, and bake for 5‑7 minutes until the edges regain their golden hue and the sugar re‑crackles. Adding a tiny splash of water (about a teaspoon) to the bottom of the oven creates a gentle steam that helps the crust re‑harden without drying out the interior.