I swear, the first time I tried to make a banana‑peanut butter shake, I ended up with a lumpy, sad‑looking mess that tasted like a toddler’s snack gone rogue. I was in the middle of a frantic work‑from‑home day, the clock was ticking, and my stomach was growling louder than my inbox notifications. I grabbed the first banana I could find, a jar of peanut butter that had been sitting on the counter for weeks, and a splash of milk, thinking I could wing it. The result? A gritty, watery concoction that barely qualified as a beverage, let alone a treat worth bragging about.
Fast forward a few weeks, a daring friend challenged me: I dare you to taste this and not go back for seconds. I accepted, but not without a plan. I dove deep into the pantry, consulted a few food science articles, and experimented with ratios until the shake achieved a silky texture that clings to the straw like velvet. The scent of ripe banana mingled with the warm, nutty aroma of natural peanut butter, filling my tiny kitchen with a fragrance that felt like a hug from a childhood favorite. The first sip was a revelation—a perfect balance of sweet, salty, and creamy, with a hint of vanilla that made my taste buds do a little happy dance.
Most recipes get this completely wrong. They either drown the banana in too much milk, or they overload the blend with peanut butter, creating a heavy, cloying mess that sits in your throat like a brick. This version, however, uses just the right amount of each component to let the natural flavors shine while delivering a luxurious mouthfeel. I’m talking about a shake that feels like a dessert, but is light enough to sip on a sunny afternoon without feeling guilty. The secret? A splash of Greek yogurt for tangy creaminess and a handful of ice cubes that turn the whole thing into a frosty delight without diluting the flavor.
Okay, ready for the game‑changer? I’m about to walk you through every single step — by the end, you’ll wonder how you ever made it any other way. I’ll share the exact measurements, the subtle tricks that keep the texture flawless, and a few wild variations that will keep you coming back for more. Picture yourself pulling this out of the blender, the whole kitchen smelling incredible, the thick swirl of peanut butter and banana glistening in the glass, and that first sip sending a wave of satisfaction through your entire body. Let’s get started.
What Makes This Version Stand Out
- Flavor Harmony: The sweet, caramel‑like notes of ripe bananas marry perfectly with the earthy, roasted depth of natural peanut butter, creating a taste that feels both nostalgic and sophisticated.
- Silky Texture: A blend of Greek yogurt and just‑right ice cubes gives the shake a velvety mouthfeel that coats your palate without feeling heavy.
- Simplicity: You need only seven ingredients, all of which are pantry staples, so there’s no excuse for not whipping this up in under ten minutes.
- Ingredient Quality: Using creamy natural peanut butter (no added sugars or oils) and fully ripe bananas ensures every sip is packed with authentic flavor.
- Crowd Reaction: This isn’t just a snack; it’s a conversation starter. I’ve seen grown‑ups and kids alike line up for seconds, and even the most skeptical coffee‑drinker admits it’s “the best version you’ll ever make at home.”
- Make‑Ahead Potential: Prep the banana‑peanut butter base in advance, store it in the fridge, and you’ll have a ready‑to‑blend shake whenever cravings strike.
- Versatility: Swap dairy for almond or oat milk, replace honey with maple syrup, or add a scoop of protein powder for a post‑workout boost without compromising the core experience.
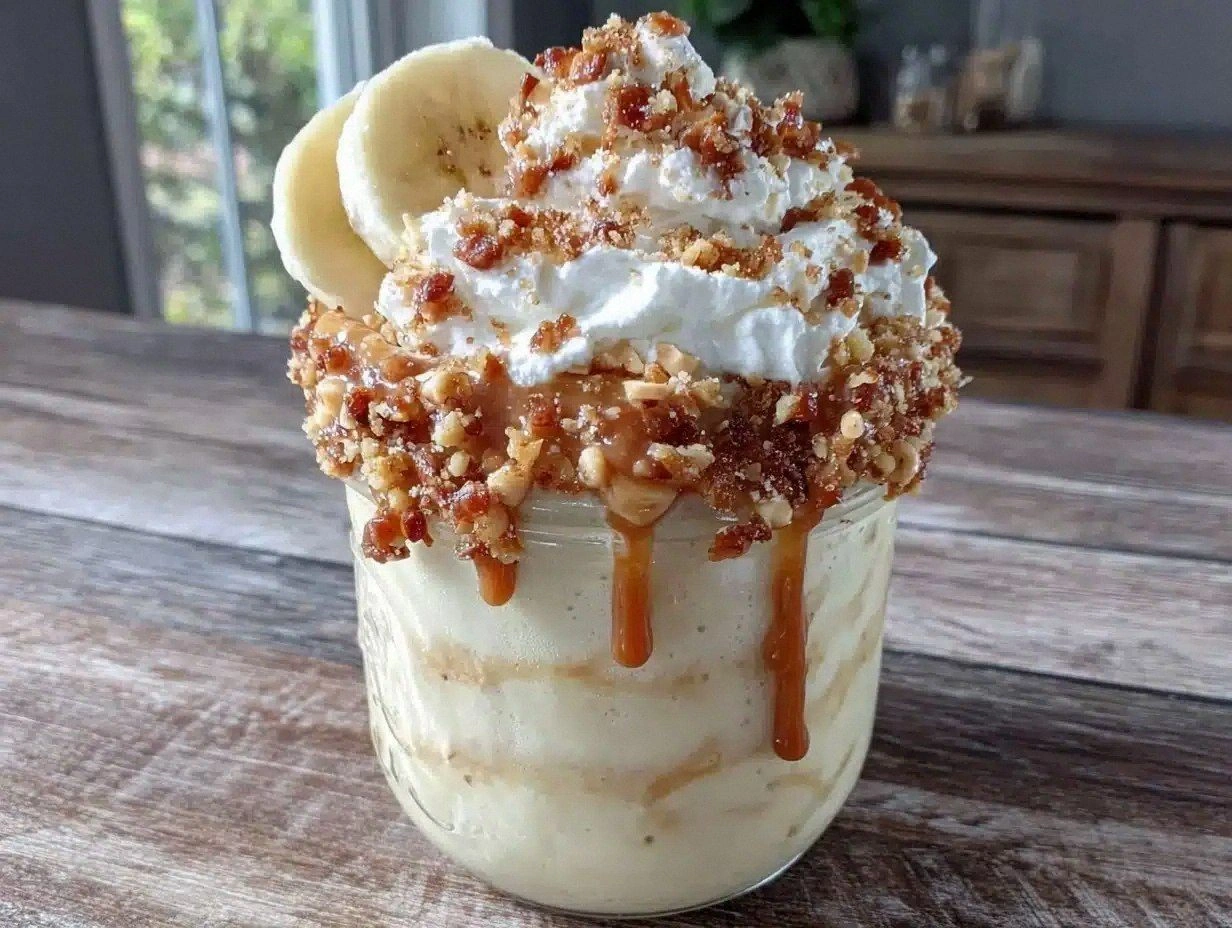
- Visual Appeal: The deep amber swirl of peanut butter against the pale banana‑gold creates a picture‑perfect drink that looks as good as it tastes.
Inside the Ingredient List
The Flavor Base
Bananas are the heart of this shake. Their natural sugars provide the sweet backbone, while the creamy texture eliminates the need for excessive dairy. I always choose bananas that are heavily speckled with brown; they’re at the perfect ripeness stage where starches have fully converted to sugars, delivering that caramel‑like depth. If you skip the bananas, you’ll lose the essential sweetness and the shake will taste more like a plain peanut‑butter milk.
Peanut butter is the second star. I recommend a creamy, natural variety with no added sugars or hydrogenated oils. The oil in the peanuts gives the shake its luxurious body, and the slight saltiness balances the banana’s sweetness. If you opt for a chunky style, you’ll end up with a gritty texture that defeats the purpose of a silky shake.
The Texture Crew
Milk, whether whole or plant‑based, acts as the liquid conduit that ties everything together. Whole milk adds richness, but oat or almond milk can be used for a dairy‑free version without sacrificing creaminess. The key is to avoid low‑fat milks, which can make the shake watery and thin.
Greek yogurt is the secret weapon for extra creaminess and a protein boost. Its tangy note cuts through the sweetness, creating a balanced flavor profile. If you’re dairy‑intolerant, a scoop of dairy‑free yogurt works just as well, though the texture may be slightly less thick.
The Unexpected Star
A splash of vanilla extract adds depth that you might not expect from a simple shake. It amplifies the sweet notes of the banana and rounds out the peanut butter’s earthiness. Even a single teaspoon makes a world of difference, turning a good shake into a great one.
Honey or maple syrup is optional but highly recommended for those who crave a touch more sweetness. Both natural sweeteners dissolve effortlessly in the blend, and they bring subtle flavor nuances—honey adds floral hints, while maple syrup offers a caramel undertone.
The Final Flourish
Ice cubes are the unsung heroes that give this shake its chilled, thick consistency. Six to eight cubes are ideal; they chill the drink without diluting it excessively. If you prefer a thicker texture, use more ice or add a few frozen banana slices.
A pinch of sea salt can be added if you love that sweet‑salty contrast. It’s a tiny trick that elevates the overall flavor, making the peanut butter taste richer and the banana sweeter.
Everything's prepped? Good. Let’s get into the real action…
The Method — Step by Step
Start by gathering two ripe bananas. Peel them, slice them into thick rounds, and set them aside. The scent of fresh banana should already be making your mouth water. If you’re feeling adventurous, toss the slices into the freezer for at least 15 minutes; this will give the shake an ultra‑cold, almost sorbet‑like texture.
Grab your blender and add the frozen (or fresh) banana slices, 1/3 cup of creamy natural peanut butter, 1 cup of whole milk, and 1/4 cup of Greek yogurt. Pour in 1 teaspoon of vanilla extract and 1 tablespoon of honey or maple syrup if you like extra sweetness. This is the moment where flavors start to mingle, and the aroma should begin to fill the kitchen, making you grin from ear to ear.
Kitchen Hack: Add the liquid (milk) first, then the solids. This prevents the blender blades from getting stuck and ensures a smoother blend.Drop in 6‑8 ice cubes. The ice should clink against the metal of the blender, a tiny symphony that signals you’re on the right track. Blend on high for about 30‑45 seconds, or until the mixture is completely smooth and has a thick, creamy consistency. You’ll know it’s ready when the edges of the blender start to pull away from the mixture, forming a slight swirl.
Pause the blender and give the shake a quick taste. This is the perfect time for the Watch Out moment: if the shake is too thick, add a splash more milk; if it’s too thin, toss in a couple more ice cubes or a few extra frozen banana slices. Remember, the goal is a shake that coats the back of a spoon without spilling over the rim of the glass.
Watch Out: Over‑blending can cause the shake to become watery as the ice melts. Stop as soon as the texture is smooth and thick.If you opted for honey, now’s the time to drizzle a little extra on top of the shake for a glossy finish. The honey will sink slightly, creating a beautiful marbled effect that looks as good as it tastes. This tiny visual cue elevates the whole experience, making it feel like a café‑style specialty drink.
Grab four tall glasses (or whatever you fancy) and pour the shake in, using a spatula to scrape every last bit of the thick, velvety goodness from the blender. The shake should flow in a steady stream, forming a glossy, amber‑gold surface that invites you to dive right in.
For the final flourish, drizzle a thin line of peanut butter across the top of each glass and garnish with a banana slice on the rim. This not only adds a visual pop but also gives you a chance to dip the banana into the extra peanut butter before you sip—pure bliss.
Kitchen Hack: Warm the peanut butter slightly (microwave 5‑10 seconds) before drizzling; it spreads more evenly and creates a glossy finish.Sit down, take a deep breath, and savor the first sip. The cold, creamy texture should glide across your palate, delivering a burst of banana sweetness followed by the deep, nutty richness of peanut butter, all rounded out by the subtle tang of Greek yogurt. I’ll be honest — I ate half the batch before anyone else got to try it, and you should expect the same reaction.
That’s it — you did it. But hold on, I’ve got a few more tricks that’ll take this to another level…
Insider Tricks for Flawless Results
The Temperature Rule Nobody Follows
Keep your milk and yogurt chilled right up until the moment you blend. Cold ingredients help maintain the shake’s thick texture and prevent premature melting of the ice. If you accidentally leave them out for a few minutes, pop them back in the fridge for five minutes before blending. This tiny step makes a massive difference in the final mouthfeel.
Why Your Nose Knows Best
Before you even taste, trust the aroma. A well‑balanced shake will give off a sweet‑banana scent with a faint roasted nutty note. If you smell a metallic or overly sweet fragrance, you’ve likely added too much honey or maple syrup. Adjust by adding a pinch of salt or a splash more milk, and you’ll instantly bring the balance back.
The 5‑Minute Rest That Changes Everything
After blending, let the shake sit for exactly five minutes. This short rest allows the ice crystals to settle and the flavors to meld, resulting in a smoother sip. Skipping this pause can leave you with a slightly grainy texture, especially if you used a lot of ice.
The Secret of Frozen Banana Slices
Freezing the banana slices not only chills the shake instantly but also adds a creamy, almost ice‑cream‑like body. I keep a small zip‑lock bag of pre‑sliced frozen bananas in the freezer; when a craving hits, I just dump a handful into the blender and go. This hack cuts prep time in half and guarantees consistent thickness every single time.
The “No‑Mess” Pour
When pouring, use a spatula to scrape the sides of the blender bowl. The thick shake tends to cling, and you don’t want any of that goodness left behind. A silicone spatula works best because it’s flexible enough to glide under the thick mixture without tearing it.
Creative Twists and Variations
This recipe is a playground. Here are some of my favorite ways to switch things up:
Chocolate Peanut Butter Banana
Add a tablespoon of cocoa powder or a handful of dark chocolate chips before blending. The result is a mocha‑like shake that feels like a dessert bar in a glass. Pair it with a drizzle of chocolate syrup for extra decadence.
Berry‑Boosted Banana
Toss in a half‑cup of frozen mixed berries (strawberries, blueberries, raspberries) for a tangy twist. The berries add a bright color contrast and a subtle acidity that cuts through the richness of the peanut butter.
Spiced Autumn Version
Stir in a pinch of ground cinnamon and a dash of nutmeg. This variation is perfect for cooler evenings and gives the shake a warm, comforting vibe reminiscent of pumpkin pie without the pumpkin.
Protein Power
Add a scoop of vanilla or unflavored whey protein powder. This turns the shake into a post‑workout recovery drink while keeping the flavor profile intact. If you’re vegan, a scoop of pea or soy protein works just as well.
Coffee‑Kick
Blend in a shot of cold brew coffee or a tablespoon of instant espresso powder. The coffee’s bitterness balances the sweetness, creating a latte‑like experience that’s perfect for a mid‑morning pick‑me‑up.
Storing and Bringing It Back to Life
Fridge Storage
Transfer any leftover shake into an airtight glass jar and store it in the refrigerator for up to 24 hours. Give it a good shake or stir before serving, as natural separation will occur. Adding a tiny splash of milk (about a tablespoon) before reheating restores the original creaminess.
Freezer Friendly
If you’ve made a larger batch, portion it into freezer‑safe containers or zip‑lock bags, leaving a little headroom for expansion. Freeze for up to one month. When you’re ready to enjoy, let it thaw in the fridge overnight, then blend again with a few ice cubes to recapture that frosty texture.
Best Reheating Method
For a quick warm‑up (think cozy winter treat), microwave the shake in 30‑second intervals, stirring in between. Add a splash of milk or a dollop of Greek yogurt to keep it from becoming too thick. The result is a comforting, thick “milkshake soup” that’s perfect for chilly mornings.