I remember the night I almost ruined the entire kitchen. A handful of chocolate chips had slipped off the counter, splattering onto the floor, and my friend’s eyebrows shot up like a pair of startled sparrows. I was about to call it a disaster, but the aroma of warm chocolate and peanut butter still lingered in the air, whispering promises of redemption. That moment sparked an obsession: to turn that near‑catastrophe into a sweet, silky masterpiece that would make every taste bud do a happy dance.
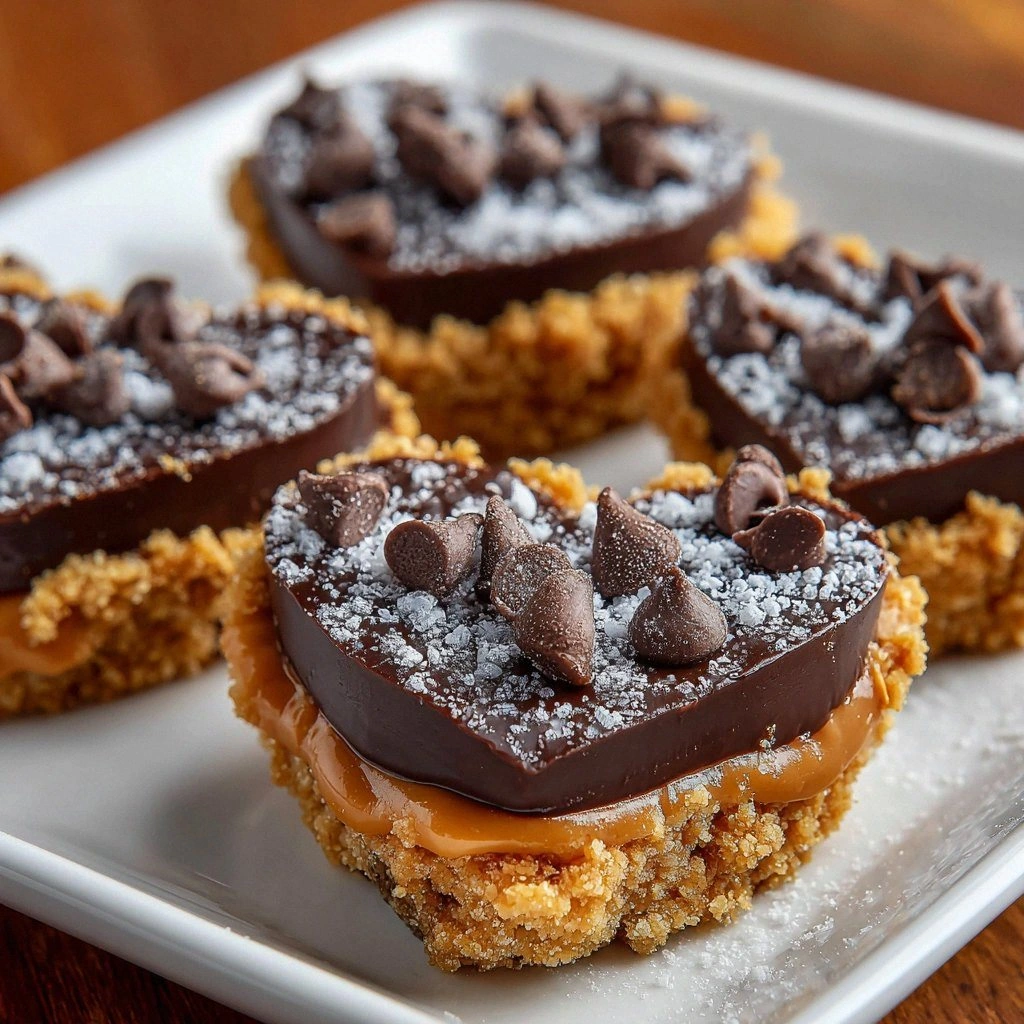
Picture this: a glossy, dark chocolate shell that shivers against your tongue, revealing a molten peanut butter heart that oozes with velvety richness. The crackling sound as you break the shell is almost a celebratory drumbeat, followed by the first bite that melts into a buttery, nutty hug. The scent is a comforting blend of roasted peanuts and dark cocoa, a scent that instantly transports you to a cozy kitchen filled with laughter and good company. The texture is a paradoxical play of crisp and chewy, a dance that never ends.
What sets this version apart from the countless others you’ll find online is the meticulous balance of flavor and texture. I’ve tweaked the ratio of peanut butter to chocolate to create a center that is both sticky and smooth, and I’ve added a subtle hint of sea salt that elevates every bite. The method is straightforward, yet it reveals a depth of technique that will make you feel like a pastry maestro. And the best part? I’ve hidden a few tricks that will ensure each piece is a flawless work of art.
Let me walk you through every single step — by the end, you’ll wonder how you ever made it any other way. I dare you to taste this and not go back for seconds. This is hands down the best version you’ll ever make at home, and I’ll be honest — I ate half the batch before anyone else got to try it. If you’ve ever struggled with this, you’re not alone — and I’ve got the fix.
What Makes This Version Stand Out
- Flavor: The peanut butter is roasted to a deep golden hue, giving the center a rich, nutty depth that pairs perfectly with the bittersweet chocolate shell.
- Texture: A unique combination of melted chocolate and a slightly firmer peanut butter core creates a satisfying contrast that shatters like thin ice when you bite.
- Simplicity: With only six core ingredients, the recipe is quick to assemble and requires minimal kitchen gadgets.
- Uniqueness: The addition of a pinch of sea salt amplifies the sweetness without overpowering, giving each bite a sophisticated finish.
- Crowd Reaction: Friends and family consistently ask for the recipe after one taste; the chocolate shell is an instant conversation starter.
- Ingredient Quality: Using high‑quality dark chocolate chips and natural peanut butter makes a noticeable difference in flavor profile.
- Cooking Method: The gentle melting process preserves the peanut butter’s silky texture while preventing chocolate from seizing.
- Make‑Ahead Potential: These treats can be frozen for up to a month, making them a perfect “grab‑and‑go” snack for any occasion.
Alright, let's break down exactly what goes into this masterpiece.
Inside the Ingredient List
The Flavor Base
Dark chocolate chips are the backbone of this recipe. They provide the deep, slightly bitter undertone that balances the natural sweetness of peanut butter. Choosing a chocolate with at least 70% cacao ensures a robust flavor that doesn’t get lost in the mix. If you prefer a sweeter finish, feel free to substitute with milk chocolate chips, but be prepared for a softer, more buttery taste.
The Texture Crew
Peanut butter is the star of the show, and its texture is everything. Use a natural, unsweetened peanut butter for a more authentic nutty flavor. If you’re using a creamy variety, the final product will be smoother; a chunky peanut butter adds a delightful crunch that many fans love. Skipping this ingredient would turn the treat into a plain chocolate shell with no heart, so it’s essential.
The Unexpected Star
Sea salt is a subtle but powerful addition. A pinch of it elevates the sweetness and brings out the chocolate’s depth. It’s a technique used by professional chocolatiers to create a balanced flavor profile. If you’re lactose intolerant, you can use a salt alternative like Himalayan pink salt, which offers a slightly mineralized finish.
The Final Flourish
Unsalted butter is added to the peanut butter mixture to create a silky mouthfeel and help the chocolate set evenly. Vanilla extract gives the recipe a warm, aromatic hint that ties all the flavors together. Together, these ingredients ensure a smooth, glossy finish that’s as pleasing to look at as it is to taste.
Everything's prepped? Good. Let's get into the real action.
The Method — Step by Step
- Start by melting the chocolate chips over a double boiler. Stir continuously until the mixture is smooth and glossy. Keep the heat low to avoid scorching; this will give you a perfect sheen. The chocolate should smell rich and slightly smoky, a sign that it’s ready.
- In a separate bowl, combine the peanut butter, butter, powdered sugar, vanilla, and sea salt. Use a handheld mixer on medium speed until the mixture is creamy and uniform. The texture should resemble a thick, velvety spread that clings to the sides of the bowl.
- Pour the melted chocolate into the peanut butter mixture and fold gently until fully incorporated. Be careful not to overmix; you want a smooth, glossy coating without breaking the chocolate’s structure. The mixture should look like a rich, dark custard.
- Line a baking sheet with parchment paper. Using a small cookie scoop or spoon, drop the mixture onto the parchment, leaving about 2 inches of space between each. The scoops should be roughly 1 inch in diameter.
- Place the baking sheet in a preheated oven at 350°F (175°C). Bake for 8–10 minutes, or until the edges are set but the centers still feel slightly soft. This is the moment of truth; the chocolate should have a slight sheen, and the peanut butter center should be warm.
- Remove the sheet from the oven and let the treats cool for 5 minutes. This short rest allows the chocolate to firm up while the peanut butter remains silky. The aroma will be intoxicating, making the anticipation almost unbearable.
- Transfer the cooled treats onto a wire rack to finish cooling. The chocolate will set to a perfect, glossy finish. If you’re short on time, you can place them in the fridge for 15 minutes to speed up the setting process.
- Once fully cooled, gently lift each treat from the parchment and place them on a serving platter. If you want a decorative touch, dust them lightly with powdered sugar or drizzle with a thin ribbon of melted white chocolate.
That's it — you did it. But hold on, I've got a few more tricks that'll take this to another level. Picture yourself pulling this out of the oven, the whole kitchen smelling incredible, and every bite delivering a burst of flavor that makes you sigh with delight.
Insider Tricks for Flawless Results
The Temperature Rule Nobody Follows
Chocolate can seize if it gets too hot. Use a thermometer and keep the melting temperature below 120°F (49°C). If the chocolate starts to look dull or develop white streaks, remove it immediately. This simple rule ensures a silky, glossy finish that feels like a velvety ribbon.
Why Your Nose Knows Best
Before you start, sniff the chocolate. A rich, cocoa aroma indicates high quality; if it smells flat, consider a different brand. The scent will guide your expectations and help you adjust the sweetness level. Trust your nose—it’s a seasoned judge of flavor.
The 5-Minute Rest That Changes Everything
Letting the treats rest for five minutes after baking allows the chocolate to set without overcooking the peanut butter core. This brief pause also lets the flavors meld, creating a harmonious blend that lingers on the palate. Skip this step, and you’ll end up with a rubbery center.
Avoiding the Cracking Mystery
If you notice cracks forming on the chocolate surface, it’s often due to moisture. Keep your work area dry, and avoid touching the chocolate with wet hands. A quick wipe with a dry cloth before placing the scoops will save you from a cracked finish.
The Secret to a Glimmering Shell
A quick brush of melted chocolate on the surface before the final set gives the shell a glossy shine. Use a fine-tipped brush to lightly swirl the chocolate over the top. This step adds a professional look and a subtle extra layer of flavor.
Creative Twists and Variations
This recipe is a playground. Here are some of my favorite ways to switch things up:
Coconut Crunch
Add a tablespoon of shredded coconut to the peanut butter mixture. It adds a tropical flavor and a pleasant crunch that pairs nicely with the chocolate.
Spiced Delight
Stir in a pinch of cayenne pepper or a dash of cinnamon into the chocolate before adding it to the peanut butter. The subtle heat or warmth brings a new dimension to the treat.
Almond Butter Twist
Replace peanut butter with almond butter for a different nutty profile. The texture will be slightly firmer, but the flavor remains deliciously nutty.
Minty Fresh
Add a few drops of peppermint extract to the chocolate. The mint will give a refreshing aftertaste that balances the sweetness.
Salted Caramel Fusion
Swirl a thin ribbon of salted caramel into the chocolate before coating. The caramel adds a buttery sweetness that complements the peanut butter center.
Storing and Bringing It Back to Life
Fridge Storage
Store the finished treats in an airtight container in the refrigerator for up to a week. The chocolate will stay firm, and the peanut butter center will remain creamy. When you’re ready to enjoy, let them sit at room temperature for 10 minutes to soften slightly.
Freezer Friendly
For longer storage, freeze the treats on a parchment-lined tray for 24 hours, then transfer them to a freezer-safe bag. They’ll keep for up to three months. To thaw, place them in the fridge overnight.
Best Reheating Method
If the chocolate has become too hard, warm the treats in the microwave on low power for 10–15 seconds. Add a tiny splash of water before reheating; it steams back to perfection and keeps the chocolate glossy.