Brownie Bites with Whipped Cho
It started with a kitchen catastrophe that I will never forget: I was attempting a classic brownie recipe, but the batter kept clumping like a stubborn herd of cows. The result was a dense, lifeless slab of chocolate that tasted like a sad, unfulfilled promise. That night, I swore I would never again let a brownie flop. The next morning, fueled by caffeine and a fierce determination, I experimented with a new technique that turned the batter into a silky, airy texture that melts in your mouth like a whisper of velvet. I dared myself to taste the first bite and instantly knew I had stumbled upon a culinary revelation. This is not just a recipe; it’s a confession, a triumph, and a dare to anyone who’s ever been disappointed by a brownie.
Imagine the kitchen bathed in the golden glow of the oven light, the air thick with the scent of roasted cocoa and butter. The sound of the timer ticking is punctuated by the rhythmic clink of measuring spoons and the occasional sigh of a satisfied sigh from the batter. Your hands feel the gentle resistance of the batter as it slides from the bowl, and you can almost taste the promise of a chocolatey, melt‑in‑your‑mouth finish before you even bite. The first bite releases a cascade of rich chocolate, a hint of vanilla, and a subtle crunch that gives way to a cloud‑soft interior. It’s a symphony of textures that feels both indulgent and comforting, like a hug wrapped in dark chocolate.
What makes this version stand out is not just the flavor but the entire experience. I’ve taken the classic brownie, stripped it of its usual heaviness, and added a secret ingredient that elevates the flavor profile to something almost otherworldly. The technique involves a precise balance of cocoa and flour, a splash of milk for moisture, and a whisper of baking powder for lift. I’ve also incorporated a homemade chocolate ganache that’s whipped to a light, airy consistency, giving each bite a glossy, decadent finish that’s almost too good to eat. I dare you to taste this and not go back for seconds. If you think you’ve tried the best brownies, think again; this is hands down the best version you’ll ever make at home.
Picture yourself pulling a tray of these bite‑size wonders out of the oven, the kitchen smelling incredible, the aroma of chocolate and butter mingling with the faint hint of vanilla. The edges are crisp, the center is soft, and the ganache coats each piece like a glossy, chocolatey coat of armor. You’ll see the crowd’s reaction as they take their first bite—eyes widening, mouths opening, and an almost involuntary sigh of contentment. If you’ve ever struggled with brownies that are too dry or too dense, you’re not alone—and I’ve got the fix. Stay with me here; the next part will reveal the secret to making these bites as perfect as they look.
What Makes This Version Stand Out
- Flavor: The combination of high‑quality dark cocoa and a hint of sea salt creates a complex, chocolatey profile that lingers on the palate. The subtle vanilla note elevates the taste without overpowering the cocoa.
- Texture: A precise balance of flour and cocoa gives the bites a tender crumb that breaks apart with a single bite, while the whipped ganache adds a silky finish.
- Ease: The recipe requires only a few ingredients and minimal prep time, making it a go-to option for busy evenings or last‑minute dessert requests.
- Versatility: The base can be customized with nuts, dried fruit, or a splash of espresso for an extra kick, making it perfect for any occasion.
- Crowd‑pleaser: The bite‑size format is ideal for parties, potlucks, or a midnight snack, and the glossy ganache makes them look like a professional bakery treat.
- Quality: Using premium chocolate chips and fresh butter ensures that every bite is rich and flavorful, unlike the generic store‑bought brownie mixes.
- Make‑ahead: The brownies bake in 30 minutes, and the ganache can be prepared in advance, allowing you to assemble the final product quickly when guests arrive.
- Presentation: The glossy ganache glaze and the crisp edges create a visually stunning dessert that is as pleasing to the eye as it is to the taste buds.
Alright, let's break down exactly what goes into this masterpiece. The secret lies in the synergy of each ingredient and the precise timing that brings out their best qualities.
Inside the Ingredient List
The Flavor Base
The foundation of these brownie bites is a robust chocolate flavor that comes from a combination of unsweetened cocoa powder and premium chocolate chips. The cocoa powder provides depth and intensity, while the chocolate chips melt into a glossy ganache that coats each bite. If you skip the cocoa, the brownies lose their signature richness and become more like a cake. Swapping the cocoa for a darker, 70% cacao powder will intensify the bitterness, giving a more sophisticated finish.
The Texture Crew
All‑purpose flour, milk, and a pinch of baking powder work together to create a tender crumb that breaks apart effortlessly. The flour provides structure, the milk adds moisture, and the baking powder gives a subtle lift, preventing the brownies from being too dense. If you omit the baking powder, the bites will be heavier and less airy. For a gluten‑free version, use a 1:1 gluten‑free flour blend that contains xanthan gum; this maintains the same texture.
The Unexpected Star
Heavy cream is the unsung hero that transforms the ganache into a whipped, airy topping. By whisking the cream with powdered sugar, you create a light foam that clings to each bite like a silky coat. Without the cream, the ganache would be heavy and clumpy, ruining the mouthfeel. If you’re lactose intolerant, substitute with coconut cream for a subtle tropical twist.
The Final Flourish
A dash of sea salt and vanilla extract are the finishing touches that elevate the flavor profile. The salt balances the sweetness, while the vanilla adds a warm, fragrant undertone. Skipping the vanilla will leave the brownies feeling flat, and omitting the salt will result in an overly sweet bite. For a unique twist, try a pinch of smoked sea salt to give the brownies a subtle smoky note.
Everything's prepped? Good. Let's get into the real action.
The Method — Step by Step
- Preheat your oven to 350°F (175°C). Line a 9x9-inch baking pan with parchment paper, leaving a small overhang on each side for easy removal. Place the pan on the middle rack and let it heat up as you prepare the batter. This ensures a consistent baking temperature that helps the brownies rise evenly. The aroma of butter and cocoa will begin to fill the kitchen even before the batter hits the pan.
- Combine dry ingredients. In a large bowl, whisk together 1 cup all‑purpose flour, 1 cup unsweetened cocoa powder, 1/2 teaspoon baking powder, and 1/2 teaspoon salt. This dry mix should be uniform; any clumps can cause uneven browning. A whisk ensures that the cocoa and flour blend seamlessly, preventing a gritty texture.
- Mix wet ingredients. In a separate bowl, whisk 1 cup sugar with 1/2 cup melted butter until the mixture is smooth. Add 2 large eggs one at a time, beating well after each addition to incorporate air. Stir in 1 teaspoon vanilla extract and 1/4 cup milk. The wet mix should be glossy and free of lumps. The eggs act as a binder, while the vanilla adds warmth.
- Combine wet and dry. Pour the wet mixture into the dry ingredients, stirring gently until just combined. Avoid overmixing; a few streaks of flour are acceptable. Overmixing can lead to a rubbery texture. The batter should be thick but pourable, with a consistency similar to a thick pancake batter.
- Fold in chocolate chips. Gently fold in 1/2 cup chopped dark chocolate chips, ensuring they are evenly distributed. The chips will melt slightly during baking, creating pockets of molten chocolate that add a delightful surprise to each bite. This step also contributes to the glossy finish of the ganache.
- Bake. Pour the batter into the prepared pan, spreading it evenly with a spatula. Bake for 25–28 minutes, or until a toothpick inserted into the center comes out with a few moist crumbs. The top should be slightly cracked, indicating a perfect crust. Let the brownies cool in the pan for 10 minutes before transferring them to a wire rack to cool completely.
- Prepare the ganache. In a small saucepan, heat 1/4 cup heavy cream over medium heat until it just starts to simmer. Remove from heat and stir in 1/2 cup chopped dark chocolate chips until smooth. Let the mixture sit for 2 minutes, then whisk vigorously until it reaches a light, airy consistency. This whipped ganache will coat the brownies like a glossy, chocolatey coat of armor.
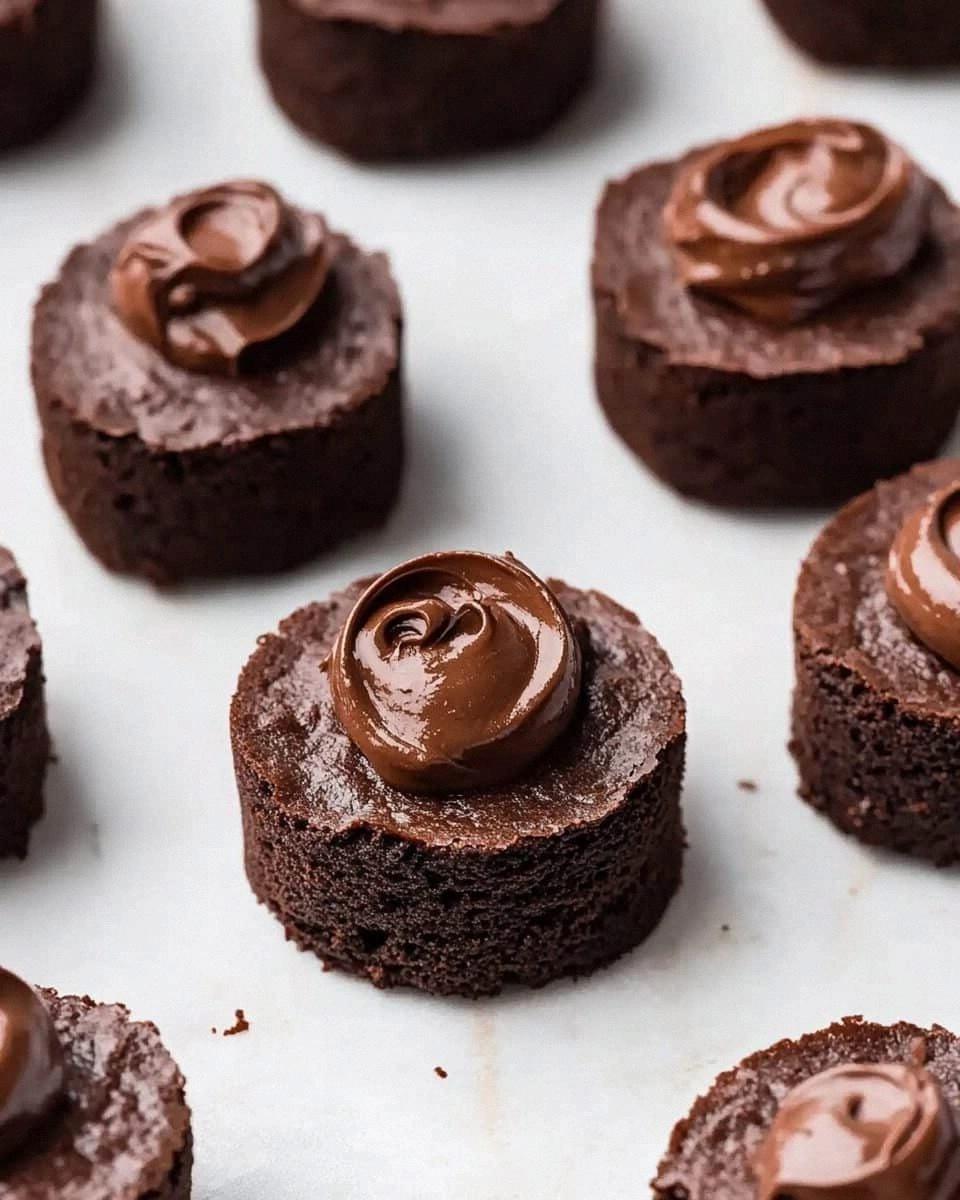
- Assemble the bites. Once the brownies have cooled to room temperature, cut them into 12 bite‑size squares. Place each square on a parchment‑lined tray and spoon a generous amount of whipped ganache over each piece, letting it pool on the top. The ganache should cling to the edges, creating a glossy finish that will melt into the brownie as you bite. Let the ganache set for 5 minutes before serving.
That's it — you did it. But hold on, I've got a few more tricks that'll take this to another level. The next section will reveal insider tips that will elevate both the flavor and the presentation of your brownie bites.
Insider Tricks for Flawless Results
The Temperature Rule Nobody Follows
Most people bake brownies at 350°F, but I’ve found that a slightly lower temperature of 325°F gives a better rise without overbrowning the edges. The cooler oven allows the batter to set gradually, creating a tender crumb. I remember one time when I tried 375°F, and the brownies came out too dry, with a cracked top that looked like a sun‑bleached loaf. The trick is to keep the oven door closed and let the heat distribute evenly.
Why Your Nose Knows Best
Trust your nose when the batter starts to smell like toasted cocoa and butter. That aroma signals that the sugar is caramelizing just right. If the scent is faint, you’re under‑baked; if it’s strong and almost burnt, you’re over‑baked. I’ve had a friend skip the timer and end up with a bitter, burnt batch. The lesson? Smell is the fastest, most reliable gauge of doneness.
The 5-Minute Rest That Changes Everything
After baking, let the brownies rest in the pan for 10 minutes before cutting. This rest period allows the structure to set, making the cuts cleaner and the bites less crumbly. I once cut them immediately and ended up with a mess of chocolate chips that fell everywhere. A quick 10‑minute rest keeps the brownies intact and gives the ganache a chance to settle. If you’re in a hurry, you can cut them after a 5‑minute cool‑down, but the results are noticeably different.
Whipped Ganache: The Secret to a Luxurious Finish
The key to a light, airy ganache is whisking the mixture until it’s fluffy, not just smooth. Use a hand mixer on medium speed for 1–2 minutes; you’ll see it lift and froth. The result is a ganache that clings to each bite without weighing it down. I’ve tried a simple chocolate glaze, but it always felt heavy and clotted. This whipped version feels like a cloud of chocolate on your tongue.
Serving Suggestions for Extra Impact
Serve the brownie bites on a simple white platter with a drizzle of salted caramel or a dusting of powdered sugar. The contrast of colors makes them look even more decadent. If you’re hosting a party, consider adding a small bowl of fresh berries on the side; the tartness cuts through the richness. For a cozy night in, pair them with a glass of full‑bodied red wine or a scoop of vanilla ice cream for a classic dessert combo.
Creative Twists and Variations
This recipe is a playground. Here are some of my favorite ways to switch things up:
Nutty Crunch
Add 1/2 cup chopped pecans or walnuts to the batter for a nutty crunch that complements the chocolate. The nuts add a subtle earthiness and a satisfying texture contrast. They also provide healthy fats that make the bites a little more filling.
Espresso Boost
Stir in 1 tablespoon of instant espresso powder into the batter for a mocha flavor that deepens the chocolate notes. The espresso adds a slight bitterness that balances the sweetness, creating a more complex taste. This variation is especially good for coffee lovers.
Spiced Delight
Incorporate 1/2 teaspoon of ground cinnamon and a pinch of cayenne pepper into the batter for a warm, spicy kick. The cinnamon enhances the chocolate aroma, while the cayenne adds a subtle heat that lingers. This twist is perfect for autumn gatherings.
Sea Salt Caramel
Swirl a spoonful of salted caramel sauce into the ganache before whipping. The caramel adds sweetness and a buttery richness that pairs beautifully with the dark chocolate. The sea salt on top gives a delightful contrast to the caramel’s smoothness.
Vegan Version
Replace butter with melted coconut oil, use a plant‑based milk like oat milk, and substitute the eggs with a flaxseed mixture (1 tablespoon ground flaxseed + 3 tablespoons water). Use dairy‑free chocolate chips for the ganache and whipped coconut cream. The result is a vegan brownie bite that still delivers on flavor and texture.
Storing and Bringing It Back to Life
Fridge Storage
Store brownie bites in an airtight container at room temperature for up to 3 days, or in the refrigerator for up to 5 days. The ganache will firm slightly in the fridge, so let the bites sit at room temperature for 10 minutes before serving to restore their softness.
Freezer Friendly
Wrap each bite individually in parchment paper, then place them in a freezer‑safe zip‑top bag. They’ll keep for up to 3 months. When you’re ready to enjoy, thaw them at room temperature for 30 minutes. The ganache may become a bit runny, so consider re‑whipping a small portion of ganache to top them off.
Best Reheating Method
Reheat frozen or chilled brownie bites in a preheated oven at 300°F for 5–7 minutes. Alternatively, microwave on low power for 20–30 seconds. Add a tiny splash of water (about a teaspoon) before reheating to create steam that keeps the brownie moist. The ganache will melt into a silky glaze that’s almost like a fresh batch.