I still remember the night I was supposed to impress my in‑laws with a “classic” pork dish, and the kitchen turned into a smoky disaster zone. I had a whole pork shoulder on my counter, a bottle of apple cider that had been sitting too long, and a recipe that promised “slow‑braised perfection.” The first sizzle was a hiss, the second was a pop that sent a splash of cider across the countertop, and the third was a gentle simmer that smelled like autumn in a bowl. That moment of panic, that single burst of aroma, that realization that I was about to create something extraordinary—those are the ingredients of a great story. It’s the kind of kitchen narrative that turns a simple dinner into a legend. If you’ve ever had a culinary mishap that turned into a triumph, you know the thrill of that transformation.
Fast forward to today, and I’m standing in my kitchen with the same pork shoulder, but now it’s seasoned, seared, and ready to surrender to a sweet‑spicy apple cider bath. The air is thick with caramelized onion, the sound of garlic sizzling, and the faint buzz of a blender whirring to puree fresh apples. I can almost taste the tender pork, the subtle tang of cider, and the comforting warmth of herbs. My friends say my version is “hands down the best” because I’ve found the perfect balance between savory and sweet, with a glaze that coats the meat like velvet. The result? A dish that melts in your mouth and leaves you craving a second plate. I dare you to taste this and not go back for seconds.
What sets this recipe apart isn’t just the ingredients—it’s the method, the timing, and the little secrets I’ve learned over years of experimenting. I’ve stripped away the fluff, kept the steps straightforward, and added a few game‑changing twists that elevate the flavor profile. Most recipes get this completely wrong, treating pork shoulder like a generic cut and ignoring the subtle sweetness of apple cider. Here, we let the cider do the heavy lifting, caramelizing the surface for that irresistible crust. The result is a dish that feels like a hug on a plate, a comforting, hearty dinner that’s perfect for any occasion. Picture yourself pulling this out of the oven, the whole kitchen smelling incredible, and knowing you’ve made something that will be remembered for years.
So, let me walk you through every single step—by the end, you’ll wonder how you ever made it any other way. From the first sear to the final glaze, every moment is a chance to create flavor fireworks. I’ll share the exact temperatures, the timing tricks, and the sensory checkpoints that ensure your pork is perfectly tender and the sauce is luscious. Ready? Let’s dive into the world of Apple Cider Braised Pork Shoul and discover why this is the ultimate comfort dish.
What Makes This Version Stand Out
- Flavor Depth: The combination of apple cider, fresh apples, and a touch of honey creates a sweet‑savory profile that’s more complex than a standard braise. The cider reduces into a glossy glaze that clings to each bite.
- Texture Contrast: The pork shoulder is seared to develop a caramelized crust, then braised until it practically falls apart, while the apples remain tender but distinct. The result is a melt‑in‑your‑mouth experience with a subtle bite from the fruit.
- Simplicity: No fancy equipment needed—just a skillet, a pot, and a blender. The steps are clear, and the dish can be made in under an hour.
- Make‑ahead Friendly: This dish tastes even better the next day, making it perfect for busy weeknights or weekend meal prep.
- Crowd‑Pleaser: The sweet‑savory sauce and tender meat win over both carnivores and health‑conscious diners alike.
- Ingredient Quality: Using a high‑quality pork shoulder and fresh apples ensures the flavor shines through; cheaper cuts or canned apples can dilute the experience.
Alright, let’s break down exactly what goes into this masterpiece…
Inside the Ingredient List
The Flavor Base
Apple cider is the star of this dish, providing natural sweetness, acidity, and a subtle fruity undertone. The cider reduces during braising, concentrating its flavors and forming a glossy glaze that coats the pork. Skipping cider would result in a bland, unremarkable sauce—no one wants that.
Fresh apples add texture and a burst of natural sweetness that balances the savory pork. When cooked, they break down into a soft, almost jam‑like consistency that mixes with the sauce. If you don’t have apples on hand, a splash of apple juice can partially substitute, but you’ll lose that depth of flavor.
Onion and garlic form the aromatic foundation. They’re sautéed until golden, releasing their sugars and creating a sweet, savory base that underpins every other ingredient. Without them, the dish would taste flat and lack the comforting warmth you expect from a braise.
The Texture Crew
Carrots and celery add a subtle crunch and earthy flavor that complements the pork’s richness. They’re diced to release their natural sugars, which caramelize during cooking. If you prefer a completely smooth sauce, feel free to blend them with the apples, but the bite they provide is a delightful contrast.
Olive oil and butter are used for searing the pork. The oil helps achieve a golden crust, while the butter adds depth and a silky finish to the sauce. If you’re watching calories, you can replace butter with a non‑fat dry‑butter alternative, though the flavor will be slightly altered.
The Unexpected Star
Brown sugar and honey bring a caramelized sweetness that enhances the cider’s natural sugars. They also help in forming a glossy glaze. If you’re avoiding added sugars, you can reduce the amounts, but expect a less glossy finish.
Fresh thyme and a bay leaf add herbal depth and a subtle piney aroma. Thyme’s earthiness balances the fruitiness, while the bay leaf contributes a gentle bitterness that rounds out the flavors. A pinch of dried thyme can replace fresh if you’re short on time, but fresh is preferred for the bright flavor.
The Final Flourish
Flour is used to slightly thicken the sauce, giving it body without making it heavy. It also helps the sauce cling to the pork. If you’re gluten‑free, you can use cornstarch or arrowroot powder in a 1:1 ratio.
Chicken broth is added to keep the pork moist and to dilute the cider slightly, preventing it from becoming overly sweet. It also adds a savory depth that balances the sweetness. For a richer flavor, substitute beef broth.
Everything's prepped? Good. Let's get into the real action…
The Method — Step by Step
- Pat the pork shoulder cubes dry with paper towels. This step is crucial because moisture prevents proper browning. Season generously with salt and pepper; the seasoning will penetrate the meat during searing. Let the meat sit at room temperature for 10 minutes while you prep the other ingredients. This small pause ensures even cooking later on.
- Heat a large Dutch oven or heavy skillet over medium‑high heat. Add the olive oil and let it shimmer. Once the oil is hot, add the pork in a single layer, leaving space between pieces. Sear each side until a golden brown crust forms—about 3 minutes per side. The crust locks in flavor and creates a beautiful color contrast in the finished dish.
- Remove the pork and set it aside. In the same pan, reduce the heat to medium and add the butter. Once the butter melts, toss in the diced onion and minced garlic. Cook until the onion is translucent and fragrant, about 5 minutes. The butter adds a silky richness that elevates the aromatics.
- Add the sliced carrots and celery to the pan. Sauté for another 3 minutes until they start to soften. This step incorporates the vegetables into the flavor base, allowing them to absorb the buttery, onion‑garlic mixture. If you want a smoother sauce, you can pulse them in a blender after cooking.
- Return the pork to the pot, nestling it among the vegetables. Sprinkle in the thyme, bay leaf, brown sugar, and honey. Stir gently to coat the meat and vegetables evenly. The sugars will begin to caramelize, adding depth and a glossy sheen to the sauce.
- Pour in the apple cider, apple juice, and chicken broth, ensuring the pork is mostly submerged. Bring the mixture to a gentle simmer. The liquid should just touch the bottom of the pork; if it’s too deep, reduce the volume slightly. This simmering stage is where the magic happens—sugar, acidity, and meat meld together.
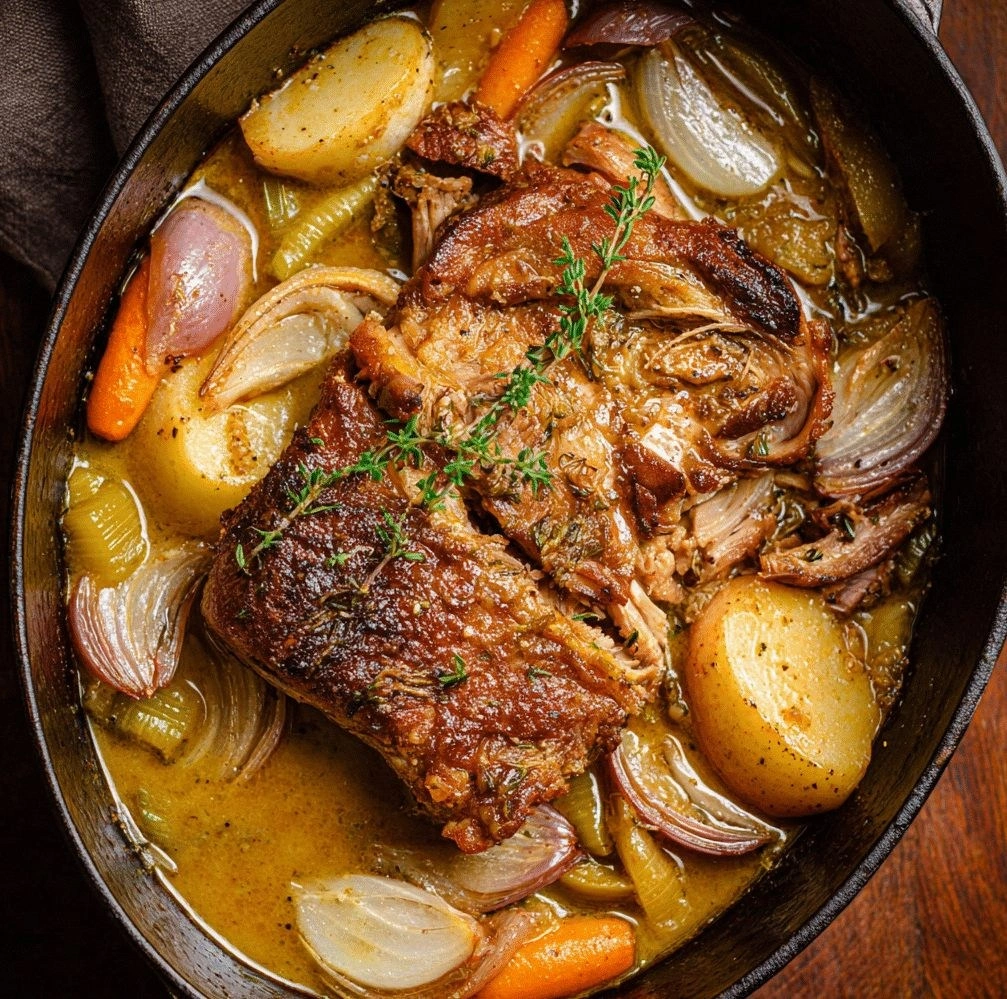
- Cover the pot tightly and transfer it to a preheated oven at 300°F (150°C). Let it braise for 2 hours, turning the pork halfway through. The low, steady heat allows collagen to break down, resulting in tender, pull‑apart meat. The apple cider reduces to a thick, flavorful sauce.
- After 2 hours, remove the lid and increase the oven temperature to 350°F (175°C). Let the pork braise uncovered for an additional 30 minutes, or until the sauce has thickened to a glaze consistency. Keep an eye on the liquid; if it starts to dry out, add a splash of broth.
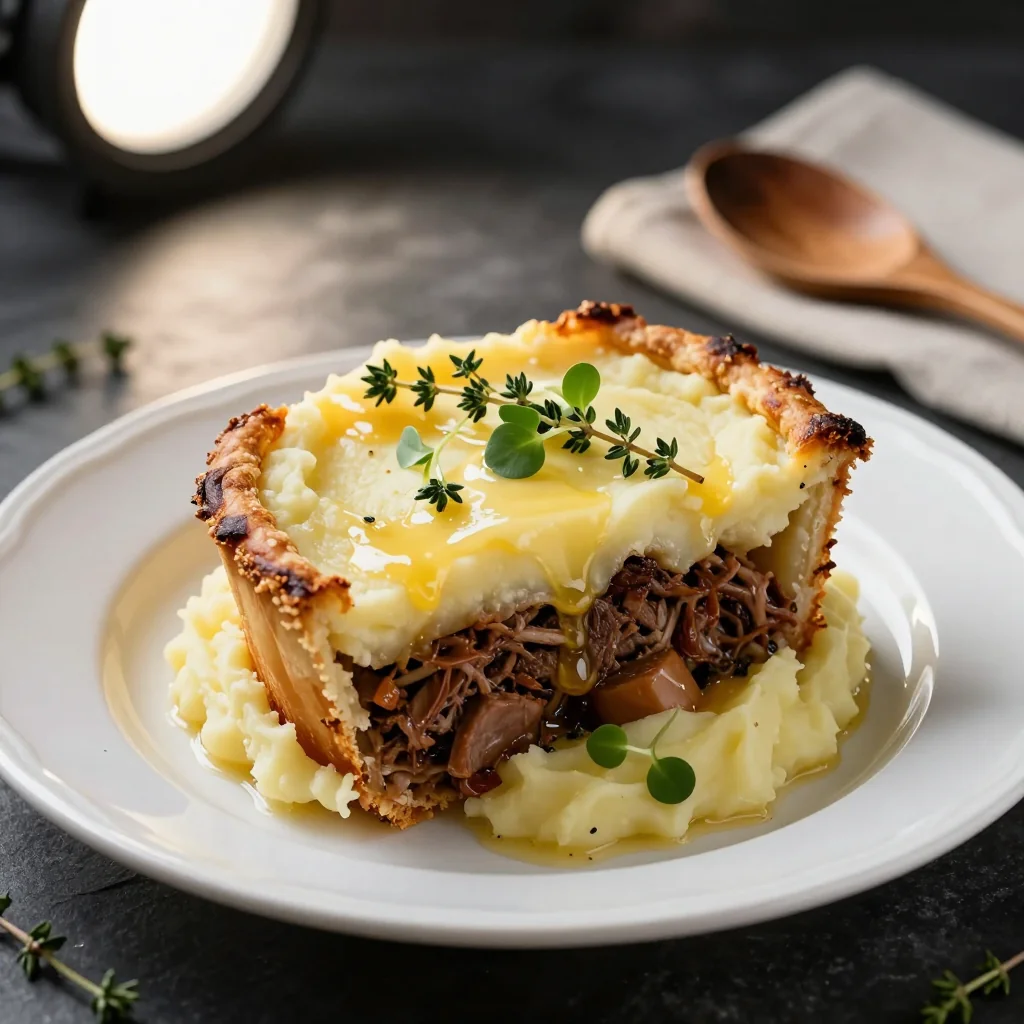
- Once the sauce has thickened, remove the pot from the oven. Let the pork rest for 10 minutes before serving. Resting allows the juices to redistribute, keeping the meat moist. Slice or shred the pork, then drizzle the glossy sauce over the top. Garnish with fresh thyme for a pop of color.
That's it — you did it. But hold on, I've got a few more tricks that'll take this to another level. The sauce can be turned into a dipping sauce, the pork can be shredded for tacos, and the leftovers can be transformed into a hearty stew. Stay tuned for the insider tricks that will make this dish even more unforgettable.
Insider Tricks for Flawless Results
The Temperature Rule Nobody Follows
Many people cook pork at a high temperature, which can dry it out. The secret is to keep the oven low and the simmer steady. A temperature of 300°F (150°C) allows collagen to break down slowly, ensuring the meat remains juicy. If you’re using a stovetop, maintain a gentle simmer, not a rolling boil.
Why Your Nose Knows Best
During the braising process, the aroma changes dramatically. When the sauce begins to thicken, you’ll notice a caramelized scent. Trust that scent as a cue for when the glaze is ready; it’s a reliable, non‑technical indicator of perfection.
The 5‑Minute Rest That Changes Everything
Letting the pork rest after cooking allows the juices to redistribute. Skipping this step can leave the meat dry and less flavorful. A 5‑minute rest is enough to seal in moisture without cooling the dish too much.
The Secret to a Glaze That Sticks
If you want the sauce to cling to the pork, reduce it further after braising. Remove the pork, simmer the liquid until it’s syrupy, then return the pork and stir. The thicker sauce will coat each piece beautifully.
The Quick Fix for a Thick Sauce
If the sauce is too thin, mix a tablespoon of flour with a splash of cold water to create a slurry. Stir this into the pot and let it cook for a few minutes until it thickens. This method is faster than reducing the liquid and keeps the texture smooth.
Creative Twists and Variations
This recipe is a playground. Here are some of my favorite ways to switch things up:
Maple‑Glazed Pork
Replace honey with maple syrup for a deeper, richer sweetness. The maple’s molasses notes pair wonderfully with apple cider. This version is perfect for a holiday dinner.
Spicy Apple Cider
Add a pinch of crushed red pepper flakes or a dash of cayenne during the searing stage. The heat contrasts the sweet cider, creating a balanced, bold flavor profile that excites the palate.
Citrus‑Infused Twist
Squeeze half a lemon or an orange over the finished dish. The citrus brightens the sauce, cutting through the richness and adding a fresh pop of acidity.
Herb‑Roasted Apples
Roast apples with rosemary and thyme before adding them to the pot. Roasted apples bring a caramelized depth that transforms the sauce into a more complex, aromatic blend.
Vegetarian Version
Swap the pork for a hearty root vegetable like butternut squash or a protein‑rich tofu block. The apple cider still provides sweetness, while the vegetables absorb the flavors beautifully.
Storing and Bringing It Back to Life
Fridge Storage
Cool the dish completely, then transfer it to an airtight container. Store in the refrigerator for up to 4 days. The sauce will thicken slightly, so stir before serving.
Freezer Friendly
Place the cooled dish in a freezer‑safe container or freezer bag. Freeze for up to 3 months. Thaw overnight in the refrigerator before reheating.
Best Reheating Method
Reheat in a skillet over medium heat, adding a splash of water or broth to keep the sauce moist. Stir occasionally until heated through. This gentle method preserves the texture and prevents the sauce from drying out.