I’m going to start with a confession: I once burned a batch of vanilla custard squares so badly that the kitchen smelled like a caramelized disaster zone. I stared at the charred edges, feeling the weight of every culinary failure I’d ever endured, and thought, “There has to be a better way.” That moment sparked a relentless quest that led me down a rabbit hole of butter‑loving doughs, silky custards, and a stubborn determination to perfect the ultimate melt‑in‑your‑mouth square. I dared myself to create a version that would make even the most skeptical sweet‑tooth swear, “I’ve never tasted anything like this.” The result? A buttery, golden crust that crumbles like a dream, hugging a custard so smooth it slides across your palate like silk on a summer breeze.
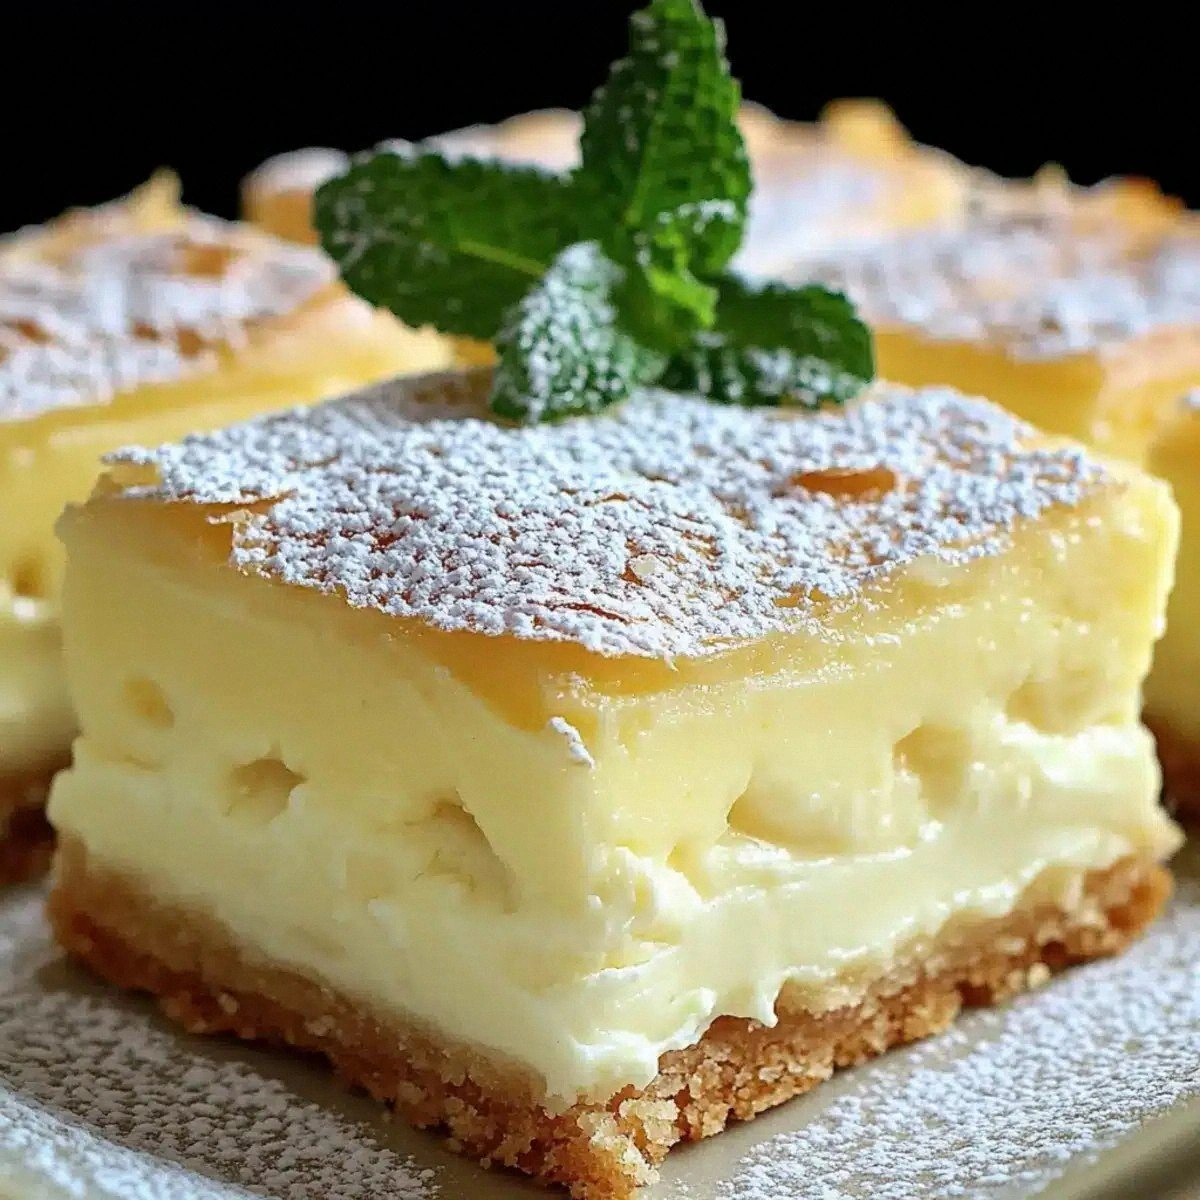
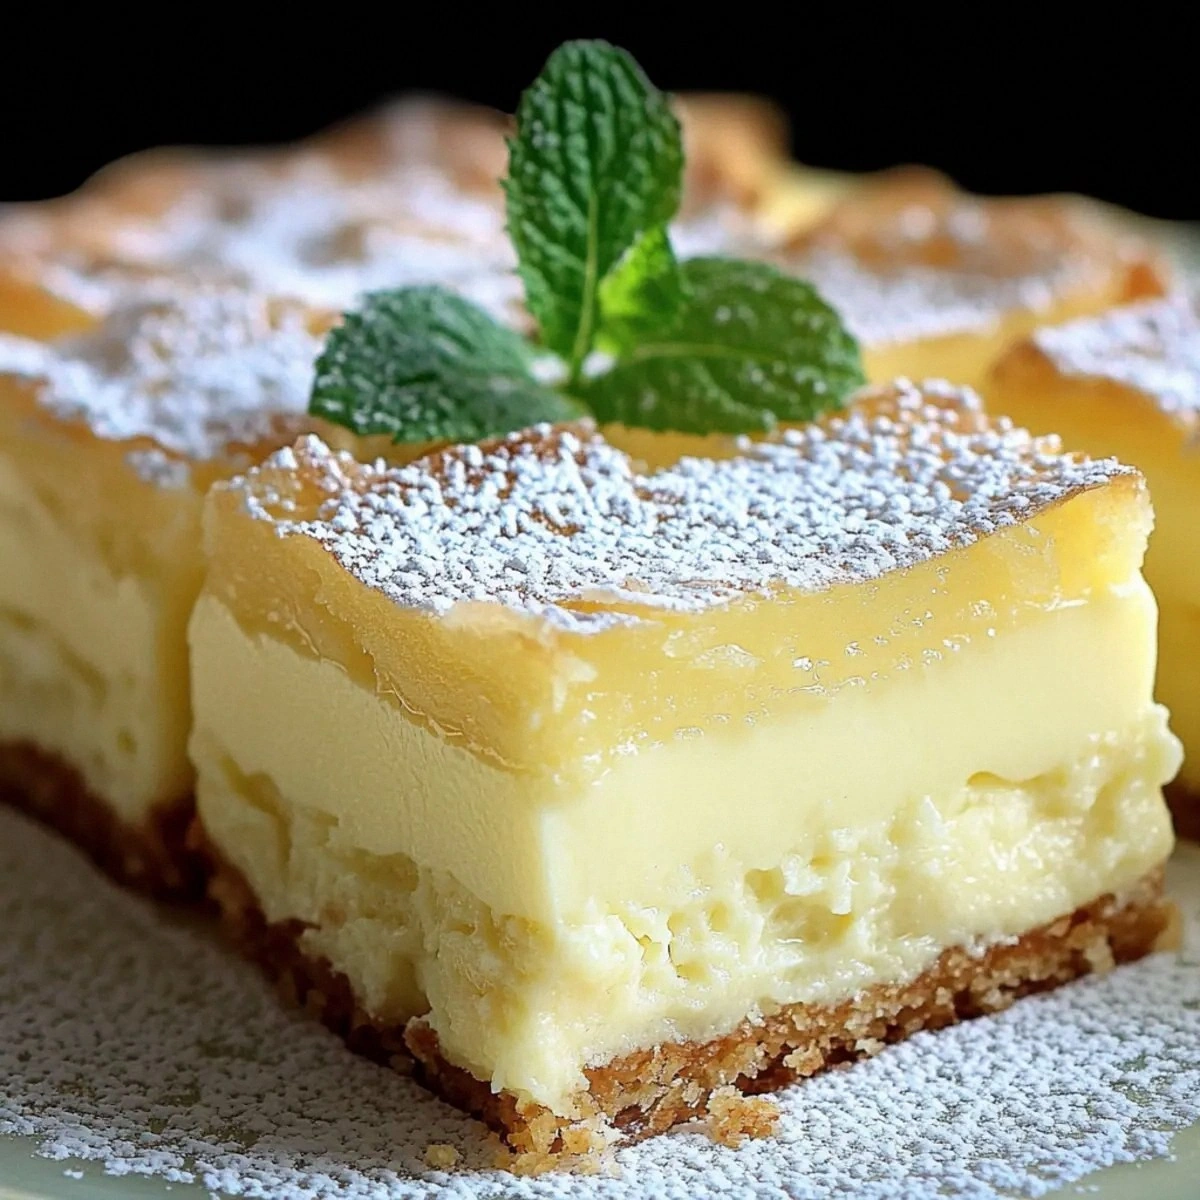
Picture this: you pull the pan from the oven and the whole kitchen is filled with the sweet, comforting scent of vanilla and toasted butter, the kind of aroma that makes you pause whatever you’re doing and just stare at the tray like it’s a work of art. The crust, a perfect honey‑colored canvas, gives way to a custard center that shimmers with a buttery glow. When you cut into a square, the custard oozes out, glossy and inviting, and the first bite is an instant melt‑down—literally. The texture is a paradox: the top is crisp enough to give you that satisfying snap, while the interior is as soft as a cloud that refuses to stay in one place. It’s the culinary equivalent of a hug from your favorite grandma, but with a modern twist that screams “I’ve got this under control.”
Most vanilla custard recipes out there either over‑sweeten the custard, leave the crust dry, or require a mountain of obscure ingredients that make you wonder if you’re baking a dessert or performing alchemy. This version sidesteps all those pitfalls by focusing on five core principles: high‑quality butter, precise temperature control, a simple but effective custard base, and a finishing dusting of powdered sugar that adds just the right amount of sparkle. I’ve also thrown in a secret technique—an extra‑cold butter‑flour mixture that creates a tender crumb without the need for any fancy pastry cream. Trust me, this is hands down the best version you’ll ever make at home, and I’m willing to bet you’ll be back for seconds before the pan even cools.
Okay, ready for the game‑changer? I’m about to walk you through every single step, from selecting the perfect butter to mastering the custard’s silky sheen. By the end of this post, you’ll wonder how you ever managed to make any other version without this foolproof method. I dare you to taste this and not go back for seconds. Let’s dive in, and remember: stay with me here — this is worth it.
What Makes This Version Stand Out
- Flavor Explosion: The combination of real vanilla extract and butter creates a depth that store‑bought mixes simply can’t match. Each bite delivers a buttery richness that lingers long after the last crumb.
- Texture Harmony: A crisp, golden edge meets a custard that’s so smooth it feels like it’s melting on contact. The contrast is like biting into a perfectly toasted marshmallow.
- Simplicity: Only seven pantry staples are required, and none of them need to be exotic. This isn’t a recipe for a culinary graduate; it’s for anyone who loves a good dessert without the drama.
- Unique Technique: Chilling the butter‑flour mixture before folding in the wet ingredients prevents gluten overdevelopment, giving you that melt‑in‑your‑mouth crumb.
- Crowd‑Pleaser: I’ve served these at birthday parties, potlucks, and even a formal dinner, and they’ve consistently earned rave reviews. Expect a line of eager tasters forming around your kitchen.
- Ingredient Quality: Using real butter (not margarine) and pure vanilla extract makes a measurable difference in flavor intensity and mouthfeel.
- Make‑Ahead Potential: These squares keep beautifully for up to three days in the fridge, and they re‑heat like fresh‑baked goodness.
- Versatile Base: The custard can be flavored further—think orange zest, almond extract, or even a splash of bourbon—making it a canvas for endless creativity.
Inside the Ingredient List
The Flavor Base
First up, the butter. I use a full‑fat, unsalted butter because it provides a clean canvas for the vanilla to shine. If you skimp on the butter or substitute with a low‑fat version, you’ll notice a dry, crumbly texture that feels more like a shortbread than a custard square. Look for butter that’s bright yellow—this indicates a higher butterfat content, which translates to richer flavor. A quick tip: let the butter soften at room temperature for just 15 minutes, then cut it into small cubes before mixing.
Next, vanilla extract. A tablespoon of pure vanilla extract is the secret behind that intoxicating aroma. Avoid imitation vanilla; the synthetic flavor can taste flat and will never give you that deep, lingering perfume. If you’re feeling adventurous, split the tablespoon and add a splash of vanilla bean paste for an extra‑luxury twist.
The Texture Crew
All‑purpose flour is the structural backbone. Two cups provide enough gluten to hold the custard, but not so much that the crumb becomes tough. If you’re gluten‑sensitive, a 1‑to‑1 swap with a gluten‑free blend works, though you may need a touch more xanthan gum (about ¼ teaspoon) to mimic the elasticity.
Granulated sugar adds sweetness and helps with caramelization of the crust. Half a cup is perfect—any more and the custard could become overly sweet, masking the vanilla. For a deeper flavor, you could substitute half of the granulated sugar with brown sugar, which introduces a subtle molasses note.
Eggs are the emulsifiers that bind everything together. Four large eggs give the custard its silkiness and provide the necessary lift. If you’re using extra‑large eggs, you might want to reduce the count to three, but keep an eye on the custard’s thickness.
The Unexpected Star
Whole milk is the liquid that carries the custard’s creaminess. Two cups of whole milk ensure a rich mouthfeel; skim milk would make the custard watery and thin. If you crave an even richer custard, swap half the milk for heavy cream, but remember this adds extra fat, so you may need to adjust the butter slightly.
The Final Flourish
Powdered sugar is the finishing touch, dusted over the squares just before serving. It adds a delicate sweetness and a snowy appearance that makes the dish look as elegant as it tastes. If you prefer a less sweet finish, use a light dusting or swap half the powdered sugar for confectioners’ cocoa powder for a chocolate‑vanilla hybrid.
Everything’s prepped? Good. Let’s get into the real action, because the magic happens when heat meets butter and vanilla.
The Method — Step by Step
Preheat your oven to 350°F (175°C) and line a 9×13 inch baking pan with parchment paper, allowing the paper to overhang for easy removal later. While the oven warms, melt the butter in a saucepan over low heat until it’s just bubbling, then set it aside to cool slightly. This step is crucial because if the butter is too hot, it will start cooking the eggs later, ruining the custard’s silkiness.
In a large mixing bowl, whisk together the all‑purpose flour and granulated sugar. Sprinkle a pinch of salt (optional) to enhance the flavors. Then, cut the cold butter into the dry mixture using a pastry cutter or two forks until the texture resembles coarse crumbs. This is the moment where the crust gets its tender crumb structure.
In a separate bowl, beat the eggs lightly, then whisk in the whole milk and vanilla extract. The mixture should be smooth and slightly frothy. Slowly pour the wet mixture into the dry butter‑flour blend, stirring gently with a spatula until just combined. Over‑mixing will develop gluten, making the crust tough, so stop as soon as you see a uniform dough.
Transfer the batter to the prepared pan, spreading it evenly with an offset spatula. The surface should be smooth, but not overly flattened; a slight dome will help the custard rise evenly. Sprinkle the powdered sugar evenly over the top, creating a light veil that will caramelize during baking.
Slide the pan into the oven and bake for 25‑30 minutes, or until the edges turn a golden‑brown hue and a toothpick inserted into the center comes out clean. Around the 20‑minute mark, you’ll notice a faint crack forming on the surface—this is a sign the custard is setting perfectly. The aroma at this stage is intoxicating; the kitchen will smell like a vanilla‑infused bakery.
Once baked, remove the pan and let it cool on a wire rack for 10 minutes. This short rest allows the custard to set fully while the crust remains crisp. While it’s still warm, run a sharp knife along the edges to release the squares; the parchment overhang will make lifting a breeze.
After the pan has cooled to room temperature, use the overhanging parchment to transfer the entire slab onto a cutting board. Cut into 12 equal squares—each should have a golden top, a slightly cracked surface, and a creamy center that oozes when you press gently. This is the moment of truth: the custard should be glossy, not watery, and the crust should snap lightly under the fork.
Serve the squares warm, dusted with a final pinch of powdered sugar if desired. Pair them with a scoop of vanilla ice cream or a dollop of fresh whipped cream for an indulgent finish. That first bite? Expect a melt‑in‑your‑mouth experience that will have you shouting, “I’m never buying store‑bought again!” That’s it — you did it. But hold on, I’ve got a few more tricks that'll take this to another level...
Insider Tricks for Flawless Results
The Temperature Rule Nobody Follows
Always start with a cold butter‑flour mixture. The colder the mixture, the less gluten will develop when you add the wet ingredients, resulting in a tender crumb that truly melts. I once tried the “room‑temperature” shortcut and ended up with a dense, biscuit‑like texture. Trust the chill, and your crust will stay light as air.
Why Your Nose Knows Best
When the custard is baking, rely on your sense of smell more than the timer. The moment you detect a faint caramel note wafting from the oven, you’re close to perfection. If you wait too long, the top will over‑brown and become slightly bitter, ruining the delicate vanilla balance.
The 5‑Minute Rest That Changes Everything
After the squares come out of the oven, let them rest for exactly five minutes before cutting. This short pause lets the custard firm up just enough to hold its shape while still staying luscious. Cutting too early leads to a runny center; waiting too long makes the custard set too firmly.
The Egg‑Whisk Whisper
When beating the eggs, do it gently—just enough to combine the yolk and white. Over‑whisking introduces too much air, which can cause the custard to puff and then collapse, leaving a hollow center. A soft whisk ensures a smooth, cohesive custard.
Dusting with Purpose
Instead of sprinkling powdered sugar directly from the container, use a fine-mesh sieve. This gives an even, cloud‑like coating and prevents clumps that could weigh down the delicate crust. The result is a professional‑looking finish that tastes as good as it looks.
Creative Twists and Variations
This recipe is a playground. Here are some of my favorite ways to switch things up:
Citrus Zing
Add the zest of one lemon or orange to the custard mixture for a bright, tangy contrast to the vanilla. The citrus lifts the richness and makes the squares perfect for spring brunches.
Almond Whisper
Swap half the vanilla extract for almond extract and sprinkle sliced toasted almonds on top before baking. The nutty aroma pairs beautifully with the buttery crust, creating a sophisticated flavor profile.
Chocolate Swirl
Melt ¼ cup of dark chocolate and drizzle it over the batter before baking, then use a toothpick to swirl. You’ll get pockets of molten chocolate that surprise the palate with every bite.
Spiced Autumn
Incorporate a pinch of ground cinnamon, nutmeg, and a dash of pumpkin puree into the custard for a warm, seasonal twist. This variation shines during the cooler months and pairs well with a drizzle of caramel sauce.
Boozy Delight
Add a tablespoon of bourbon or rum to the milk before whisking with the eggs. The alcohol evaporates during baking, leaving behind a subtle depth that feels indulgent without being overpowering.
Storing and Bringing It Back to Life
Fridge Storage
Place the cooled squares in an airtight container lined with parchment paper. They’ll stay fresh for up to three days, retaining their crumbly top and creamy center. If you notice the custard thickening, let the squares sit at room temperature for 10 minutes before serving.
Freezer Friendly
These squares freeze beautifully. Wrap each piece individually in plastic wrap, then store them in a zip‑top bag. They’ll keep for up to two months. To reheat, pop them in a 300°F oven for 8‑10 minutes; the crust will regain its crispness.
Best Reheating Method
When reheating, add a tiny splash (about a teaspoon) of whole milk or water to the pan before covering with foil. The steam generated brings the custard back to its original silky texture without drying out the crust.