I still remember the first time I attempted French macarons. My kitchen looked like a powdered sugar crime scene, I had egg whites in my hair, and those sad little puddles on my baking sheet resembled anything but the elegant Parisian confections I had envisioned. Three failed batches later, I was ready to throw my spatula out the window and swear off almond flour forever. But here's the thing about macarons — they're like that sophisticated friend who seems intimidating at first but becomes your favorite once you understand their quirks.
Fast forward through countless trials, a few choice words muttered under my breath, and what felt like metric tons of almond flour, I finally cracked the code. The moment I pulled out a tray of perfectly domed, smooth-topped macarons with those signature frilly feet, I did what any self-respecting baker would do: I danced around my kitchen like I'd won the lottery, then immediately ate four of them before they were even filled. My neighbor caught me mid-victory dance, mouth full of cookie, and that's how I ended up teaching an impromptu macaron class that very afternoon.
What makes this version different? I've stripped away all the intimidating pastry chef terminology and replaced it with clear, foolproof steps that actually work in a home kitchen. No need for fancy equipment or impossible-to-find ingredients. These macarons will have you feeling like you just stepped out of a Parisian patisserie, minus the airfare and the jet lag. The secret lies in a few game-changing techniques that most recipes gloss over — things like the proper way to fold your batter (spoiler: it's not the figure-eight method everyone teaches), the exact temperature your egg whites should be, and why aging them actually matters.
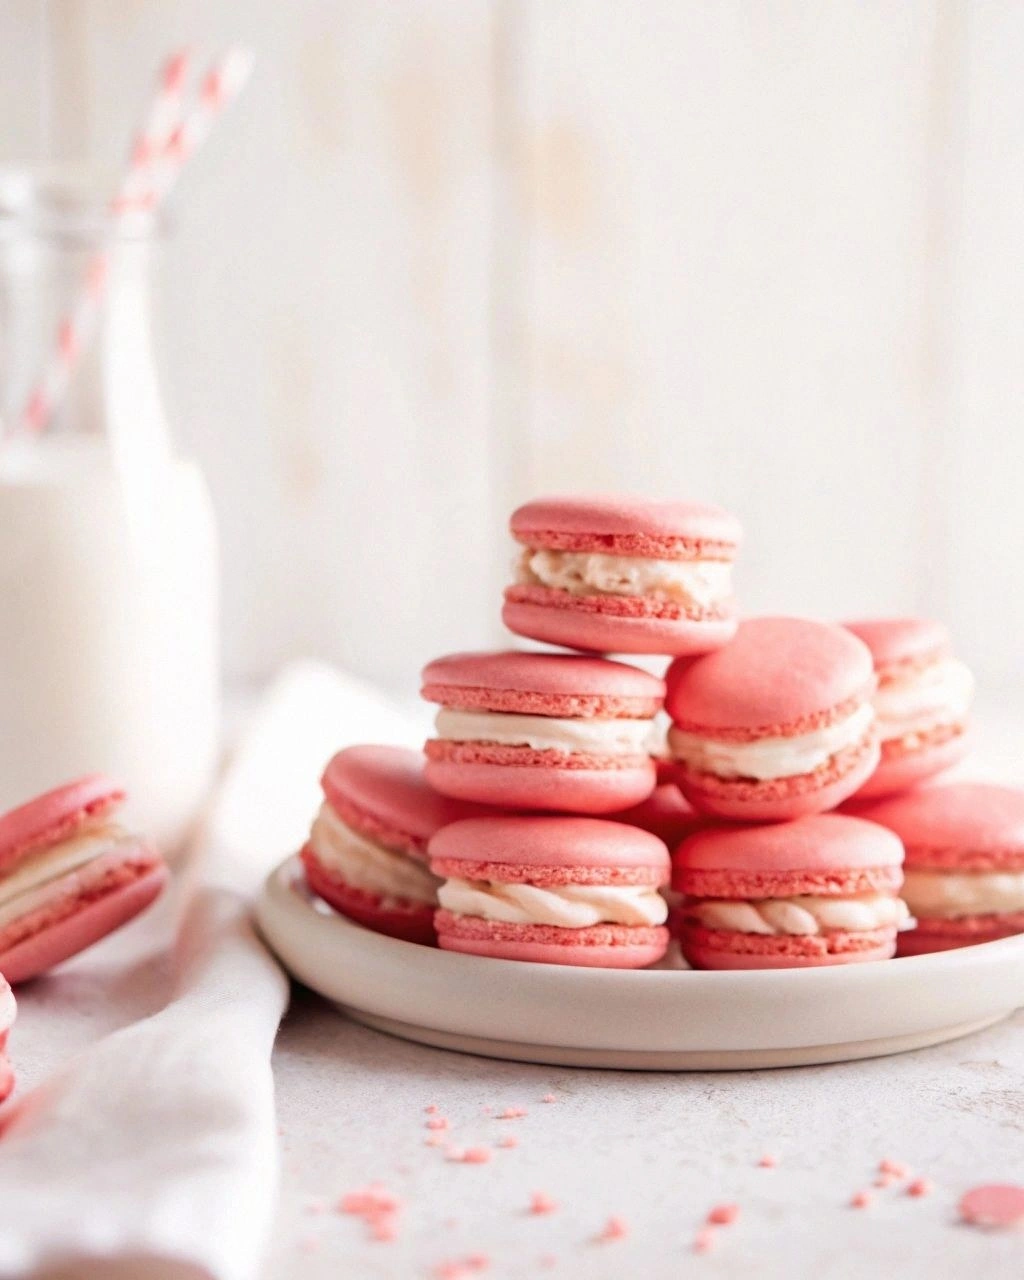
Picture yourself pulling a tray of these delicate beauties from your oven, the air thick with the sweet aroma of almonds and vanilla. The shells have that perfect matte finish, the feet are ruffled like tiny ballerina tutus, and when you bite into one, it gives way with the most satisfying delicate crunch before melting into chewy perfection. Trust me, once you nail this recipe, you'll be the person everyone begs to bring dessert to dinner parties. Let me walk you through every single step — by the end, you'll wonder how you ever made it any other way.
What Makes This Version Stand Out
Perfect Texture Every Time: These macarons deliver that elusive combination of crisp shell and chewy interior that makes grown adults close their eyes in bliss. The secret is in the precise meringue technique that creates a stable structure without making the shells rock-hard.
No Fancy Equipment Required: While most recipes demand a stand mixer and silicone mats, I've perfected a method that works with a hand mixer and parchment paper. Your wallet stays happy, and your macarons turn out just as stunning as the professional versions.
Flavor That Actually Packs a Punch: Most macarons taste like sweet almond air, but these bad boys are infused with real flavor throughout the shell, not just in the filling. I dare you to taste one and not immediately reach for a second.
Foolproof Folding Method: Forget everything you've heard about the mysterious "macaronage" technique. My simple counting method takes the guesswork out of when to stop mixing, so you never end up with flat pancakes or concrete blobs.
Make-Ahead Magic: These shells freeze beautifully for up to three months, which means you can always have a stash ready for emergencies. Trust me, nothing impresses unexpected guests like whipping out homemade macarons on a Tuesday night.
Endless Flavor Possibilities: Once you master the base recipe, you'll have a playground of flavors at your fingertips. From classic vanilla bean to adventurous Earl Grey lavender, each variation is more addictive than the last.
Alright, let's break down exactly what goes into this masterpiece...
Inside the Ingredient List
The Foundation Players
Almond flour is the star of our show, but not all almond flours are created equal. You want superfine blanched almond flour that feels like velvet between your fingers. If it feels gritty or has brown flecks from the skins, your macarons will have a rough, nubbly texture that screams "homemade" in the worst way possible. I learned this the hard way after buying whatever almond flour was on sale, only to produce macarons that looked like they had acne. Bob's Red Mill makes a reliable version, but if you can find it, Blue Diamond's superfine is like silk and produces the smoothest shells imaginable.
Powdered sugar serves double duty here, providing sweetness and structure while helping to absorb moisture from the meringue. Don't even think about substituting granulated sugar here — it won't dissolve properly and will leave you with grainy, cracked shells. Fresh powdered sugar works best, and here's a pro tip: sift it twice with the almond flour for ultimate smoothness. If your powdered sugar has been sitting in the pantry for months and smells like cardboard, treat yourself to a fresh bag. Your macarons will thank you with their smooth, flawless tops.
The Meringue Makers
Egg whites are where the magic happens, but they need to be treated with respect. Room temperature whites whip up to a more stable, voluminous meringue that creates the perfect structure for our macarons. Cold whites whip up faster but produce a looser, less stable foam that collapses during baking. If you've ever wondered why your macarons spread into sad puddles, this might be your culprit. I keep a carton of egg whites in my freezer specifically for macaron emergencies — they work beautifully once thawed to room temperature.
Granulated sugar for the meringue needs to be added slowly, allowing each grain to dissolve completely before adding more. Rush this step and you'll end up with a weepy meringue that oozes sugar syrup. The French meringue method we're using might seem scarier than the Italian, but it produces lighter, more delicate shells once you get the hang of it. Think of it as the difference between a fluffy cloud and a dense marshmallow — both sweet, but only one will make you swoon.
The Unexpected Game-Changers
Cream of tartar is your insurance policy against deflated meringue. Just a pinch stabilizes those precious air bubbles and helps prevent over-whipping. Don't skip this unless you enjoy the taste of disappointment. If you don't have cream of tartar, a few drops of lemon juice works in a pinch, but cream of tartar is more reliable. It's cheap, lasts forever, and will save you from more meringue disasters than I care to count.
Salt might seem odd in a sweet cookie, but it brightens all the flavors and prevents your macarons from tasting like almond-scented sugar bombs. Just a tiny pinch makes the difference between cloyingly sweet and perfectly balanced. I use fine sea salt because it distributes evenly, but kosher salt works if you crush it between your fingers first. This tiny addition elevates your macarons from amateur hour to professional patisserie quality.
The Flavor Enhancers
Vanilla bean paste is worth every penny for these macarons. Those tiny black flecks don't just look gorgeous; they pack intense vanilla flavor that extract can't match. Plus, the paste format means no alcohol to potentially destabilize your meringue. If you must substitute, use vanilla powder rather than extract — the liquid can throw off your careful ratios. Nielsen-Massey makes an incredible paste that will make your kitchen smell like a vanilla dream factory.
Food coloring gel is your friend here, but water-based colors can sabotage your shells. Gel colors provide vibrant hues without adding excess moisture that could flatten your macarons. Start with a toothpick dipped in color — these gels are concentrated, and you can always add more but can't take it away. Americolor and Chefmaster are my go-to brands for consistent, beautiful results that don't fade during baking.
Everything's prepped? Good. Let's get into the real action...
The Method — Step by Step
- Prep Your Station Like a Pro: This isn't just about being organized — it's about setting yourself up for success. Line three baking sheets with parchment paper, not silicone mats (they retain too much moisture). Trace 1.5-inch circles about an inch apart on one sheet, then flip it over so the pencil marks are on the bottom. This becomes your template for piping perfect circles. Fit a large piping bag with a 1/2-inch round tip, or snip the end of a zip-top bag for a makeshift version. Most importantly, clear a flat surface near your oven — these babies need to rest before baking, and finding a spot mid-process is a recipe for disaster.
- Master the Dry Mix: In a medium bowl, whisk together your almond flour and powdered sugar for a full 30 seconds. This isn't just mixing — it's breaking up clumps that could create lumpy shells. Now comes the crucial part: sift this mixture not once, not twice, but three times. Yes, it's tedious, but those tiny almond flour pebbles that refuse to go through your sieve? Discard them. They're the difference between smooth, professional-looking shells and something that screams "homemade by someone who gave up halfway." Trust me, I've eaten enough reject macarons to know that this step matters more than it seems.
- Create the Perfect Meringue: In the bowl of a stand mixer (or a large bowl with your hand mixer), beat the egg whites on medium speed until they look foamy like bubble bath. Add the cream of tartar, increase speed to medium-high, and beat until soft peaks form. Now, reduce speed to medium and slowly rain in the granulated sugar, taking about 30 seconds. Once all the sugar is in, increase to high speed and beat until you reach stiff, glossy peaks. The meringue should hold its shape but still look smooth, not curdled. This usually takes 2-3 minutes total, but watch carefully — over-beaten meringue creates dry, cracked shells that taste like sweet cardboard.
- Incorporate Flavor and Color: Add your vanilla bean paste and gel food coloring to the meringue, then beat on high for just 10 seconds to combine. Don't overmix here — you want to distribute the additions without deflating your carefully created structure. The color will lighten slightly during baking, so go a shade darker than you want the final product to be. This is also when you'd add any other flavor extracts or powders, but be conservative — too much liquid will flatten your meringue faster than a punctured balloon.
- Master the Macaronage: Here's where most recipes fail you with vague instructions about "folding until the batter flows like lava." Instead, add half your almond flour mixture to the meringue and fold with a rubber spatula, scraping around the sides and cutting through the center. Once mostly combined, add the remaining almond mixture and continue folding. Now, here's the game-changer: count your folds. You'll need about 50-60 total folds for the perfect consistency. The batter should flow off your spatula in a thick ribbon that you can write the letter "J" with. If it breaks into pieces, keep folding. If it runs like pancake batter, you've gone too far and need to start over.
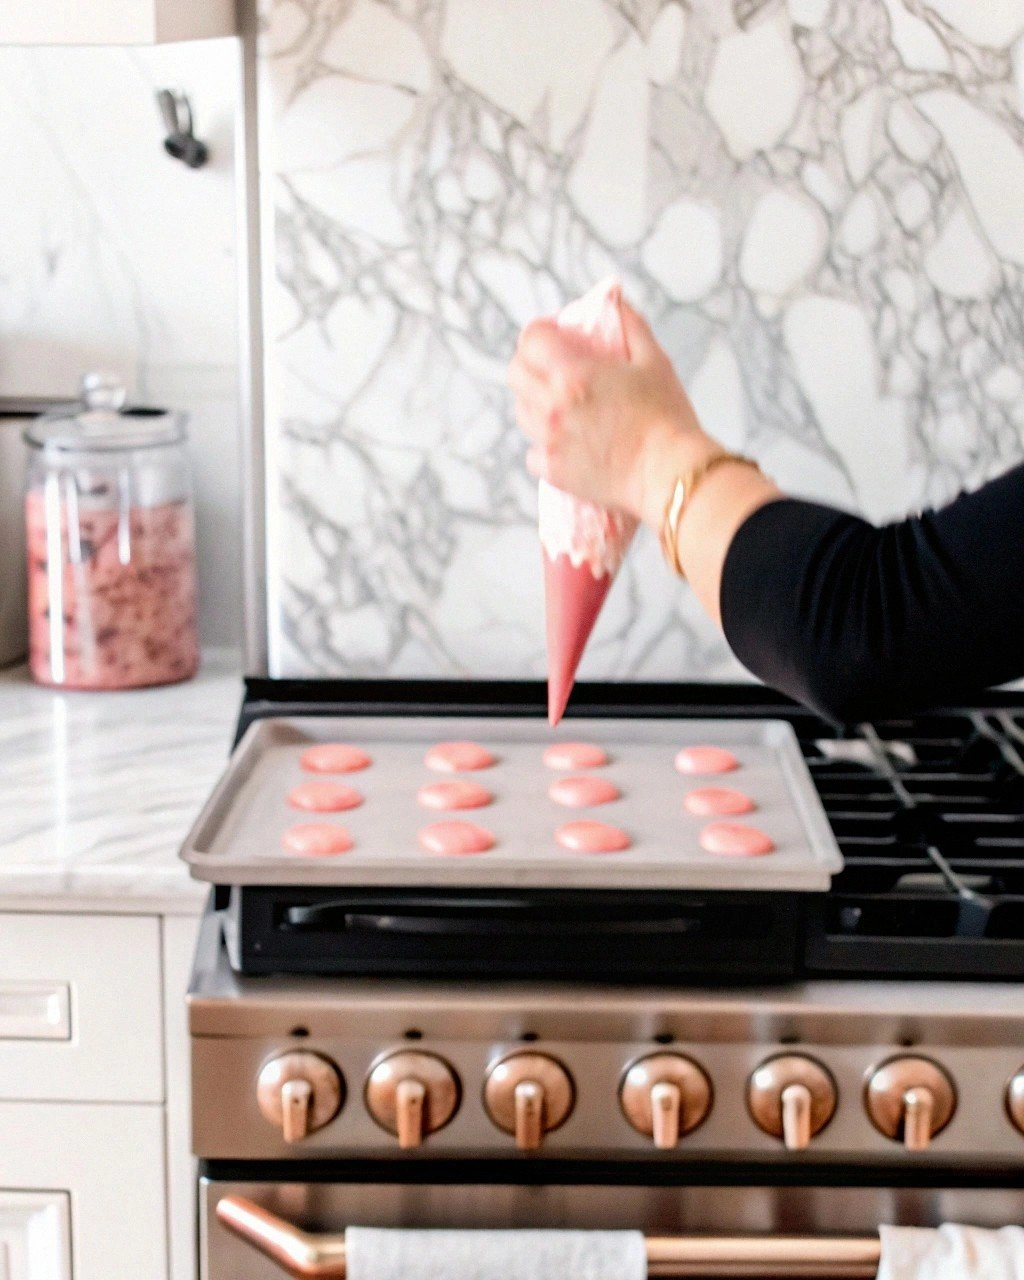
- Pipe with Confidence: Transfer your batter to the prepared piping bag, twisting the top to prevent leaks. Hold the bag perpendicular to your template sheet, about half an inch above the parchment. Pipe straight down until the batter reaches the edge of your circle template, then make a quick circular motion to cut off the flow. Don't swirl or move the tip around — let gravity do the work. If you get little peaks on top, that's normal. They'll smooth out during the resting phase.
- The All-Important Rest: This step separates the amateurs from the pros. Let your piped macarons sit at room temperature for 30-60 minutes, depending on humidity. You're looking for them to form a skin — gently touch the top of one, and it shouldn't stick to your finger. In humid climates, this might take longer; in dry climates, check after 20 minutes. This skin is what creates the feet during baking. Rush this step, and you'll end up with cracked, footless shells that look like sad whoopie pies.
- Bake to Perfection: Preheat your oven to 325°F (160°C), but here's the crucial part: every oven lies. Use an oven thermometer to verify the temperature, and adjust accordingly. Bake one sheet at a time on the middle rack for 12-14 minutes, rotating halfway through. The macarons are done when they're set but not browning. Test by gently wiggling one — if it slides around on its feet, give it another minute. If it doesn't move, it's ready. Over-baking creates dry, brittle shells that shatter when you try to fill them.
- Cool and Fill: Let your macarons cool completely on the baking sheets — attempting to remove them while warm will result in shells that stick and tear. Once cool, they should lift off easily with an offset spatula. Match up shells by size, then pipe your chosen filling onto one shell and sandwich with another. Don't overfill — a small amount goes a long way, and too much filling causes the shells to slide and become soggy.
That's it — you did it. But hold on, I've got a few more tricks that'll take this to another level...
Insider Tricks for Flawless Results
The Temperature Rule Nobody Follows
Here's the thing about macarons — they're basically divas when it comes to temperature. Your oven temperature matters more than your mixing technique, and I learned this after producing batch after batch of cracked, footless disasters. Invest in an oven thermometer and trust it over your oven's display. Most home ovens run 25-50 degrees off, which means you think you're baking at 325°F but you're actually at 350°F, creating macaron carnage. Once I started using a thermometer and adjusting accordingly, my success rate jumped from 60% to 95%. If your oven runs hot, lower the temperature by 10-15 degrees and extend the baking time. If it runs cool, increase accordingly. This single adjustment will transform your macaron game.
Why Your Nose Knows Best
Here's a secret that sounds insane but works every time: smell your macarons while they bake. When they're perfectly done, your kitchen will fill with the most incredible almond-vanilla aroma that's sweet but not cloying. If you smell something toasty or nutty, you've gone too far and risk over-baking. This happens at the 10-11 minute mark, so start paying attention. My neighbor thought I was nuts when I told her this, but after she tried it, she called to say she'd saved three batches from over-baking by trusting her nose. Combined with the wiggle test, this sensory checkpoint ensures perfectly baked shells every time.
The 5-Minute Rest That Changes Everything
After piping, give your macarons exactly five minutes, then gently drop the baking sheet from about 3 inches above your counter. This simple action releases any large air bubbles trapped in the batter, preventing cracked shells and ensuring even feet formation. Don't go crazy — one gentle drop is plenty. I discovered this trick after watching a French pastry chef on YouTube, and it's been a game-changer. Before adopting this method, I'd get at least three cracked shells per batch. Now I might get one, if any. Plus, it helps smooth out any remaining peaks from piping, giving you perfectly rounded shells.
The Aging Secret Professional Pastry Cheaches Swear By
Fill your macarons, then refrigerate them overnight before serving. This "maturation" process allows the shells to absorb moisture from the filling, creating that signature chewy texture that makes French macarons legendary. Freshly filled macarons have a crisp shell that shatters dramatically but lacks the chewy interior that makes these cookies special. After 24 hours in the fridge, the flavors meld together into something transcendent. I always make mine two days before I need them — the anticipation nearly kills me, but the result is worth the wait. Just bring them to room temperature for 30 minutes before serving for the ultimate texture experience.
The Humidity Hack That Saves Rainy Days
High humidity is the enemy of macarons, but don't let a rainy day stop you. Run a dehumidifier in your kitchen, or if you don't have one, turn on your bathroom exhaust fan and pipe the macarons in there to rest. The key is getting them into a dry environment where they can form a proper skin. I've successfully made macarons during monsoon season by creating a makeshift dry room in my bathroom. Another trick? Use a hair dryer on the cool setting to gently blow air over the piped macarons for 2-3 minutes. This accelerates skin formation without cracking the shells. Just keep the dryer moving constantly to avoid creating hot spots.
Creative Twists and Variations
This recipe is a playground. Here are some of my favorite ways to switch things up:
Salted Caramel Explosion
Replace the vanilla with a teaspoon of caramel extract and add a drop of brown food coloring to the shells. Fill with a generous dollop of salted caramel buttercream and a small piece of soft caramel in the center. The contrast between the sweet shells and salty filling creates a flavor explosion that caramel lovers dream about. These disappear faster than any other flavor I make, often before they've finished maturing in the fridge.
Raspberry Rose Romance
Add 1/4 teaspoon of rose water and a drop of pink coloring to your shells for a delicate floral note. Fill with raspberry jam mixed with a touch of rose water and white chocolate ganache. The combination tastes like a summer garden party in Paris — elegant, romantic, and utterly addictive. These are stunning for bridal showers or anytime you want to feel fancy.
Mocha Madness
Dissolve 2 teaspoons of instant espresso powder in the vanilla, and add brown coloring to the shells. Fill with coffee buttercream and a thin layer of chocolate ganache. Coffee and chocolate combine with the almond shells to create a sophisticated flavor that makes coffee addicts weak in the knees. These are my go-to for dinner parties where I want to impress without showing off.
Lemon Lavender Dreams
Add the zest of one lemon and 1/2 teaspoon of culinary lavender to your almond flour before sifting. The lemon brightens everything while the lavender adds a sophisticated floral note that transports you to a Provence garden. Fill with lemon curd mixed with whipped cream for a light, refreshing treat that tastes like springtime in cookie form.
Chocolate Orange Elegance
Replace 2 tablespoons of almond flour with good quality cocoa powder, and add orange zest to the shells. Fill with dark chocolate ganache spiked with Grand Marnier. The classic combination of chocolate and orange gets elevated to new heights with the delicate almond shells. These taste like the most sophisticated chocolate orange truffle you've ever encountered.
Pistachio Perfection
Replace half the almond flour with finely ground pistachios for naturally green shells with incredible flavor. Fill with pistachio buttercream for a double pistachio experience that green-hued cookie lovers obsess over. These have a more pronounced nut flavor than traditional almond macarons, with a beautiful natural color that needs no artificial enhancement.
Storing and Bringing It Back to Life
Fridge Storage
Store filled macarons in an airtight container in the refrigerator for up to 5 days, though they're best within 3 days. Layer them between sheets of parchment paper to prevent sticking, and let them come to room temperature for 30 minutes before serving. The flavors continue to develop during storage, so day-two macarons often taste better than fresh ones. Just be warned — they have a way of disappearing from the fridge when family members discover your stash.
Freezer Friendly
Unfilled shells freeze beautifully for up to 3 months — simply cool completely, then store in an airtight container with parchment between layers. Fill them while still frozen, then let them mature in the fridge as usual. This makes macaron production manageable for busy schedules, letting you bake shells ahead for parties or gifts. Filled macarons also freeze well for up to 2 months, though the texture might be slightly less delicate than fresh ones.
Best Reheating Method
While macarons are never reheated, you can refresh shells that have been stored too long and become overly chewy. Place them on a baking sheet in a 200°F oven for 3-4 minutes, just until slightly warm. Let them cool completely before filling. This restores some of the crisp texture without drying them out. It's a last resort that works in a pinch, but honestly, properly stored macarons shouldn't need refreshing.