Picture this: I was in my cramped apartment kitchen, the radio blasting a cheesy 80s hit, and my friend dared me to whip up something that would make her taste buds dance. I stared at the rack of chicken breasts, soy sauce, and a handful of pantry staples, thinking, “Why not?” The moment the first skewer hit the grill, a sizzling symphony erupted, and the kitchen filled with a caramelized aroma that felt like a warm hug from an old friend. I laughed, because I knew this would be the kind of dish that turns a regular night into a memorable feast. The chaos of flipping, basting, and watching the glaze thicken was pure, unfiltered joy. It was a culinary dare that I didn’t just accept—I embraced with gusto, ready to share every detail with you.
I’ve spent countless hours in kitchens trying to nail that perfect balance of sweet, salty, and umami in grilled chicken, only to end up with dry, flavorless meat or an overly sweet glaze that clung like syrup. The disappointment was real, and the frustration grew each time I forgot to baste or over‑season. This time, I set a new rule: no more half‑baked attempts. I was determined to create a Yakitori that would melt in your mouth and leave you craving a second skewer. The result? A dish that sings with a glossy, caramelized coat, tender chicken that practically falls apart, and a burst of flavor that lingers on the palate.
The secret sauce? It’s a blend of soy sauce, mirin, a splash of red wine, brown sugar, and a touch of vinegar that together create a glaze that coats the chicken like velvet. The combination of garlic and ginger adds depth, while a dash of ground pepper gives a subtle kick that elevates the entire dish. The cornstarch thickener ensures the glaze clings beautifully, forming a glossy finish that’s both eye‑catching and mouth‑watering. Every bite delivers a harmonious blend of sweet, salty, and savory notes that dance together. This isn’t just another Yakitori recipe; it’s the culmination of years of experimentation, a version that stands apart from every other recipe out there.
But here’s the twist: I’ve added a splash of red wine to the glaze, a little secret that most recipes overlook. This subtle addition deepens the umami profile and gives the sauce a silky, almost buttery texture that’s incredibly satisfying. Most people skip it, thinking the glaze will be too sweet or too heavy. Trust me, that wine infusion transforms the entire experience, creating a sauce that’s both complex and approachable. The result is a Yakitori that’s hands down the best version you’ll ever make at home.
I’ll be honest—when I first served these skewers to my friends, I ate half the batch before anyone else got a taste. The sizzle, the aroma, the glossy glaze—it’s a moment you don’t want to miss. I dare you to taste this and not go back for seconds. If you’re skeptical, just imagine the tender chicken, the caramelized glaze, and the subtle warmth of the spices. The flavor will hit you like a wave, and you’ll find yourself reaching for more. So let me walk you through every single step—by the end, you’ll wonder how you ever made it any other way.
When you first open the recipe, you might think this is another standard Yakitori. But I’ve spent months tweaking the sauce, adjusting the ratios, and testing different grilling techniques until I achieved the perfect balance. I’ve learned that the key isn’t just the ingredients—it’s how you handle them, how you layer flavors, and how you finish the dish. This version is not just a recipe; it’s a revelation. It’s a testament to the fact that a little creativity, a dash of daring, and a willingness to experiment can elevate a humble dish into something extraordinary. And that’s exactly what I’m about to share with you.
The first thing that sets this Yakitori apart is the sauce’s glossy finish. It’s not just sweet; it’s layered with umami, acidity, and a subtle heat that wakes up your taste buds. The chicken is marinated just enough to absorb flavors without becoming mushy. The grilling technique ensures a charred exterior that locks in juices, while the glaze locks in moisture, creating a tender, succulent bite. The result is a dish that’s both comforting and exciting, a fusion of classic Japanese technique and modern flavor sensibilities.
Most recipes get this completely wrong by overcooking the chicken or underbasting the glaze. The result is either dry, bland, or overly sweet. I’ve discovered that the secret lies in timing and temperature control. The chicken should hit the grill at medium heat, allowing it to sear without burning. The glaze should be added at the right moment—just before the chicken is done—to create a caramelized coating that stays tacky but not sticky. By mastering these nuances, you’ll consistently achieve a Yakitori that’s juicy, flavorful, and irresistibly glossy.
If you've ever struggled with grilling chicken, you're not alone—and I've got the fix. The trick is to let the chicken rest after marinating, so it can absorb the flavors fully. Use a non‑stick grill or brush the grill with oil to prevent sticking. Keep a close eye on the glaze; it can go from perfect to burnt in seconds. Remember to baste regularly, and don’t be afraid to flip the skewers to ensure even cooking. These small adjustments will elevate your Yakitori from good to unforgettable.
Picture yourself pulling this out of the grill, the whole kitchen smelling incredible, and the skewers glistening like tiny works of art. The sound of the first bite—crackling, juicy, and flavorful—will reverberate in your mind. Your guests will be amazed at the depth of flavor, the perfect char, and the glossy finish. They’ll ask for the recipe, and you’ll grin, knowing that you’ve shared a culinary masterpiece. The satisfaction of seeing that reaction is the ultimate reward.
Okay, ready for the game‑changer? The next section will break down exactly what goes into this masterpiece. From the sauce to the seasoning, every ingredient plays a vital role. I’ll walk you through the ingredient list, the preparation steps, and the final grilling process. By the end, you’ll have a clear, step‑by‑step roadmap to creating the ultimate Yakitori. Let’s dive in.
What Makes This Version Stand Out
- Flavor Depth: The combination of soy sauce, mirin, red wine, and brown sugar creates a multi‑layered glaze that’s sweet, salty, and umami‑rich. Each bite delivers a burst of complexity that keeps you coming back for more. The subtle heat from the ground pepper adds just enough spice to balance the sweetness.
- Texture: The cornstarch thickener gives the glaze a silky, clingy coating that melts on the tongue. The chicken stays juicy inside while the exterior develops a caramelized, slightly crispy crust. The result is a contrast that’s both satisfying and memorable.
- Simplicity: Despite its depth, the recipe uses only ten ingredients, most of which you already have on hand. The steps are straightforward, making it accessible for beginners and seasoned chefs alike. No fancy equipment or obscure ingredients required.
- Unique Twist: The splash of red wine is a game‑changer that elevates the sauce’s flavor profile. It adds depth and a silky texture that most Yakitori recipes miss. This twist sets the dish apart from the standard, making it unforgettable.
- Crowd‑Pleaser: The glossy glaze and tender chicken make this dish a hit at parties, potlucks, or family dinners. It’s the kind of dish that people rave about and ask for the recipe. The presentation alone is a crowd‑pleaser.
- Ingredient Quality: Using high‑quality soy sauce, fresh ginger, and a good red wine ensures that every component shines. The flavor of the sauce is directly tied to the quality of the ingredients. The result is a dish that truly tastes premium.
- Cooking Method: Grilling the skewers on medium heat allows the chicken to sear perfectly without drying out. The glaze is added at the right moment to create a caramelized finish. The method is proven to deliver consistent results.
- Make‑Ahead Potential: The sauce can be pre‑made and stored, and the chicken can be marinated ahead of time. This flexibility makes it easy to prepare in advance for busy schedules. You’ll have a ready‑to‑cook meal whenever you need it.
Inside the Ingredient List
The Flavor Base
Soy sauce is the cornerstone of any Yakitori glaze, providing a rich umami foundation that grounds the dish. The 1/2 cup of soy sauce offers a balanced saltiness that doesn’t overpower the other flavors. If you prefer a lighter version, swap it with low‑sodium soy sauce, but keep the quantity the same to maintain the glaze’s consistency. The soy sauce also helps the chicken develop a beautiful, dark crust when grilled.
Mirin, or its substitute red wine, adds a subtle sweetness and depth to the sauce. The 1/4 cup of mirin brings a hint of acidity that brightens the glaze. If you’re using red wine, choose a dry variety like pinot noir or a light-bodied red to avoid bitterness. The wine’s tannins work with the soy sauce to create a complex flavor profile that’s both sweet and savory.
Brown sugar is the sweetener that caramelizes during grilling, giving the glaze that signature glossy sheen. The 2 tablespoons of brown sugar balance the saltiness of the soy sauce and the acidity of the vinegar. If you’re watching your sugar intake, you can reduce the amount slightly, but be careful not to compromise the glaze’s caramelization. A small pinch of sea salt can also enhance the overall flavor.
Vinegar, in the form of rice or white vinegar, adds a bright, sharp note that cuts through the richness of the glaze. The 1 tablespoon of vinegar balances the sweetness and ensures the sauce doesn’t become cloying. If you prefer a milder flavor, you can reduce the vinegar slightly, but the acidity is essential for the glaze’s brightness.
The Aroma Crew
Garlic is the aromatic backbone that infuses the glaze with savory depth. The 3 cloves of minced garlic release essential oils that enhance the overall flavor profile. Fresh garlic works best; if you’re in a hurry, a teaspoon of garlic powder can substitute, but it won’t give the same fresh bite. The garlic also helps the chicken absorb the glaze more evenly.
Fresh ginger adds a zesty, peppery kick that complements the sweet and salty elements. The 1 tablespoon of ginger provides a bright, slightly spicy undertone that lifts the dish. If you can’t find fresh ginger, a teaspoon of grated ginger paste works, but the flavor will be more subdued. Ginger also has a subtle health benefit, boosting digestion and circulation.
The Texture Enhancer
Ground pepper adds a whisper of heat that brings the sauce to life. The 1 teaspoon of ground pepper gives the glaze a subtle kick that balances the sweetness. If you’re sensitive to heat, use black pepper; for a slightly different flavor, try white pepper. The pepper also helps to break down the proteins in the chicken, making it more tender.
Cornstarch is the secret to that glossy, clingy finish. The 1 tablespoon of cornstarch, when mixed with a small amount of water, creates a smooth slurry that thickens the glaze without adding heaviness. If you want a thicker glaze, add an extra tablespoon of cornstarch, but be careful not to over‑thicken. The cornstarch also helps the glaze set, preventing it from running off the skewers.
The Final Flourish
Chicken breast is the star of the show, offering lean protein and a mild flavor that absorbs the glaze beautifully. The 1 pound of chicken breast is cut into bite‑size pieces, ensuring even cooking and maximum flavor absorption. For a richer flavor, you can add a small amount of chicken fat, but the breast alone is enough to deliver a satisfying bite. The chicken’s texture is key; it should be juicy inside with a slightly caramelized exterior.
Everything's prepped? Good. Let's get into the real action. The next step is to assemble the glaze, marinate the chicken, and set your grill for the perfect char. I’ll walk you through each detail so you can replicate this masterpiece at home.
The Method — Step by Step
- Begin by whisking together the soy sauce, mirin, brown sugar, vinegar, minced garlic, grated ginger, ground pepper, and water in a medium bowl. The mixture should be smooth, with the sugar fully dissolved. This is your glaze base, and it’s the foundation for every bite. Let the sauce sit for five minutes to allow the flavors to meld. The aroma will already hint at the depth of flavor to come.
- Next, dissolve the cornstarch in a tablespoon of cold water to create a slurry. Stir until it’s completely smooth, free of lumps. This slurry will give the glaze a glossy finish and help it cling to the chicken. Keep it aside; you’ll add it to the glaze in a moment. The consistency should be thin enough to coat the back of a spoon.
- Add the cornstarch slurry to the glaze mixture and whisk until fully incorporated. The glaze should thicken slightly but still flow. If it’s too thick, add a splash of water; if it’s too thin, add a pinch more cornstarch. This step is crucial for achieving that perfect caramelized sheen. The glaze should coat the back of a spoon without dripping.
- Cut the chicken breast into 1‑inch cubes, ensuring each piece is uniform for even cooking. Pat the chicken dry with paper towels; moisture on the surface will prevent the glaze from sticking. Place the chicken in a bowl and pour half of the glaze over it, tossing gently to coat. Let the chicken marinate for at least 20 minutes, allowing the flavors to penetrate. The longer you marinate, the more flavorful the chicken becomes.
- Preheat your grill or grill pan to medium heat (around 350°F/175°C). Oil the grill grates lightly to prevent sticking. Thread the marinated chicken onto skewers, spacing them evenly to allow for even cooking. Place the skewers on the grill and let them sear for about 2 minutes on each side. The chicken should develop a golden crust while remaining juicy inside.
- While the chicken is grilling, pour the remaining glaze into a small saucepan and bring it to a simmer over medium heat. Stir frequently to prevent burning. The glaze should reduce slightly, thickening and intensifying in flavor. Once it reaches a syrupy consistency, remove it from the heat. This is your final glaze to baste the chicken.
- Baste the chicken skewers with the hot glaze, turning them to ensure an even coating. Continue grilling for another 3-4 minutes, basting every minute. The glaze should caramelize, forming a glossy, slightly crispy shell around the chicken. The sound of the glaze bubbling is a cue that the flavor is locking in.
- When the chicken is cooked through (internal temperature 165°F/74°C) and the glaze is caramelized, remove the skewers from the grill. Let them rest for a couple of minutes to allow the juices to redistribute. The result is a tender, juicy bite with a glossy, caramelized coating.
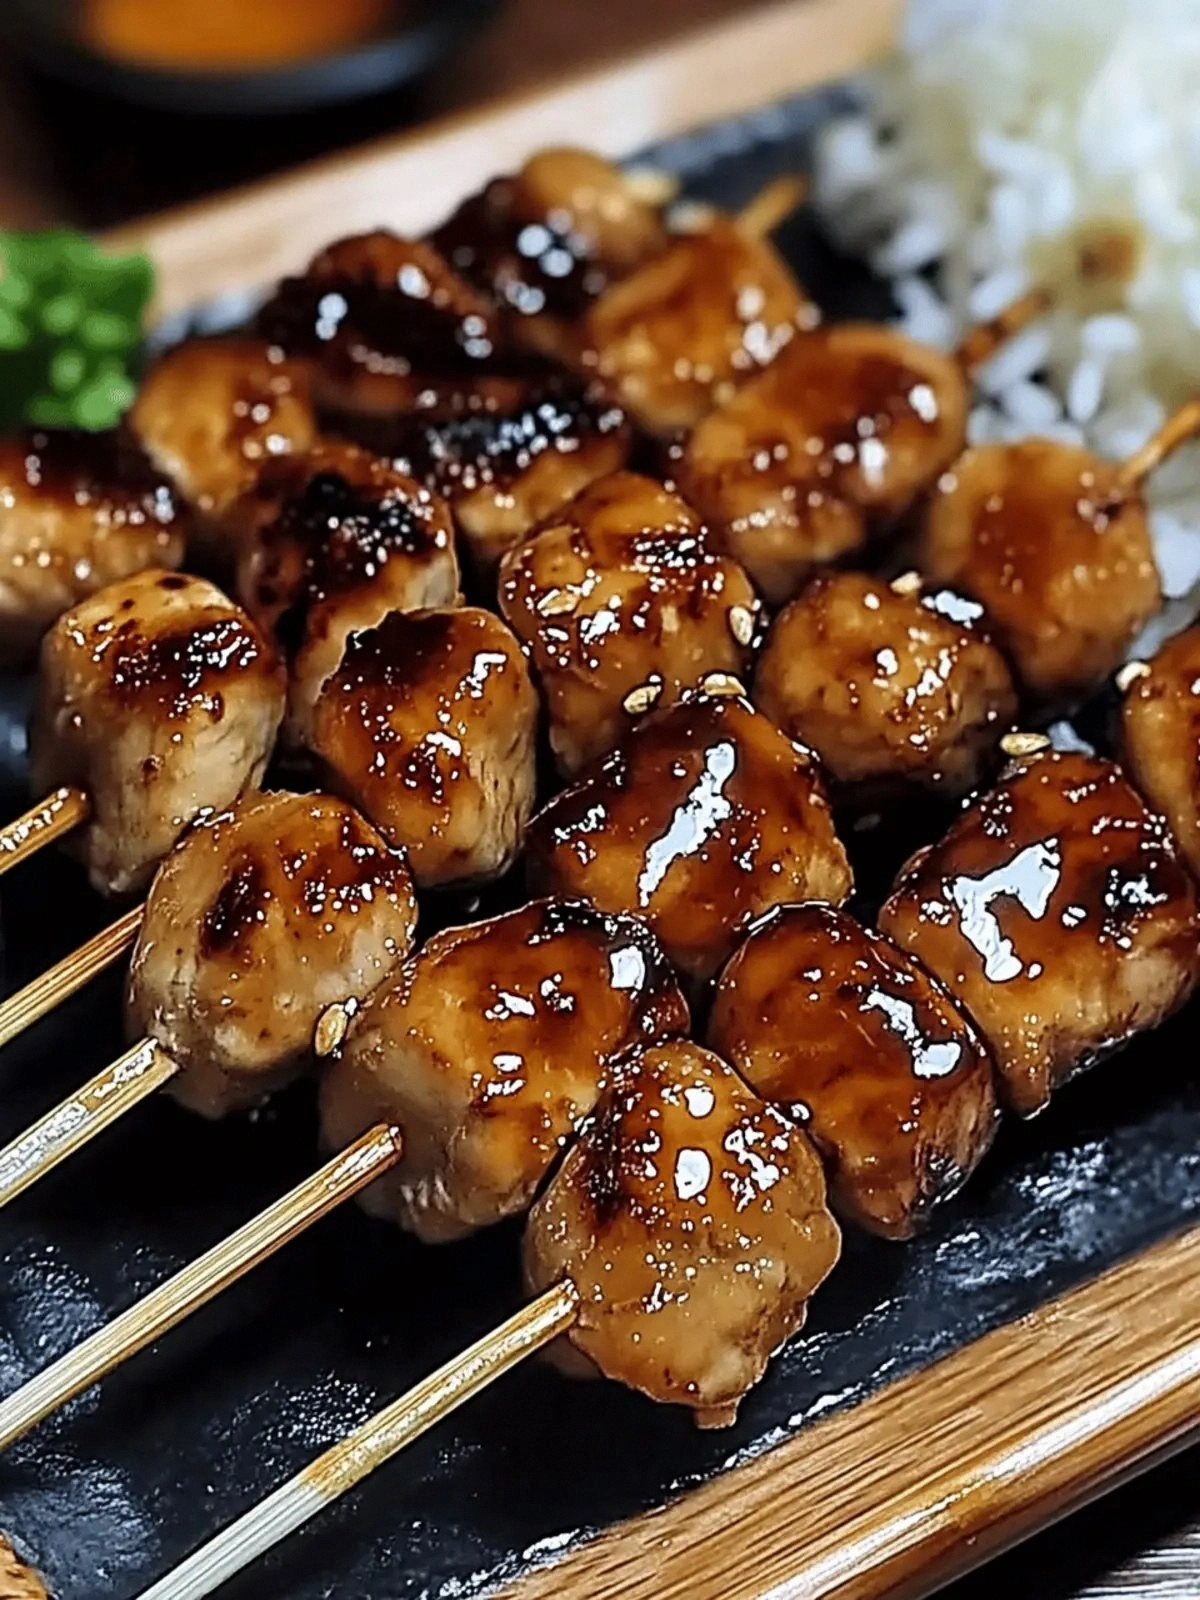
- Serve the Yakitori immediately, garnished with sesame seeds and a sprinkle of chopped scallions if desired. Pair them with steamed rice or a crisp salad for a balanced meal. The aroma will fill your kitchen, and the first bite will deliver a burst of sweet, salty, and umami flavors.
- That sizzle when it hits the pan? Absolute perfection. The moment the glaze caramelizes, the flavor is at its peak. The glossy finish glistens like a mirror, and the aroma is irresistible. The taste is a harmonious blend of sweet, salty, and umami, with a subtle heat from the pepper. This is the moment you’ll want to savor every bite.
That's it — you did it. But hold on, I've got a few more tricks that'll take this to another level. The next section will dive into insider tips that will help you achieve flawless results every time. These are the subtle nuances that separate a good Yakitori from a legendary one.
Insider Tricks for Flawless Results
The Temperature Rule Nobody Follows
Many people think a high heat is the key to a good char, but the secret lies in maintaining a steady medium heat. A temperature that’s too hot will burn the glaze before the chicken cooks through, leaving a bitter aftertaste. Aim for around 350°F (175°C) and adjust as needed. This ensures the chicken stays juicy while the glaze caramelizes beautifully. Keep a thermometer handy to monitor the grill temperature.
Why Your Nose Knows Best
Your sense of smell is a powerful tool when cooking. The first whiff of the simmering glaze will tell you if the sauce is too sweet or too salty. If the aroma is overpowering, add a splash of water or a pinch of salt. The subtle changes you make based on scent will elevate the flavor profile. Trust your nose; it’s the best judge of seasoning.
The 5-Minute Rest That Changes Everything
After grilling, let the skewers rest for five minutes. This short pause allows the juices to redistribute, preventing them from spilling out when you bite. It also gives the glaze time to set, resulting in a glossy finish that’s easier to eat. Many cooks skip this step, but the difference is noticeable. The rest period is a small investment for a big payoff.
Don’t Skew the Skewers
Use wooden skewers soaked in water for at least 30 minutes before grilling. This prevents them from burning and adds a subtle woody aroma to the dish. If you prefer metal skewers, keep an eye on them, as they can scorch the chicken. The right skewer choice can make a subtle but important difference in the final taste.
The Basting Rhythm
Baste the chicken every minute while it’s on the grill. This rhythm keeps the glaze moist and prevents it from drying out. The constant moisture helps the glaze caramelize evenly, creating a beautiful sheen. A quick dip in the glaze after each turn ensures a consistent flavor.
The Final Glaze Touch
Right before serving, drizzle a tiny amount of sesame oil over the skewers for an extra layer of flavor. The oil adds a nutty aroma that complements the sweet glaze. It also gives the skewers a glossy sheen that’s visually appealing. This final touch is a simple way to elevate the dish.
Creative Twists and Variations
This recipe is a playground. Here are some of my favorite ways to switch things up:
Spicy Sriracha Yakitori
Add a tablespoon of sriracha to the glaze for a fiery kick. The heat balances the sweetness and adds a smoky undertone. Serve with a side of cooling cucumber salad to cut the spice. The contrast makes each bite refreshing.
Thai Coconut Yakitori
Replace the mirin with coconut milk for a tropical twist. The coconut adds a creamy sweetness that pairs beautifully with the savory glaze. Garnish with fresh cilantro and lime zest for an extra burst of flavor. This version feels like a beach vacation on a plate.
Balsamic Glazed Yakitori
Swap the vinegar for balsamic for a richer, fruitier tang. The balsamic caramelizes into a deep, glossy sauce that’s almost dessert‑like. Pair with roasted vegetables for a hearty meal. The depth of flavor is unmistakable.
Herb‑Infused Yakitori
Add a handful of fresh herbs like thyme or rosemary to the glaze. The herbs infuse the sauce with aromatic notes that elevate the dish. The result is a fragrant, herbaceous Yakitori that feels like a gourmet experience. Perfect for a dinner party.
Pineapple Sweet Yakitori
Incorporate diced pineapple into the glaze for a tropical sweetness. The pineapple adds juiciness and a subtle tartness that balances the glaze. Serve over rice or with a side of mango salsa. The combination is a tropical paradise in every bite.
Vegetarian Yakitori
Swap the chicken for tofu or tempeh for a plant‑based version. Marinate the protein in the glaze for 30 minutes before grilling. The tofu absorbs the flavors beautifully, creating a savory, satisfying bite. This version is just as delicious as the original.
Storing and Bringing It Back to Life
Fridge Storage
Store leftover Yakitori in an airtight container in the refrigerator for up to 3 days. Keep the glaze separate if you plan to reheat the skewers, as the glaze can become thick. When ready to eat, reheat the skewers in a skillet over medium heat, adding a splash of water to loosen the glaze. The result is a tender, juicy bite that tastes almost fresh.
Freezer Friendly
Freeze the skewers in a single layer on a baking sheet before transferring them to a freezer bag. They’ll stay good for up to 2 months. Thaw overnight in the refrigerator before reheating. Reheat in a skillet or microwave, adding a splash of water to keep the glaze moist. The texture remains pleasantly juicy.
Best Reheating Method
The best way to reheat Yakitori is in a skillet over medium heat, adding a small amount of water or broth to create steam. This method helps the glaze stay glossy and prevents the chicken from drying out. Reheat for 2-3 minutes per side, or until the internal temperature reaches 165°F (74°C). The result is a dish that tastes almost as good as freshly grilled.