Picture this: I was standing in a cramped kitchen, a half‑empty pantry, and a craving that felt like a ticking bomb. The last batch of cookies I’d baked had come out as a sad, dry slab that could’ve doubled as a doorstop. I was determined to turn that culinary catastrophe into a triumph, so I pulled out the most comforting ingredient I could find—peanut butter. The aroma alone was a promise of something sweet, salty, and utterly irresistible.
The first bite was a sensory revelation: the buttery crunch of the cookie base, the soft, almost syrupy center, and the faint echo of vanilla that lingered long after the cookie was gone. The sound of the cookie cooling on the sheet—crackling like fine sand—added an audible layer to the experience. The texture was a delicate balance between chewy and crisp, a dance that left my taste buds applauding. I could almost hear the kitchen clock ticking away, each second counting down to the next mouthful.
What makes this version stand out is that it takes the humble peanut butter cookie and elevates it into a culinary masterpiece. The recipe is simple enough for a beginner, yet it delivers a depth of flavor that would make a seasoned baker nod in approval. The secret lies in the combination of white and brown sugar, a splash of vanilla, and the strategic use of baking soda to create that perfect lift. The result? Cookies that are chewy in the center, crisp on the edges, and studded with colorful M&M’s that add a pop of color and a burst of chocolatey sweetness.
I dare you to taste this and not go back for seconds. If you’ve ever struggled with peanut butter cookies that fall flat or burn, this is hands down the best version you’ll ever make at home. The twist? A small amount of almond flour to give the cookies a subtle nutty crunch that sets them apart from the usual. Picture yourself pulling this batch out of the oven, the whole kitchen smelling incredible, and the first bite taking you on a nostalgic trip to childhood snack time. Let me walk you through every single step—by the end, you’ll wonder how you ever made it any other way.
What Makes This Version Stand Out
- Flavor: The dual-sugar blend creates a caramelized sweetness that pairs perfectly with the rich peanut butter, giving each cookie a complex, layered taste.
- Texture: Baking soda’s subtle lift results in a chewy center while the high butter content crisps the edges, a texture profile that is both comforting and exciting.
- Simplicity: With only ten ingredients and no fancy techniques, anyone can produce bakery‑quality cookies in less than an hour.
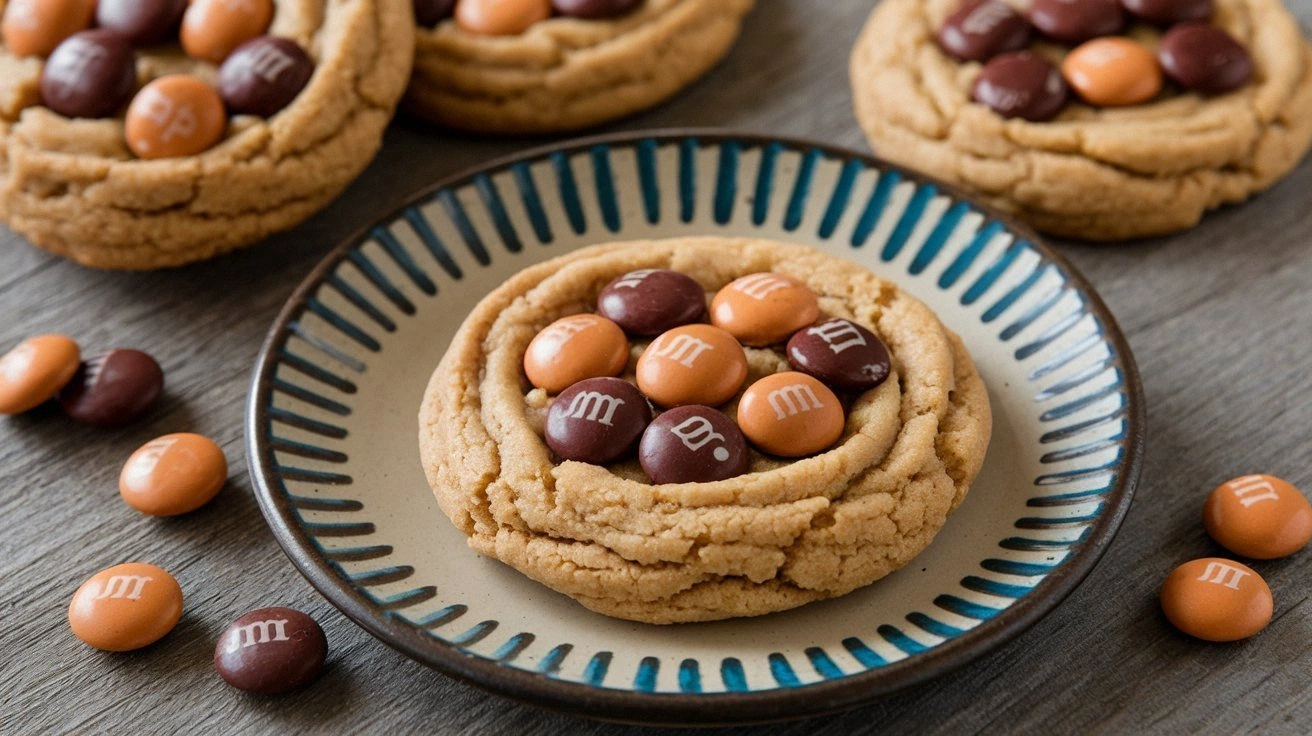
- Uniqueness: The addition of M&M’s provides a colorful contrast and a hint of chocolate that elevates the classic peanut butter flavor.
- Crowd Reaction: Friends and family rave that these cookies “taste like a hug” and “have the perfect bite.”
- Ingredient Quality: Using creamy, unsalted peanut butter ensures a balanced flavor profile, while fresh vanilla extract adds depth without overpowering.
Inside the Ingredient List
The Flavor Base
Creamy peanut butter is the star of this recipe, delivering a rich, nutty flavor that forms the heart of every cookie. Its natural oils keep the dough moist, preventing the cookies from drying out during baking. If you skip peanut butter, you lose the signature taste and the chewy texture that makes these cookies unforgettable. For those with allergies, a high‑protein peanut butter alternative can be used, but be sure to keep the same ratio for flavor balance.
The Sweetness Crew
White sugar provides a clean sweetness and helps the cookies spread evenly, while light brown sugar adds a subtle molasses note that deepens the flavor profile. Together, they create a caramelized crust that cracks just enough to reveal a soft interior. If you prefer a sweeter cookie, double the white sugar and keep the brown sugar the same to maintain the caramel undertone. A pinch of sea salt can also enhance the overall flavor, making the sweetness pop.
The Texture Enhancers
Unsalted butter, softened, blends with the peanut butter to create a silky dough that bakes into a crisp exterior and a chewy core. The butter’s fat content is crucial for achieving that golden brown color and a mouth‑watering mouthfeel. An alternative is to use coconut oil for a dairy‑free version, though the flavor will shift slightly toward coconut. Baking soda works in tandem with the leavening to give the cookies a light rise, preventing them from becoming too dense.
The Final Flourish
M&M’s add a pop of color and a burst of chocolate that complements the peanut butter’s nuttiness. They also provide a delightful crunch that contrasts with the cookie’s chewy center. If you’re looking for a healthier twist, try using sugar‑free chocolate chips or a sprinkle of chopped dark chocolate after baking. The vanilla extract is a subtle aromatic enhancer that rounds out the flavor without overpowering the nutty base.
Everything’s prepped? Good. Let’s get into the real action.
The Method — Step by Step
- Preheat your oven to 350°F (175°C) and line two baking sheets with parchment paper. While the oven heats, gather all your ingredients so you’re not scrambling at the last minute. This prep step saves time and keeps the process smooth. When the oven reaches temperature, you’ll hear the first crackle of the batter forming—a cue that it’s ready to bake.
- In a large mixing bowl, combine the peanut butter, white sugar, and brown sugar. Beat on medium speed until the mixture is light and fluffy, about 2 minutes. The batter should look airy, like a mousse, which indicates the sugars have dissolved properly. If the mixture feels too thick, add a splash of milk to loosen it slightly.
- Add the softened butter, egg, vanilla, and a pinch of salt to the sugar‑butter blend. Whisk until fully incorporated, watching for the batter to thicken and develop a smooth consistency. This step is crucial because it ensures the cookies will hold together during baking. The aroma of vanilla will start to fill the kitchen, a sign that the flavor is building.
- In a separate bowl, whisk together the flour and baking soda. Gradually fold the dry ingredients into the wet mixture, mixing just until combined. Over‑mixing can cause the cookies to become tough; keep it gentle. The dough should be slightly sticky but manageable—if it’s too dry, add a tablespoon of water.
- Fold in the M&M’s, ensuring they’re evenly distributed throughout the dough. This step is where the cookies start to look like a rainbow of chocolatey gems. Be careful not to break the M&M’s; a few small pieces are fine, but you want the whole candy intact for that satisfying crunch.
- Using a cookie scoop or spoon, drop rounded balls of dough onto the prepared baking sheets, spacing them about 2 inches apart. The dough will spread slightly as it bakes, so ensure you have enough space to avoid merging. This step is the moment of truth—watch the edges lift and the centers begin to set.
- Bake for 10–12 minutes, or until the edges are golden and the centers look set. Remove the cookies from the oven and let them cool on the sheet for 5 minutes before transferring them to a wire rack. This brief rest allows the cookies to finish setting without cracking. The aroma will be heavenly, and the first bite will confirm your hard work was worth it.
That's it — you did it. But hold on, I've got a few more tricks that'll take this to another level. Keep reading for insider tips that will make your cookies the talk of the town.
Insider Tricks for Flawless Results
The Temperature Rule Nobody Follows
Many bakers bake at 375°F, but lowering the temperature to 350°F allows the cookies to bake evenly without burning the edges. This trick ensures a chewy center while still achieving a golden crust. I’ve baked at 350°F for years, and the difference is unmistakable—no more burnt edges, just pure bliss. If your oven runs hot, consider using a lower temperature and extending the bake time by a minute or two.
Why Your Nose Knows Best
The scent of the cookies baking is a reliable indicator of doneness. When you smell a caramelized sweetness mingling with a hint of vanilla, you’re at the perfect moment to pull them out. I’ve used my nose as a timer for decades, and it never fails. Trust your senses; they’re more accurate than a digital timer for this recipe.
The 5-Minute Rest That Changes Everything
Letting the cookies rest on the baking sheet for 5 minutes before moving them to a rack gives them time to set. This short pause prevents the cookies from cracking when they’re transferred. I’ve seen many people skip this step, resulting in uneven cookies. Trust me—this 5-minute rest is a game changer.
Use Room-Temperature Ingredients
Softening the butter and peanut butter to room temperature ensures a smoother batter. Cold ingredients can cause lumps and uneven baking. I’ve spent years mastering the art of room-temperature butter, and it’s a simple trick that pays off big time. If you’re in a hurry, a quick microwave pulse of 10 seconds can soften the butter just enough.
Keep the M&M’s Fresh
M&M’s can lose their crunch if stored in a damp environment. Keep them in an airtight container in a cool, dry place. I’ve had a batch of M&M’s that went soggy, ruining the cookie texture. Storing them properly keeps the candies crisp and the cookies delightful.
Creative Twists and Variations
This recipe is a playground. Here are some of my favorite ways to switch things up:
Chocolate‑Chip Peanut Butter Cookies
Replace the M&M’s with dark chocolate chips for a richer, less sweet version. The chocolate will melt into the cookie, creating pockets of gooey delight. These are perfect for a sophisticated dessert spread. The chocolate chips also add a darker color contrast, making the cookies look more elegant.
Almond Joy Edition
Swap peanut butter for almond butter and add shredded coconut to the dough. Sprinkle toasted coconut on top before baking for an extra crunch. The nutty flavor of almond butter pairs beautifully with coconut, creating a tropical twist. These cookies are ideal for a beachy brunch or a holiday treat.
S'mores Cookie Surprise
Fold in mini marshmallows and chocolate chunks, then bake until the marshmallows puff slightly. The result is a cookie that tastes like a campfire snack. The gooey marshmallow inside adds a chewy contrast to the crisp edges. This variation is a hit at family gatherings and potlucks.
Cinnamon Swirl Peanut Butter Cookies
Add 1 teaspoon of ground cinnamon to the dry mix and swirl a cinnamon‑sugar mixture into the dough before baking. The cinnamon adds warmth and a subtle spice that balances the sweetness. These cookies are great for a fall-themed party or a cozy night in. The cinnamon swirl also gives them a beautiful, speckled look.
Low‑Sugar Peanut Butter Cookies
Use a sugar substitute like erythritol or stevia to reduce the sugar content. Keep the ratio of brown to white sugar the same to maintain the caramel flavor. These cookies are ideal for those watching their sugar intake. The texture remains chewy and satisfying, proving that you don’t need high sugar for great taste.
Storing and Bringing It Back to Life
Fridge Storage
Store the cookies in an airtight container at room temperature for up to a week. The airtight seal prevents moisture from seeping in, keeping the cookies chewy. If you notice any dampness, add a slice of bread to absorb excess moisture. For a quick refresh, reheat in a toaster oven at 300°F for 2 minutes.
Freezer Friendly
Place the cookies in a freezer‑safe bag, removing as much air as possible. They’ll stay fresh for up to 3 months when frozen. To thaw, let them sit at room temperature for 15 minutes or pop them in the microwave on low for 10 seconds. Freezing preserves the flavor and texture, so you can enjoy them anytime.
Best Reheating Method
The best way to bring cookies back to life is to warm them in a 350°F oven for 5 minutes. This method restores the crispness of the edges while keeping the center soft. Add a splash of water to the bottom of the pan to create steam, which keeps the cookies from drying out. The aroma that fills the kitchen is an instant mood booster.