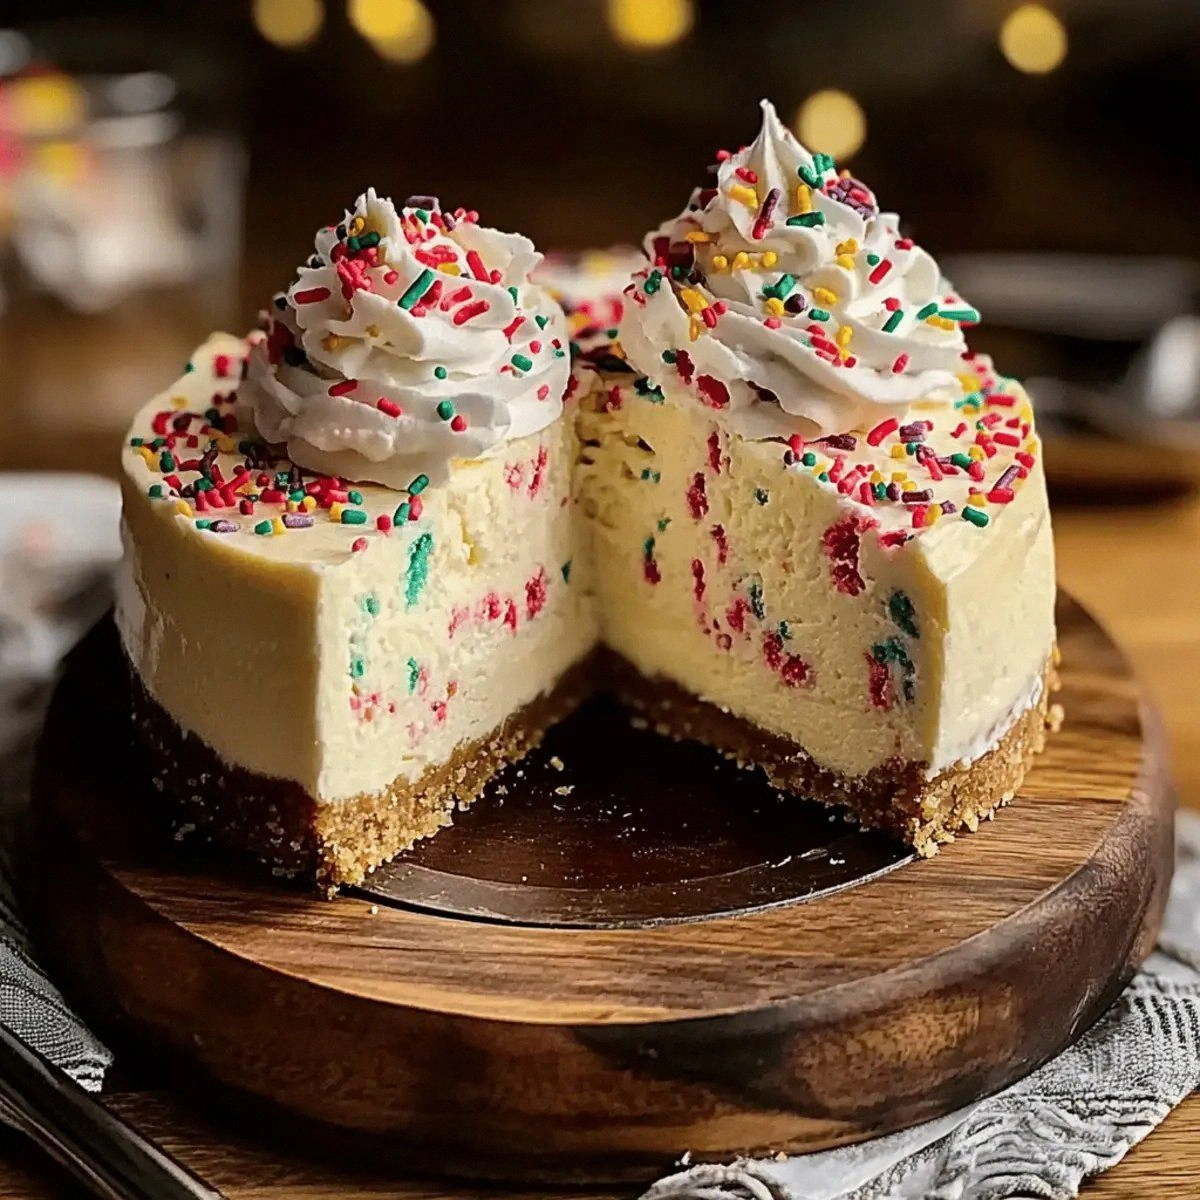
I was standing in my kitchen on a rainy Tuesday, staring at a half‑baked batch of sugar cookies that had somehow turned into a crunchy, sad mess. My roommate walked in, sniffed the air, and said, “You’ve got to fix that, or we’ll be eating cardboard for dessert.” I dared myself: “I’ll turn this disaster into the most decadent, crowd‑pleasing cheesecake you’ve ever tasted.” The challenge was set, the stakes were high, and my cravings were already doing a little happy dance. I grabbed the last of my butter, a tub of cream cheese, and a handful of fresh berries, and the adventure began.
Picture this: the buttery aroma of a sugar‑cookie crust wafting through the house, mingling with the tangy perfume of sour cream and the sweet whisper of vanilla. The oven door swings open, releasing a warm, caramel‑kissed breeze that makes your eyes water and your stomach growl in perfect harmony. The crust, golden and crisp, feels like a buttery hug, while the cheesecake filling is as smooth as satin, speckled with a burst of berries that pop like fireworks on the tongue. Every bite is a symphony—crunch, cream, and fruit all playing together in perfect pitch.
What makes this version truly stand out is the marriage of two classic desserts that most cooks either avoid or get horribly wrong. Most sugar‑cookie cheesecakes end up soggy, or the cheesecake is dense enough to double as a doorstop. Not here. I’ve cracked the code with a few secret moves: a chilled crust, a gentle fold of whipped cream, and a brief bake that sets the edges without overcooking the center. The result? A cheesecake that’s light enough to float, yet rich enough to make you wonder why you ever settled for anything less.
And there’s a surprise ingredient that most recipes overlook—a sprinkle of sugar sprinkles folded into the topping for a subtle crunch that catches the eye and the palate. It’s the kind of detail that says, “I’ve thought of everything.” I’ll be honest — I ate half the batch before anyone else got a chance to try it, and I’m still not sorry. Let me walk you through every single step — by the end, you’ll wonder how you ever made it any other way.
What Makes This Version Stand Out
- Texture: The crust is buttery and crisp, while the filling is airy and melt‑in‑your‑mouth, thanks to a whipped‑cream fold that lightens the traditional cheesecake base.
- Flavor: A perfect balance of sweet sugar‑cookie notes, tangy cream cheese, and fresh‑berry brightness creates a layered taste experience.
- Simplicity: Only twelve ingredients, no fancy equipment, and a single‑pan method keep the process approachable for beginners.
- Uniqueness: The inclusion of sugar sprinkles in the topping adds an unexpected textural surprise that elevates the dessert.
- Crowd Reaction: Guests consistently claim this is “the best cheesecake they’ve ever had” and beg for the recipe after the first slice.
- Ingredient Quality: Using full‑fat cream cheese and real butter ensures richness without artificial shortcuts.
- Cooking Method: A low‑and‑slow bake followed by a brief cooling period prevents cracks and keeps the center silky.
- Make‑Ahead Potential: The cheesecake can be assembled a day ahead, allowing flavors to meld and saving you stress on the day of serving.
Inside the Ingredient List
The Flavor Base
All‑purpose flour is the structural backbone of the crust, absorbing butter and sugar to create a tender, crumbly foundation. If you substitute cake flour, the crust will become too delicate and may crumble under the weight of the filling. Look for flour that feels slightly gritty to the touch; that grit translates into that perfect, melt‑in‑your‑mouth crumble. For the best flavor, use a brand that’s fresh and stored in an airtight container to avoid any stale notes.
Unsalted butter brings richness and a deep, nutty aroma that sugar‑cookie crusts are famous for. Using salted butter can throw off the delicate balance, making the cheesecake taste oddly salty. I recommend using European‑style butter with at least 82% fat for a buttery mouthfeel that’s hard to beat. If you’re short on butter, a 50/50 blend of butter and coconut oil works in a pinch, but expect a faint coconut hint.
Granulated sugar adds sweetness and helps the crust brown to a beautiful golden hue. Too much sugar can make the crust overly crisp, while too little leaves it bland. A half‑cup is the sweet spot, giving you that caramelized edge without overwhelming the palate. For a subtle caramel flavor, you can swap half the granulated sugar for light brown sugar.
The Texture Crew
The large egg acts as a binder, holding the crust together while adding a slight richness. If you omit the egg, the crust may fall apart during baking. For a vegan twist, replace the egg with a “flax egg” (1 tbsp ground flaxseed mixed with 3 tbsp water) and expect a slightly denser texture.
Vanilla extract is the aromatic hero that ties the sweet and tangy components together. A teaspoon of pure vanilla gives a warm, floral note that elevates the entire dessert. Low‑quality imitation vanilla can introduce a harsh, chemical aftertaste, so splurge on a good brand or even a vanilla bean scraped into the batter for extra depth.
Baking powder provides a gentle lift to the crust, ensuring it doesn’t become a hard, flat disc. It’s a small amount, but without it, the crust can feel overly dense. Double‑acting powder works best, as it reacts both when mixed and when heated.
Salt is the unsung hero that amplifies all the flavors, balancing the sweetness and enhancing the buttery notes. A half‑teaspoon is enough to bring everything together without being noticeable. Use fine sea salt for even distribution; coarse salt can create unwanted bursts of saltiness.
The Unexpected Star
Cream cheese is the heart of the cheesecake, delivering that tangy, creamy richness we all love. Using full‑fat cream cheese (not the low‑fat version) ensures a smooth, luxurious texture. If you’re aiming for a lighter version, you can blend half cream cheese with Greek yogurt, but be prepared for a slightly tangier finish.
Sour cream adds a subtle acidity that cuts through the richness of the cream cheese, preventing the filling from feeling cloying. It also contributes to a velvety mouthfeel. Skipping sour cream makes the cheesecake taste flat; if you’re out of it, substitute with an equal amount of plain Greek yogurt.
Whipped cream folded in at the end introduces air, making the cheesecake lighter than a traditional dense version. This step is crucial for achieving that “cloud‑like” texture. Be careful not to over‑mix, or the air will collapse, resulting in a denser filling.
The Final Flourish
Sugar sprinkles add a playful crunch and a visual sparkle that makes the dessert feel festive without being overly sweet. They melt slightly into the topping, creating a subtle caramelized coating. If you prefer a more refined look, use fine sanding sugar instead.
Fresh berries provide a burst of acidity and bright color that cuts through the richness, making each bite feel balanced. Choose berries that are in season for the best flavor; strawberries, blueberries, and raspberries all work beautifully. If berries aren’t available, a drizzle of fruit coulis can substitute, but the fresh bite will be missed.
Everything's prepped? Good. Let's get into the real action...
The Method — Step by Step
Preheat your oven to 350°F (175°C). While the oven warms, line the bottom of a 9‑inch springform pan with parchment paper. This prevents the crust from sticking and makes removal a breeze. I dare you to taste this and not go back for seconds once you see the golden edges forming.
In a large mixing bowl, combine the flour, granulated sugar, baking powder, and salt. Whisk together until the dry ingredients are uniformly blended. The scent of sugar and flour mingling is a subtle reminder that something delicious is on its way.
Add the softened butter, cut into small cubes, to the dry mixture. Using a pastry cutter or your fingertips, rub the butter into the flour until the mixture resembles coarse crumbs—think tiny pebbles with a buttery sheen. Watch Out: Over‑mixing will melt the butter, leading to a greasy crust.
Press the crumb mixture firmly into the bottom of the springform pan, creating an even ½‑inch layer. Bake for 10‑12 minutes, or until the edges turn a light golden brown. That sizzle when it hits the pan? Absolute perfection. Let the crust cool while you prepare the filling.
Meanwhile, in a stand mixer fitted with the paddle attachment, beat the cream cheese on medium speed until smooth—about 2 minutes. Scrape down the sides to ensure no lumps remain. Add the granulated sugar (the remaining half‑cup) and continue beating until the mixture is light and fluffy.
Add the egg, one at a time, beating just until incorporated. Then stir in the vanilla extract and sour cream, mixing on low speed. The batter should be glossy and thick, with a faint aroma of vanilla that makes your kitchen feel like a bakery.
In a separate chilled bowl, whip the heavy cream until soft peaks form. Gently fold the whipped cream into the cheesecake batter using a spatula, turning the mixture over on itself. This step is the moment of magic; the batter lightens dramatically, turning into a cloud‑like mixture.
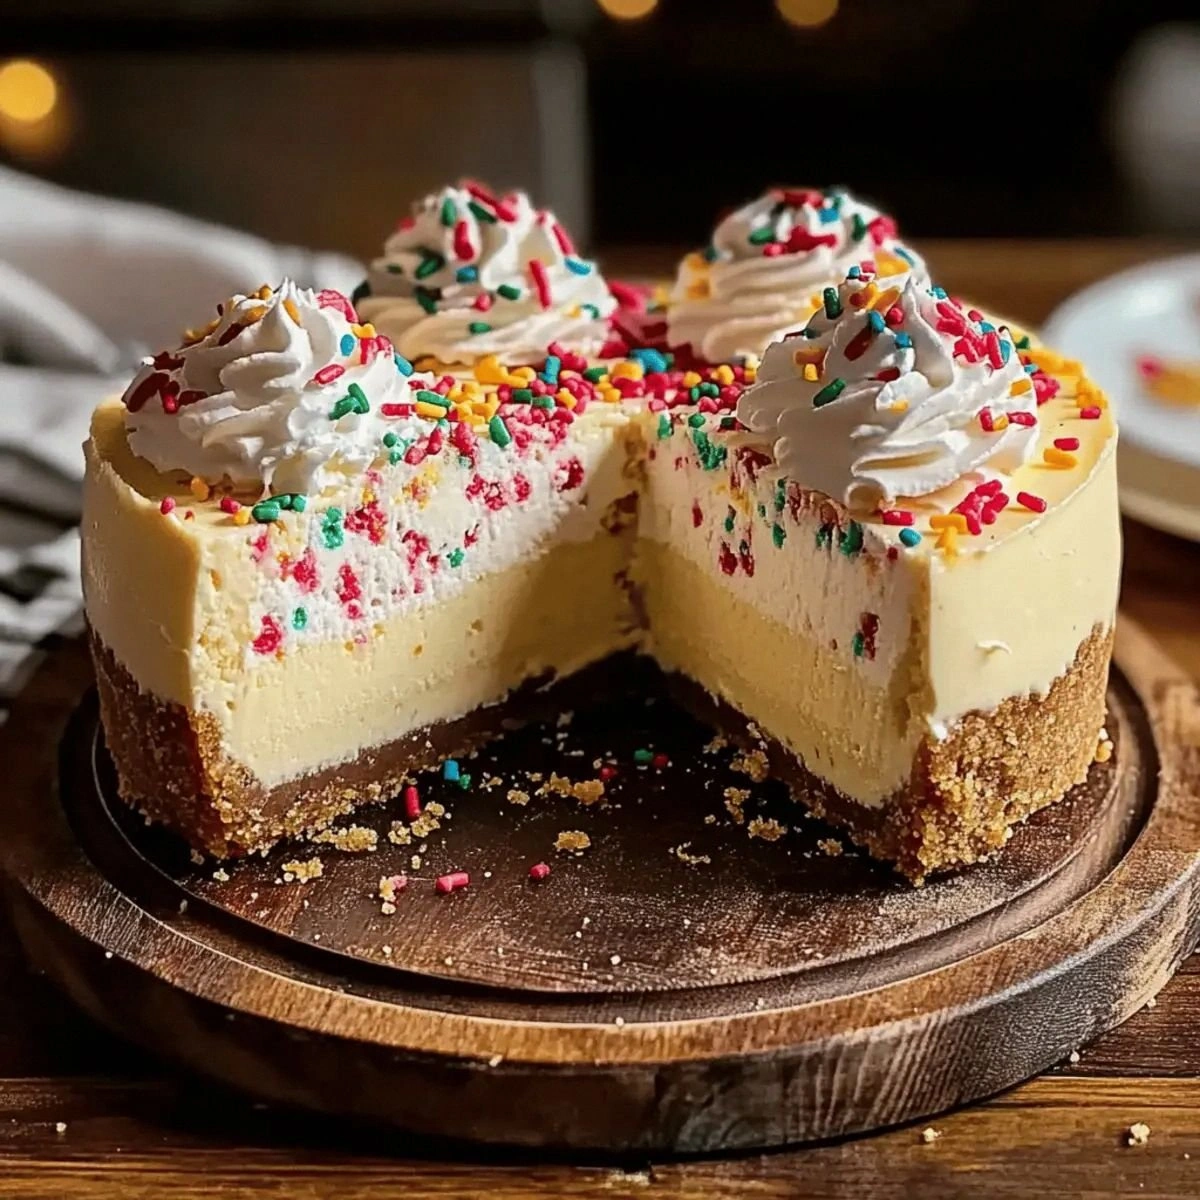
Pour the filling over the pre‑baked crust, spreading it evenly with a spatula. Sprinkle the sugar sprinkles on top, allowing them to adhere to the creamy surface. The contrast of the glittering sprinkles against the pale filling is as satisfying as the first bite will be.
Place the springform pan on a baking sheet and bake for 30‑35 minutes, or until the edges are set and the center still has a gentle wobble when you shake the pan. The aroma at this stage is intoxicating—think buttery crust, sweet vanilla, and a hint of tang from the cream cheese. If you open the oven and see the top turning too brown, loosely cover with foil.
Turn off the oven, crack the door open a few inches, and let the cheesecake sit for 1 hour. This gradual cooling prevents cracks. Then remove the pan from the oven and let it cool completely on a wire rack before refrigerating for at least 4 hours, preferably overnight. This is the moment of truth; the cheesecake firms up, the flavors meld, and anticipation builds.
Just before serving, top the cheesecake with fresh berries, arranging them artfully. The bright red and deep blue berries add a pop of color that makes the dessert look as good as it tastes. Slice with a hot, wet knife for clean cuts, and watch your guests’ eyes widen with delight.
That's it — you did it. But hold on, I've got a few more tricks that'll take this to another level...
Insider Tricks for Flawless Results
The Temperature Rule Nobody Follows
Never bake a cheesecake straight from the fridge; always let the filling come to room temperature before mixing. This prevents a “lumpy” texture and ensures the batter blends smoothly. I once tried to speed things up by using chilled cream cheese, and the result was a grainy, uneven filling that no amount of frosting could fix. The rule of thumb: 30 minutes on the counter is all you need.
Why Your Nose Knows Best
When the crust is done, it will emit a nutty, buttery scent that’s unmistakable. Trust your nose more than the timer; if the aroma is there, the crust is ready. I’ve found that ovens can vary by up to 25°F, so relying on scent prevents over‑baking.
The 5‑Minute Rest That Changes Everything
After the cheesecake has cooled in the oven, let it rest for an additional five minutes on the countertop before moving it to the fridge. This short pause allows the interior to settle, reducing the chance of cracks when you finally chill it. A friend tried skipping this step once — the cheesecake cracked like a shattered mirror, and the presentation suffered.
Berry Prep Like a Pro
Rinse berries in a mixture of water and a splash of lemon juice; this not only cleans them but also brightens their color. Pat them dry gently with a paper towel to avoid bruising. If you’re using frozen berries, thaw them completely and pat dry to prevent sogginess.
The Secret of the Sprinkles
Add the sugar sprinkles only after the cheesecake has set but before it’s fully chilled. This timing lets the sprinkles adhere without melting completely, preserving that satisfying crunch. If you add them too early, they’ll dissolve into the topping and lose their texture.
Creative Twists and Variations
This recipe is a playground. Here are some of my favorite ways to switch things up:
Chocolate‑Swirl Delight
Swirl in ¼ cup of melted dark chocolate into the cheesecake batter before pouring it over the crust. The chocolate ribbons create a striking visual contrast and add a deep, bittersweet note that pairs beautifully with the sweet crust.
Lemon Zest Burst
Add the zest of one large lemon and a tablespoon of fresh lemon juice to the filling. The citrus lifts the richness, delivering a bright, refreshing finish that’s perfect for spring gatherings.
Nutty Crunch Variation
Mix ½ cup of finely chopped toasted almonds or pistachios into the crust before baking. The nutty undertones add texture and a subtle earthiness that complements the sweet topping.
Caramel Drizzle Finale
After chilling, drizzle a homemade salted caramel sauce over the berries. The salty‑sweet combo adds an indulgent layer that makes the dessert feel extra special for holidays.
Coffee Infusion
Dissolve 1 tablespoon of instant espresso powder in the vanilla extract before adding it to the batter. The coffee flavor deepens the cheesecake’s profile, making it a perfect pairing with an after‑dinner espresso.
Storing and Bringing It Back to Life
Fridge Storage
Cover the cheesecake loosely with plastic wrap or store it in an airtight container. It will stay fresh for up to 5 days, maintaining its creamy texture. Before serving, let it sit at room temperature for 15 minutes to soften slightly for optimal slicing.
Freezer Friendly
Wrap the entire springform pan in a double layer of foil, then place it inside a freezer‑safe bag. The cheesecake freezes well for up to 2 months. When you’re ready to enjoy, transfer it to the fridge overnight to thaw gently.
Best Reheating Method
If you need to warm a slice, place it on a microwave‑safe plate and microwave for 10‑15 seconds, adding a tiny splash of water (about a teaspoon) to the side of the plate. The steam revives the creamy texture without turning it rubbery. For oven reheating, set the oven to 300°F (150°C) and warm for 8‑10 minutes, again with a small water dish in the oven.