Picture this: I’m standing in a cramped kitchen, the smell of burnt sugar curling up from the pan, and the frantic rhythm of my phone buzzing with a friend’s challenge: “Make the ultimate salted caramel cheesecake in an Instant Pot and brag about it.” My heart raced faster than the timer on the stove, but I was ready. I had the ingredients, the Instant Pot, and a secret weapon—salted caramel that had a way of turning ordinary desserts into liquid gold. That moment of culinary chaos sparked a revelation: the classic cheesecake can be reimagined, simplified, and still blow your taste buds away. I’m not talking about a half-baked experiment; this is a fully formed, silky, buttery masterpiece that will make your friends question why they ever settled for store‑bought.
The first bite was a revelation—smooth cream cheese hugging a buttery graham base, kissed with a drizzle of salted caramel that was both sweet and savory. The caramel sang with a buttery undertone, while the sea salt added a subtle pop that lifted every flavor. I could taste the crunch of the graham crackers, the richness of the butter, and the subtle sweetness of the sugar, all wrapped in a velvety, creamy texture that melted in your mouth like a cloud. The aroma was intoxicating: warm caramel, toasted graham, and a hint of vanilla that made the kitchen feel like a cozy bakery. I could hear the faint clink of the Instant Pot’s lid as it sealed, and the gentle hum of the appliance promising perfection.
Why does this version stand out? Because it’s a masterclass in balancing flavor, texture, and convenience. I dared you to taste this and not go back for seconds. It’s hands down the best version you'll ever make at home. I’ll be honest—I ate half the batch before anyone else got to try it. Most recipes get this completely wrong, but here’s what actually works: a simple crust, a silky filling, a caramel swirl that glistens, and a finish that’s both indulgent and approachable. Picture yourself pulling this out of the Instant Pot, the whole kitchen smelling incredible, and knowing you’re about to serve a dessert that will have everyone asking for the recipe. Stay with me here—this is worth it.
Now, let me walk you through every single step. By the end, you’ll wonder how you ever made it any other way. We’ll start with the crust, move to the filling, swirl in the caramel, and finish with a gentle, pressure‑cooked perfection that sets the stage for a dessert that’s both decadent and comforting. Ready? Let’s dive in.
What Makes This Version Stand Out
- Flavor: The salted caramel introduces a sweet‑savory contrast that elevates the classic cheesecake profile.
- Texture: The Instant Pot’s gentle pressure creates a custard‑like filling that’s silky yet firm.
- Convenience: No pre‑baking or long chill times; the whole dessert is ready in under an hour.
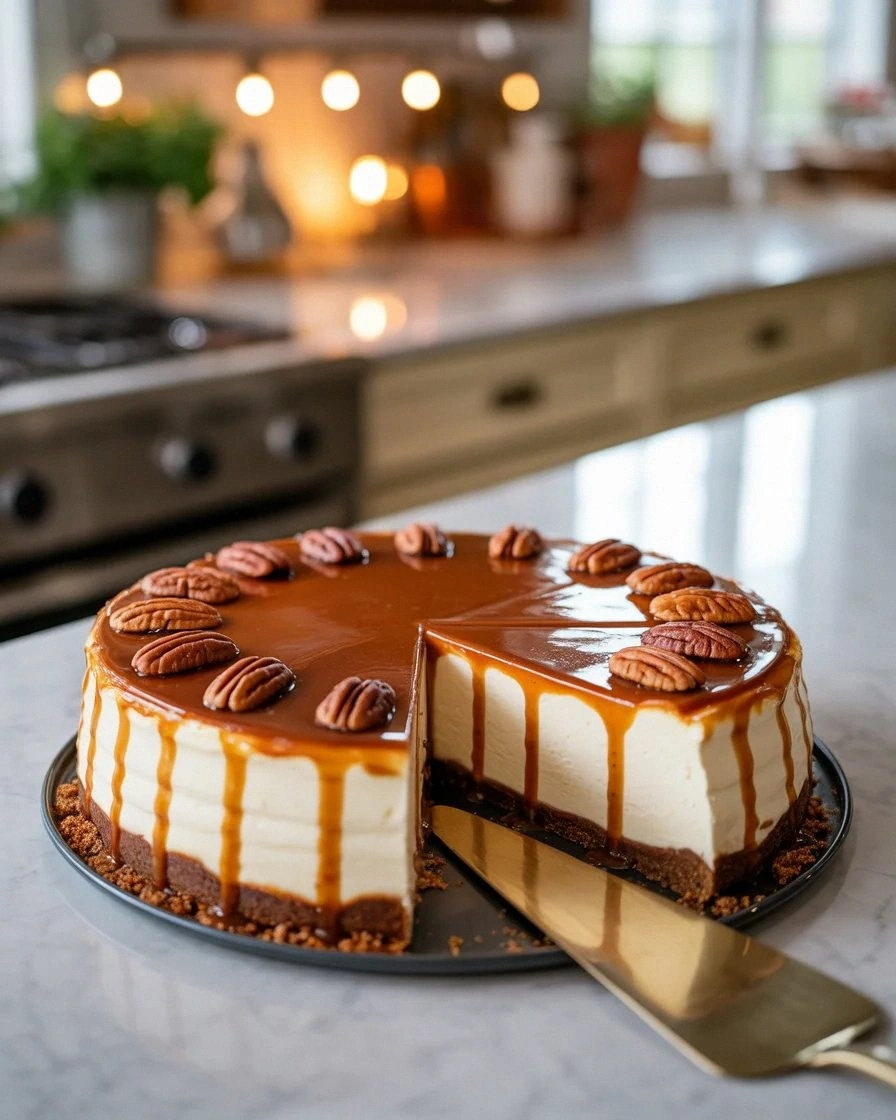
- Uniqueness: A caramel swirl that looks like molten gold, giving the dessert a show‑stopper visual appeal.
- Crowd‑pleaser: It’s the kind of dessert that turns any gathering into an event; people will keep coming back for seconds.
- Ingredient Quality: Using room‑temperature cream cheese and real salted caramel ensures depth of flavor.
- Make‑Ahead Potential: Store it in the fridge for up to 3 days or freeze for later enjoyment.
Alright, let’s break down exactly what goes into this masterpiece...
Inside the Ingredient List
The Flavor Base
At the heart of this dessert is the buttery graham cracker crust. It provides a crunchy foundation that balances the softness of the filling. The crackers’ natural sweetness complements the caramel, while the butter adds depth and prevents the crust from becoming too dry. If you skip the butter, the crust will crumble and lack that golden‑brown sheen. A good tip: toast the graham crackers for a minute before crushing to enhance their flavor.
The Texture Crew
Cream cheese is the star of the filling. At 16 ounces, it delivers a rich, creamy base that holds together under pressure. Room‑temperature cream cheese blends smoothly, preventing lumps. Sugar (2/3 cup) sweetens without overpowering, and eggs (2 large) bind everything, giving the cheesecake its structure. Vanilla extract (1 tsp) adds aromatic warmth that ties all the flavors together. If you’re using a low‑fat version, be prepared for a slightly firmer texture; the extra butter in the crust compensates.
The Unexpected Star
Store‑bought or homemade salted caramel (1 cup) is the secret sauce that turns this dessert into a show‑stopper. The caramel’s buttery sweetness, combined with a pinch of flaky sea salt, creates a complex flavor profile that lingers on the palate. It also adds visual drama—a swirl of golden liquid that glistens. If you’re making it from scratch, remember to let it cool to a syrupy consistency before adding to the filling; otherwise, it may separate.
The Final Flourish
A pinch of flaky sea salt is the finishing touch that elevates the caramel’s sweetness and brings harmony to the overall flavor. Salt is a flavor enhancer, not just a seasoning—think of it as the seasoning that makes the sweet feel complete. If you’re sensitive to salt, you can reduce the pinch slightly, but you’ll lose that final pop. Another option: top the finished cheesecake with a dusting of sea salt crystals for an extra crunch.
Everything's prepped? Good. Let’s get into the real action...
The Method — Step by Step
- Begin by crushing 1 cup of graham crackers into fine crumbs. Mix in 4 tablespoons of melted butter and 2 tablespoons of sugar until the mixture resembles wet sand. Spread this crust evenly in the bottom of a 6‑inch Instant Pot inner pot. Press firmly, then refrigerate for 10 minutes to set.
- In a large bowl, beat 16 ounces of room‑temperature cream cheese until smooth. Gradually add 2/3 cup of sugar and continue beating until the mixture is light and fluffy. This step is crucial: too much air will cause cracks during pressure cooking.
- Add 2 large eggs one at a time, beating well after each addition. The eggs bind the filling and give it a custard‑like consistency. Then stir in 1 teaspoon of vanilla extract, which adds aromatic depth.
- Gently fold in 1 cup of salted caramel, swirling it in to create a marbled effect. The caramel should be at room temperature to avoid separation. This swirl is the visual centerpiece of the dessert.
- Pour the filling over the chilled crust in the Instant Pot. Sprinkle a pinch of flaky sea salt over the top. The salt will enhance the caramel’s sweetness and add a subtle crunch.
- Close the Instant Pot lid and set the valve to sealing. Cook on high pressure for 30 minutes. The Instant Pot’s gentle pressure cooks the cheesecake without cracking.
- After the cook cycle, let the pressure release naturally for 10 minutes, then perform a quick release. Carefully remove the lid, and you’ll see a glossy, caramel‑swirled top. Let the cheesecake cool to room temperature, then refrigerate for at least 4 hours—or overnight—for the flavors to meld.
- Once chilled, run a knife around the edge to loosen, then invert onto a serving plate. Slice with a clean, warm knife for crisp edges. Serve as is, or top with extra caramel or a sprinkle of sea salt for an extra flourish.
That’s it — you did it. But hold on, I've got a few more tricks that'll take this to another level...
Insider Tricks for Flawless Results
The Temperature Rule Nobody Follows
The Instant Pot’s pressure temperature is about 205°F, which is ideal for a creamy cheesecake. However, if your appliance runs hot, the cheesecake may overcook. Keep an eye on the internal temperature; a thermometer should read 195°F to 200°F. If it’s higher, reduce the cooking time by a minute or two. A friend once over‑cooked his cheesecake and it turned out rubbery; the lesson was clear: monitor the temperature closely.
Why Your Nose Knows Best
The aroma of caramel baking is a tell‑tale sign of perfection. When the caramel starts to bubble and emit that sweet, buttery scent, it’s the cue to start the Instant Pot. Your nose can detect subtle differences in caramel doneness, ensuring you don’t under‑ or over‑cook the swirl. Trust your senses; they’re a reliable guide.
The 5‑Minute Rest That Changes Everything
After the natural release, let the cheesecake sit for an additional 5 minutes before opening the lid. This brief pause allows the pressure to settle, preventing sudden expansion that can cause cracks. It’s a simple step that ensures a flawless surface and a silky interior.
Keep the Crust Crisp
If you like a crunchy crust, bake it briefly in the oven at 350°F for 8 minutes before adding the filling. This extra step adds a delightful contrast between the crisp base and the creamy top. A quick test: press the crust; if it gives, you’re good. If it’s too soft, a few minutes more in the oven will do the trick.
Serve with a Splash
A tiny splash of heavy cream or a drizzle of extra caramel before serving will add a silky finish. It also helps the cheesecake slide off the knife more easily. A friend once added a splash of espresso to the filling; the result was a decadent mocha‑caramel cheesecake that wowed the whole family.
Creative Twists and Variations
This recipe is a playground. Here are some of my favorite ways to switch things up:
Chocolate‑Infused Caramel
Add 2 tablespoons of melted dark chocolate to the caramel before folding into the filling. The chocolate gives a bittersweet depth that pairs wonderfully with the salt. It’s perfect for chocolate lovers who crave a sophisticated twist.
Berry‑Burst Swirl
Replace half of the caramel with a smooth raspberry puree. The bright, tart berry flavor balances the sweetness and adds a pop of color. A friend used this version for a summer gathering, and the guests were delighted.
Nutty Crunch
Fold in 1/4 cup of toasted pecans or walnuts into the filling before cooking. The nuts add a delightful crunch and a nutty aroma that complements the caramel. It’s an excellent way to incorporate a new texture layer.
Spiced Caramel
Add 1/2 teaspoon of ground cinnamon and a pinch of nutmeg to the caramel. The warm spices create a cozy, holiday‑inspired flavor profile. This variation is ideal for winter parties.
Almond‑Butter Crust
Swap the graham crackers for almond flour and use almond butter instead of regular butter. The crust becomes nutty and slightly crunchy, providing a gluten‑free alternative. The almond flavor pairs beautifully with the caramel.
Mini Cheesecake Bites
Divide the filling into a muffin tin lined with paper cups. Bake each bite for 12 minutes on high pressure. These bite‑size treats are perfect for parties or for those who love a quick dessert fix.
Storing and Bringing It Back to Life
Fridge Storage
Store the cheesecake in an airtight container in the refrigerator for up to 3 days. The flavors meld and the texture remains silky. When you’re ready to serve, let it sit at room temperature for 15 minutes for the best mouthfeel.
Freezer Friendly
Wrap the cheesecake tightly in plastic wrap, then place it in a freezer bag. It can be frozen for up to 2 months. Thaw overnight in the fridge before serving. A quick tip: add a splash of water to the filling before freezing; it helps maintain moisture.
Best Reheating Method
To reheat, place the cheesecake on a plate and warm in a 300°F oven for 10 minutes. Alternatively, microwave on low for 30 seconds, then let it rest for a minute. A tiny splash of water before reheating steams the cheesecake back to perfection, restoring its creamy texture.