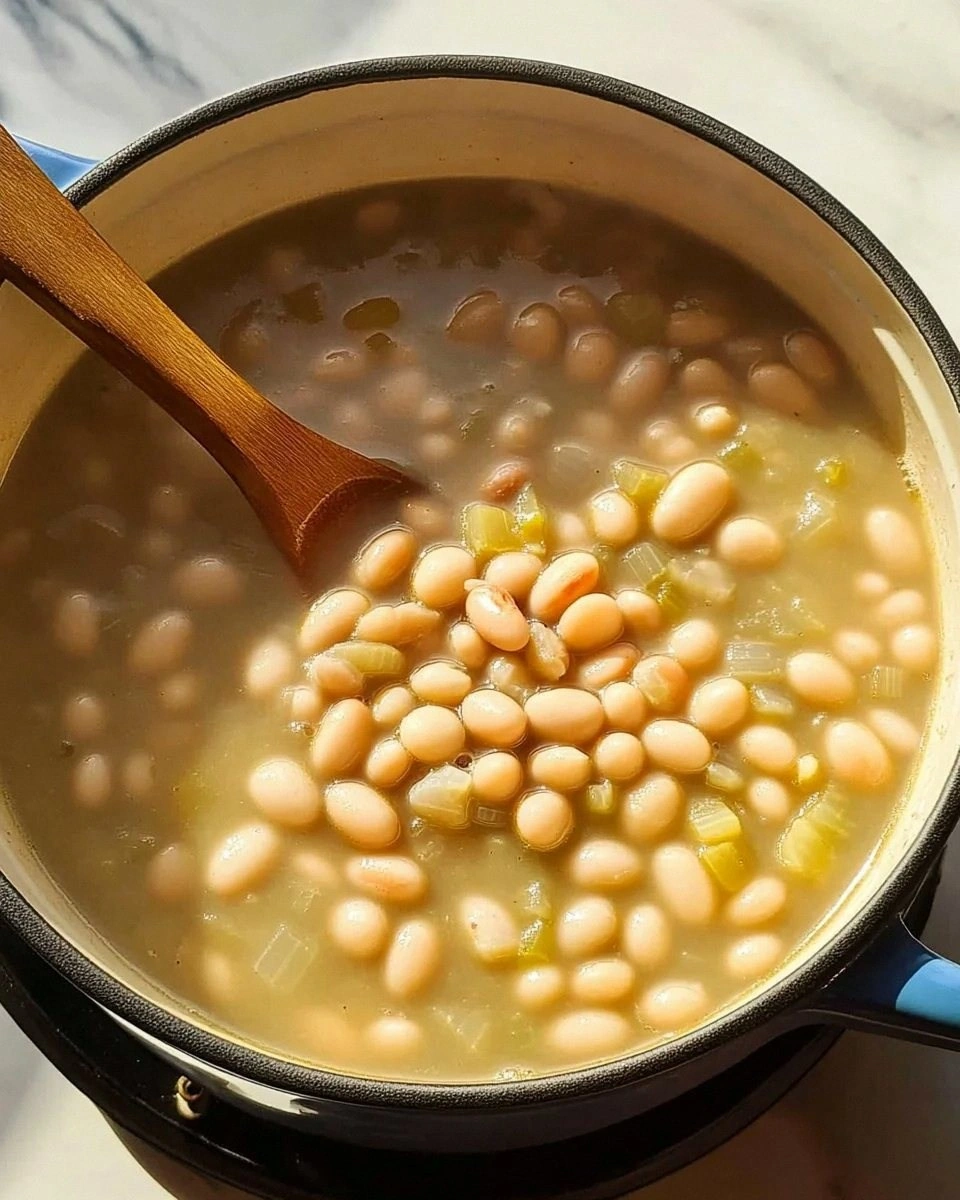
I still remember the day I ruined my first pot of navy bean soup so spectacularly that the neighbors called to check if something had died in my apartment. The beans had turned to gray mush, the ham hock tasted like salty cardboard, and the whole mess smelled like a wet sock that had been left in a gym bag for a month. I stood there with my wooden spoon, ready to swear off legumes forever, when my grandmother's voice echoed in my head: "Good soup is just patience wearing an apron." Fast forward through three years of obsessive testing, gallons of failed experiments, and one memorable incident involving a pressure cooker and my ceiling, and here we are. This navy bean soup doesn't just feed your stomach—it wraps around your soul like that perfect blanket that's been through the wash just enough times to be cloud-soft, but not so many times that it falls apart.
Picture this: it's Sunday afternoon, the kind of gray winter day where the sky looks like it's been rubbed with a dirty eraser. You've got Fleetwood Mac playing softly, a fire crackling, and this pot of liquid gold bubbling away on the stove. The aroma drifts through every room—earthy beans, smoky ham, sweet onions, and something else you can't quite name but know you've been craving since childhood. Every fifteen minutes, you lift the lid just to watch the transformation: hard little beans plumping into tender pearls, the broth shifting from thin and watery to rich and velvety, the ham falling apart in delicate shreds that make your mouth water. This isn't just dinner; it's time travel in a bowl.
Here's what makes this version absolutely lethal in the best possible way: we're not just throwing everything in a pot and hoping for the best. We're building layers of flavor like a symphony orchestra, each ingredient joining at exactly the right moment to create something that'll make you close your eyes with the first spoonful. The secret isn't fancy ingredients or complicated techniques—it's understanding that navy beans are basically little sponges that want to soak up every ounce of goodness you offer them. Treat them right, and they'll reward you with a soup so luxuriously creamy, so deeply satisfying, that you'll find yourself making excuses to stay home and "check on the pot" every twenty minutes.
Let me walk you through every single step — by the end, you'll wonder how you ever made it any other way.
What Makes This Version Stand Out
Depth Charge: Most recipes treat navy beans like background actors, but here they're the star of the show. We coax out their natural creaminess by starting them in cold, salted water and bringing them up slowly, which helps them cook evenly without exploding into mush. The result is beans that hold their shape but melt on your tongue like savory marshmallows.
Ham Hock Alchemy: Instead of tossing in a ham hock and forgetting about it, we render the fat first, creating crispy cracklings that get stirred back in at the end for textural contrast that'll make your spoon do a happy dance. The smoky, porky essence infuses every molecule of the broth without turning it into a salt lick.
The Soffritto Switch-Up: Traditional mirepoix gets a glow-up with fennel fronds and a whisper of fresh thyme. The fennel adds this incredible anise note that plays against the earthy beans like they were born to tango together. Your kitchen will smell like a Tuscan grandmother's kitchen, and your taste buds will write you thank-you notes.
Texture Wizardry: We blend just one cup of the finished soup and stir it back in, creating this silky mouthfeel that makes people think you added cream. Nope—just bean magic doing what bean magic does best. It's like giving your soup a cashmere sweater to wear.
Make-Ahead Champion: This soup actually improves overnight as the flavors mingle and deepen. Make a double batch on Sunday, and you've got lunches that'll make your coworkers weep with jealousy. It freezes like a dream, too—portion it into mason jars and you've got emergency comfort food for those days when adulting feels impossible.
Budget Hero Status: The whole pot costs less than a fancy coffee habit, yet feeds an army of hungry humans. We're talking about turning a dollar's worth of dried beans into something that tastes like it came from a restaurant with white tablecloths and impossible reservations.
One-Pot Wonder: Everything happens in a single Dutch oven, which means minimal dishes and maximum flavor development as all those gorgeous browned bits get scraped up and incorporated. Less time washing dishes means more time for important things, like eating this soup while wearing fuzzy socks.
Alright, let's break down exactly what goes into this masterpiece...
Inside the Ingredient List
The Foundation Crew
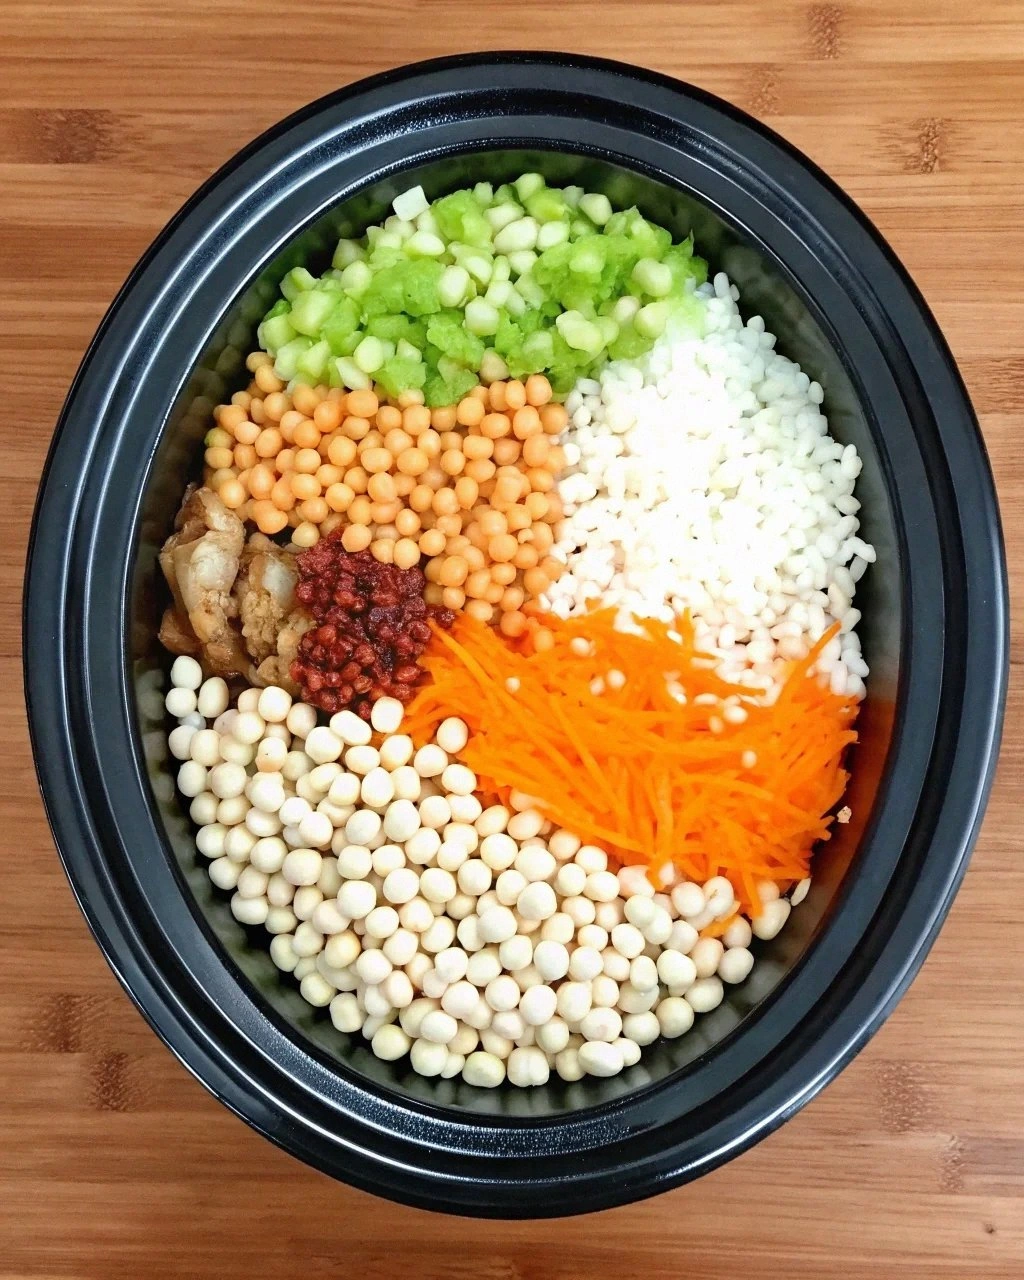
The dried navy beans are obviously the headliners here, but don't just grab any old bag from the dusty bottom shelf. Look for beans that are uniformly creamy white, with no dark spots or wrinkled skins—those are old and will take forever to cook. Fresh dried beans (yes, that's a thing) should feel smooth and almost waxy, not chalky. If you can only find sad-looking beans, that's okay; just add an extra hour to the soaking time and they'll still turn into something magical. And please, for the love of all that is holy, don't use canned beans here. They'll dissolve into sad, flavorless mush that'll break your heart and waste your ham hock.
Your ham hock should be meaty and well-marbled with fat—this isn't the time for lean and healthy. The fat is where all the flavor lives, and it'll render down into liquid gold that'll make your soup taste like it simmered for days instead of hours. If you can't find ham hocks, a smoked turkey wing works beautifully and adds a slightly different but equally addictive flavor profile. Just promise me you won't use one of those pre-diced ham steaks from the deli counter; they taste like salty sadness and will ruin everything they touch.
The Aromatic Army
Onion selection matters more than you'd think. A sweet Vidalia will give you a mellower, almost honeyed base, while a yellow onion brings more punch and attitude. I like to use one of each because I'm greedy and want all the flavors. Dice them small but not minuscule—you want to be able to see and taste the individual vegetables in the finished soup, but not feel like you're eating a stew of vegetable chunks.
Celery leaves are the secret weapon that most people throw away. Those frilly tops pack way more celery flavor than the stalks, plus they look gorgeous floating on top like little green confetti. Save the stalks for another recipe and use the leaves here; your future self will high-five you when you taste the difference. If your celery doesn't have leaves attached, that's a sign it's been traveling too long—find a better grocery store or farmers market.
The Flavor Bombs
Fresh thyme makes dried thyme taste like dusty cardboard that's been sitting in your spice cabinet since the Clinton administration. The little leaves will fall off the stems as they cook, creating these tiny explosions of herbaceous goodness in every bite. Don't bother stripping the leaves beforehand—just toss in the whole sprigs and fish out the stems later. The stems have flavor too, and we're not about wasting good taste around here.
Bay leaves are like that quiet friend who doesn't say much but somehow makes every gathering better. They add this subtle background note that you can't quite identify but would definitely miss if it disappeared. Use Turkish bay leaves if you can find them—they're milder and more complex than the harsh California variety. And yes, you really do need to remove them before serving. Nobody wants to play "who gets the crunchy leaf" at dinner.
The Unexpected Stars
A splash of apple cider vinegar at the end brightens everything up like turning on overhead lights after candlelight. It doesn't make the soup taste sour; it just makes all the other flavors pop and sing in harmony. Add it gradually and taste as you go—you want the soup to taste more alive, not like you accidentally spilled your salad dressing in it.
The fennel fronds are my favorite curveball here. They add this incredible freshness that cuts through the richness of the pork and beans, plus they make your kitchen smell like you're cooking in a Mediterranean seaside village. If you can't find fennel with the fronds attached, a teaspoon of fennel seeds lightly crushed will work, but it's not quite the same magic.
Everything's prepped? Good. Let's get into the real action...
The Method — Step by Step
- Start the night before by sorting through your beans like you're panning for gold. Spread them on a light-colored towel and pick out any stones, wrinkled beans, or ones that look like they've seen better days. Rinse them under cold water until it runs clear, then cover with cold water by two inches. Add a tablespoon of salt—yes, salt helps the beans cook more evenly by strengthening their skins so they don't explode. Let them soak overnight on the counter, not in the fridge. Room temperature soaking helps activate enzymes that break down complex sugars, which means less musical fruit effects later.
- The next morning, drain and rinse your now-plump beans. They should have nearly doubled in size and look like they're ready for their close-up. In your Dutch oven, cover them with fresh cold water by one inch, add a bay leaf, and bring to a gentle simmer. Here's the crucial part: don't let them boil like they're trying to escape. A gentle bubble-break every few seconds is perfect. Boiling makes the beans angry, and angry beans fall apart. Skim off any foam that rises—it's just protein and won't hurt you, but it makes the final soup look murky.
- While the beans are finding their happy place, score the skin of your ham hock in a crosshatch pattern. This helps the fat render out and creates more surface area for browning. Heat a dry skillet over medium heat and sear the ham hock on all sides until it's golden and the kitchen smells like a smokehouse. Don't rush this step—those caramelized bits are liquid flavor gold. Set the ham hock aside but don't you dare wash that skillet yet.
- Now we're building what's technically called a soffritto but I call "the reason your neighbors will start dropping by unexpectedly." In the same skillet with all those gorgeous ham drippings, add your diced onions, celery, and carrots. The vegetables will deglaze the pan, lifting up all those browned bits. Cook them slowly, stirring occasionally, until they're soft and starting to turn golden around the edges. This should take about 15 minutes—if you're tempted to crank up the heat, remember that good things come to those who wait and stir wine into their mouths while they cook.
- Clear a little space in the center of your vegetable mixture and add the minced garlic. Let it cook for about 30 seconds until it smells like you want to rub it on toast, then stir everything together. Add the thyme sprigs and another bay leaf. The herbs will start to perfume the oil, creating this incredible aroma that makes you understand why people in old movies faint from pleasure.
- By now your beans should be starting to soften around the edges but still have a firm center—think al dente pasta. They'll finish cooking with the ham hock, so don't worry if they're not completely tender yet. Add the seared ham hock to the pot, nestling it down into the beans like it's going to sleep. Pour in enough water to cover everything by about half an inch.
- This is where the magic happens. Bring everything to the gentlest simmer possible, cover with the lid slightly ajar, and let it bubble away for the next hour. Check every 20 minutes to make sure it's not drying out—add hot water if needed, but only enough to keep things barely submerged. The beans will finish cooking and start to release their starch, creating that luxurious creamy texture we're after.
- After an hour, remove the ham hock to a plate and let it cool enough to handle. Meanwhile, taste your beans—they should be tender but not mushy, with a creamy interior that makes you want to weep with joy. If they're still too firm, keep simmering and check every 15 minutes. Every batch of beans is different, and rushing this step is how you end up with gravel soup.
- Shred the meat from the ham hock, discarding the skin, bones, and excess fat. Chop the meat into bite-sized pieces—some will be soft and shreddy, some will be firmer, and that's perfect. Return all the meat to the pot along with any juices that collected on the plate. This is also when you add that splash of apple cider vinegar and taste for salt. Remember that the soup will taste slightly less salty once it cools, so err on the side of under-salting now.
- For the final flourish, remove about a cup of beans and broth and blend until smooth, then stir it back into the pot. This is like adding a natural cream sauce without any actual cream. Let everything simmer together for five more minutes to let the flavors marry, then serve hot with a shower of fresh parsley and maybe some crusty bread for sopping up every last drop of liquid gold.
That's it — you did it. But hold on, I've got a few more tricks that'll take this to another level...
Insider Tricks for Flawless Results
The Temperature Rule Nobody Follows
Here's the thing about bean soup: temperature discipline separates the amateurs from the legends. Once you've got everything simmering, you want to see one gentle bubble rise to the surface every 2-3 seconds. Any more vigorous and your beans will bounce around like they're at a rock concert, breaking apart and turning your soup into bean-flavored water. Too gentle and they'll just sit there, hard as pebbles, mocking your impatience. Get yourself a cheap infrared thermometer and aim for 190°F—it's the sweet spot where beans cook to creamy perfection without falling apart. I learned this after ruining three batches in a row because I thought "simmer" meant "barely moving." Turns out bean soup is like that friend who needs exactly the right amount of attention—not too clingy, not too distant.
Why Your Nose Knows Best
Forget timers—your nose is the most sophisticated piece of kitchen equipment you own. When the soup is ready, your house will smell like Sunday dinner at your grandmother's, even if your grandmother never cooked a day in her life. It's this incredible combination of smoky ham, sweet vegetables, and earthy beans that makes your mouth water before you even taste it. If you walk into the kitchen and don't immediately want to face-plant into the pot, keep cooking. The aromatics need time to develop and meld. A friend tried rushing this step once and ended up with soup that tasted like separate ingredients having an argument instead of a harmonious choir singing in perfect pitch.
The Five-Minute Rest That Changes Everything
After you turn off the heat, let the soup rest for exactly five minutes with the lid on. Not ten, not two—five. During this time, the beans absorb some of the broth back in, the temperature evens out, and the whole pot relaxes into itself like it's had a spa day. This is when the magic happens, when good soup becomes great soup. If you skip this step, you'll have soup that's hot on the edges and lukewarm in the middle, with beans that haven't quite decided if they're done yet. Trust me on this one—set a timer and walk away. Use those five minutes to slice bread or pour wine or just stare out the window and feel proud of what you've created.
The Salt Timing Secret
Salt is a fickle friend to beans. Add it too early and the bean skins will turn tough as leather, refusing to soften no matter how long you cook them. Add it too late and the soup tastes flat and lifeless, like someone forgot to turn the flavor on. The sweet spot is when the beans are about 75% done—tender around the edges but still slightly firm in the middle. At this point, salt actually helps the beans finish cooking evenly. I keep a little bowl of salt next to the stove and add it in pinches, tasting after each addition. The soup should taste like the ingredients are singing in harmony, not like you accidentally dumped in the entire salt shaker.
The Texture Test That Never Fails
Here's how to tell if your beans are perfectly cooked: blow on one. Seriously. Take a bean out of the pot, let it cool for a second, then blow on it. If the skin wrinkles and peels back slightly, revealing the creamy interior, you're golden. If it just sits there looking smug, keep cooking. If it falls apart completely, you've gone too far and need to stop immediately. This works because perfectly cooked beans have skins that are just taut enough to hold their shape but relaxed enough to respond to a gentle breeze. My grandmother taught me this trick, and she learned it from her grandmother, who probably learned it from someone who didn't have clocks or thermometers, just wisdom passed down through generations of bean-cooking excellence.
Creative Twists and Variations
This recipe is a playground. Here are some of my favorite ways to switch things up:
The Mediterranean Makeover
Swap the ham hock for a couple of anchovy fillets and a parmesan rind, add a can of diced tomatoes during the last 30 minutes, and finish with a handful of chopped fresh basil and a glug of good olive oil. Suddenly you're in a seaside village in Italy, where grandmothers argue about whose beans are creamier and everyone agrees that life is better when you eat soup slowly with crusty bread.
The Southwestern Smoke Show
Replace the ham hock with smoked turkey wings, add a diced chipotle pepper in adobo sauce, swap the thyme for oregano, and finish with lime juice and cilantro. Top with crispy tortilla strips and a dollop of sour cream. This version tastes like it should be served from a cast iron pot over a campfire while someone plays guitar and the stars come out one by one.
The French Farmhouse Fantasy
Use duck confit instead of ham hock, add a splash of white wine, throw in some herbes de Provence, and finish with a handful of fresh parsley and a drizzle of duck fat. It's rustic elegance in a bowl—like you're eating in a stone cottage where the table is made from reclaimed barn wood and the wine flows like water.
The Vegetarian Victory
Ditch the meat entirely and build your base with smoked paprika, mushroom powder, and a dash of liquid smoke. Add a sheet of kombu (dried seaweed) while the beans cook for incredible umami depth. Finish with a swirl of pesto and some crispy fried shallots. Even devoted carnivores won't miss the meat when they taste this deeply satisfying version.
The Spicy Winter Warmer
Add a ham hock plus a smoked ham bone if you can find one, throw in a ham steak during the last hour, and spike it with a pinch of cayenne and some black pepper. This is the soup you want when it's so cold outside that your breath freezes, when you need something that'll stick to your ribs like thermal underwear sticks to your legs.
The Summer Garden Party
Make the base soup in spring when beans are fresh, then during summer add fresh corn cut from the cob, cherry tomatoes, and zucchini. Finish with basil and a squeeze of lemon. It's like your garden decided to throw itself a party and everyone showed up wearing their brightest colors.
Storing and Bringing It Back to Life
Fridge Storage
Let the soup cool completely before storing—it should take about an hour on the counter, but don't leave it longer than two or you'll be hosting a bacteria convention. Transfer to airtight containers, leaving about an inch of space at the top because soup expands slightly as it chills. It'll keep for up to five days, though honestly, mine never lasts longer than three because people keep finding excuses to "just taste a spoonful" until suddenly the container is empty and someone's looking guilty. Store the soup without any fresh herbs or acid additions—add those when you reheat for maximum brightness.
Freezer Friendly
This soup freezes like a champion, but skip the dairy additions if you're planning to freeze. Cool completely, then portion into freezer bags laid flat—they'll stack like delicious bean pancakes and thaw much faster than blocks. Remove as much air as possible to prevent freezer burn, which is basically the arctic death of good soup. Label with the date and what it is, because three months from now "mystery brown soup" doesn't sound as appealing as "navy bean soup with ham, October 2024." Frozen soup keeps for up to six months, but let's be real—if you can keep this stuff around that long without eating it, you have more willpower than a monk.
Best Reheating Method
Thaw frozen soup overnight in the fridge, or use the defrost setting on your microwave if you're the kind of person who plans meals three minutes in advance. Reheat gently over medium-low heat, stirring occasionally and adding water or broth as needed because the beans will have absorbed most of the liquid. Bring just to a simmer—don't let it boil or you'll break the beans and turn your beautiful soup into bean paste. Add fresh herbs, acid, or dairy only after reheating. A splash of fresh lemon juice or vinegar right before serving brightens everything up and makes it taste like you just made it, not like you're eating leftovers while standing in front of the fridge in your pajamas.