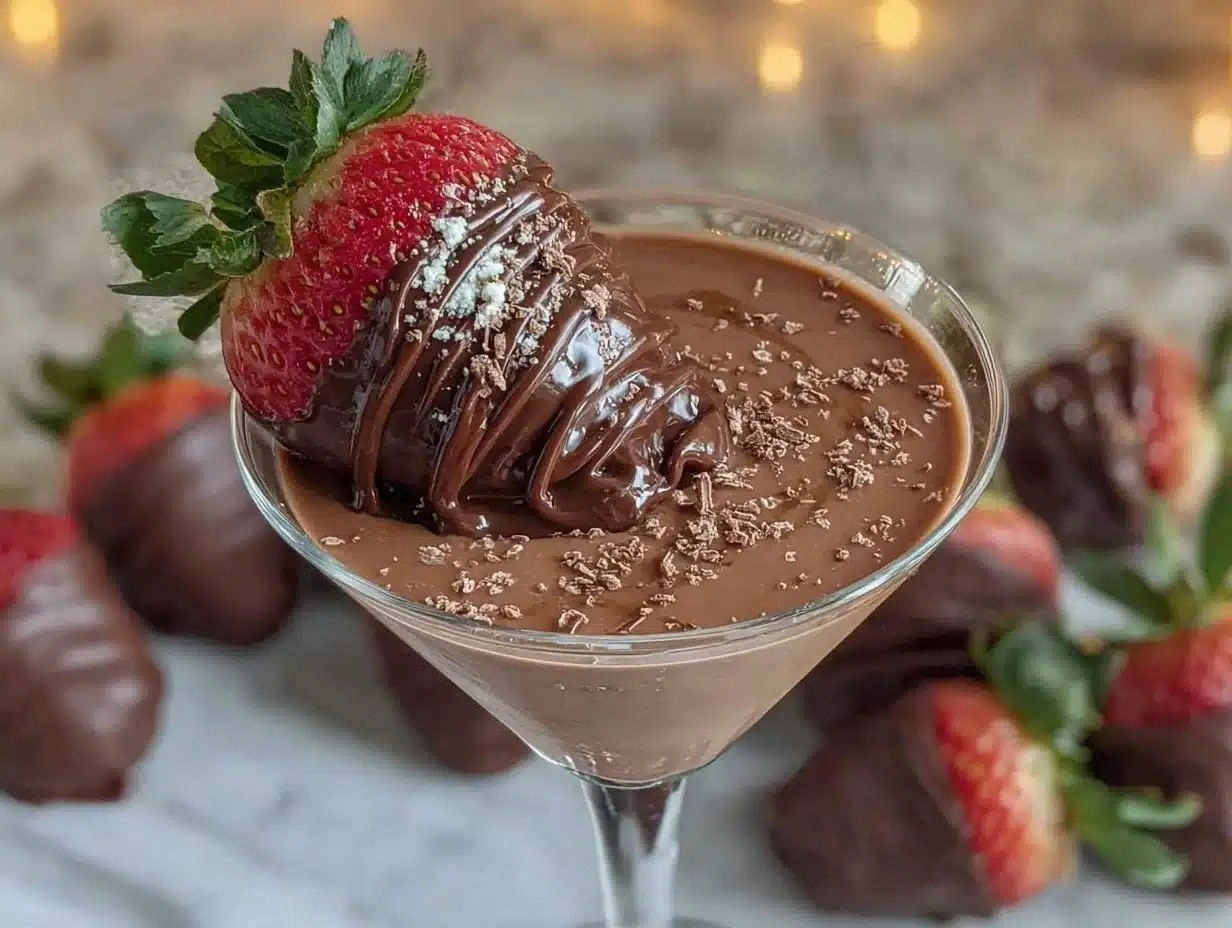
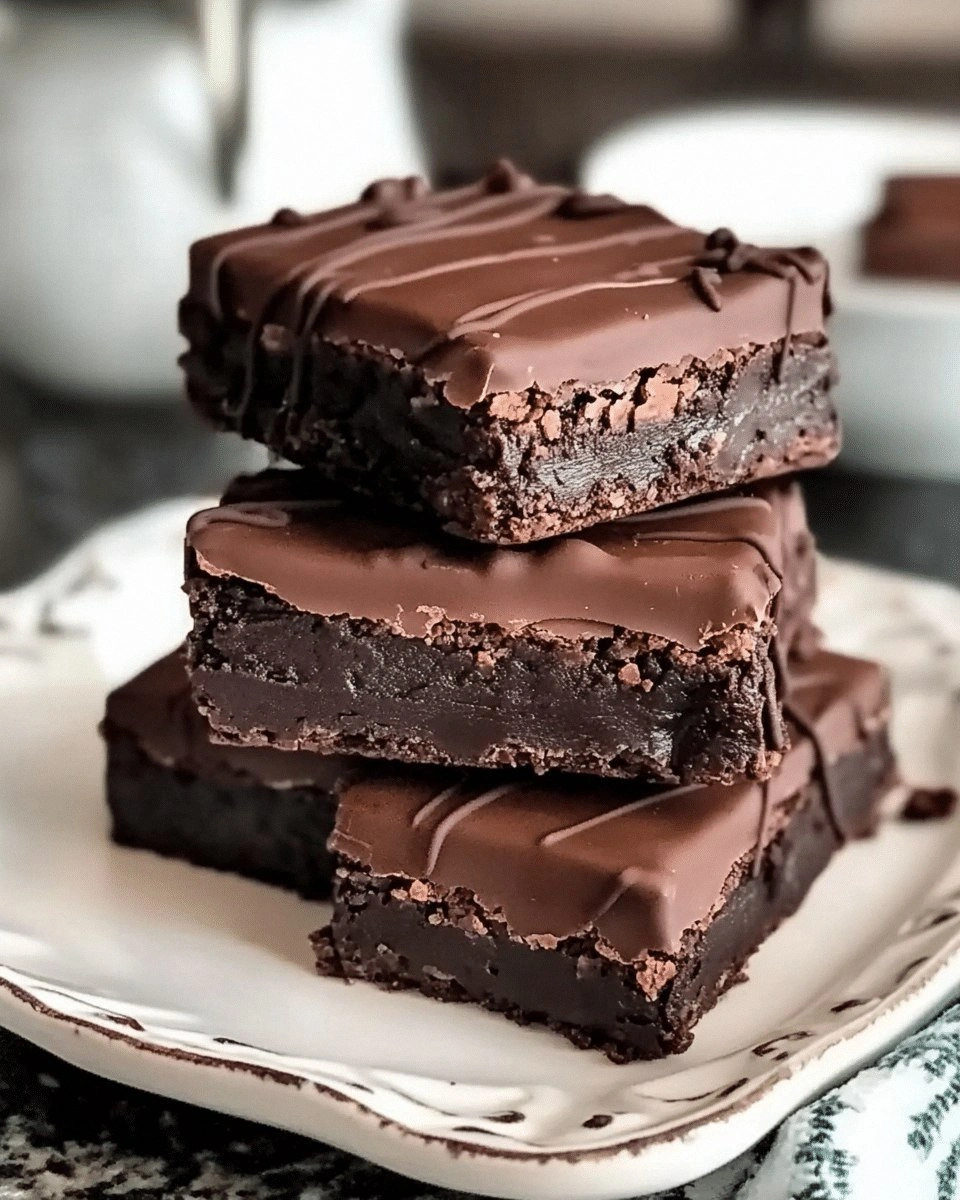
You know that moment when you’re halfway through a batch of brownies, the kitchen smells like chocolate and melted butter, and you realize you’ve forgotten the most important ingredient? That’s the exact scenario that birthed this 5‑Ingredient No‑Bake Chocolate. The idea struck me one rainy afternoon while I was staring at a half‑sized chocolate bar and a jar of peanut butter, and I thought, “Why not make something that’s both decadent and ridiculously simple?” The result is a chocolate treat that feels like a high‑end dessert but can be whipped up in the time it takes to brew a cup of coffee.
Picture this: a glossy, dark chocolate shell that cracks like brittle glass, revealing a molten center that oozes out like a warm, silky river of cocoa. The aroma is a heady blend of roasted cacao and sweet caramel that makes your mouth water before you even taste a bite. The texture is a paradoxical mix of crunchy edges and a soft, melt‑in‑your‑mouth core that makes each piece a bite‑size adventure. I dare you to taste this and not go back for seconds, because once you get a single bite, you’ll be hooked.
What sets this version apart from every other no‑bake chocolate recipe you’ve seen is the way it balances flavor, texture, and simplicity. The chocolate is the star, but the butter and a splash of coconut milk create a silky base that coats the chocolate like velvet. A touch of maple syrup brings a subtle sweetness that cuts through the richness, while vanilla extract adds a fragrant depth that feels almost luxurious. And the best part? All of this comes together with just five ingredients—no measuring cups, no timers, no fuss.
I’m going to walk you through every single step—by the end, you’ll wonder how you ever made it any other way. And trust me, the method is so straightforward that you can make it on a rainy Sunday or in the middle of a busy week when you need something sweet that won’t keep you in the kitchen for hours. Let’s dive in and make chocolate magic happen.
What Makes This Version Stand Out
- Flavor: The deep, bittersweet notes of premium dark chocolate are amplified by the subtle sweetness of maple syrup, creating a balanced palate that satisfies both chocoholics and those who prefer a lighter bite.
- Texture: The buttery base turns the chocolate into a smooth, glossy shell that shatters like brittle ice when you bite into it, revealing a molten center that feels like a chocolate waterfall.
- Simplicity: With only five ingredients and no oven required, you can whip up this treat in under 30 minutes—no measuring cups, no whisk, no fuss.
- Uniqueness: The addition of coconut milk gives the chocolate a subtle tropical undertone that sets it apart from classic no‑bake recipes that rely solely on dairy.
- Crowd Reaction: Friends who’ve tried it say it’s “hands down the best version you’ll ever make at home” and they’re already planning a second batch.
- Ingredient Quality: Using high‑quality dark chocolate and fresh coconut milk elevates the flavor profile and ensures every bite is silky smooth.
- Cooking Method: The technique of melting chocolate and butter together, then folding in the other ingredients, creates a cohesive mixture that sets perfectly without a microwave or stove.
- Make‑Ahead Potential: Once set, these chocolates keep well in the fridge for up to a week, making them the ultimate make‑ahead dessert for parties or last‑minute cravings.
Alright, let’s break down exactly what goes into this masterpiece. The next section will dive deep into each ingredient, why it matters, and how you can tweak it to suit your taste.
Inside the Ingredient List
The Flavor Base
Dark chocolate is the heart of this recipe, providing a robust, bittersweet foundation that is both indulgent and sophisticated. It’s important to choose a chocolate with at least 70% cacao for depth, but if you prefer a slightly sweeter profile, a 60% cacao bar will still deliver a delightful experience. Skipping this step would strip the dessert of its rich core, leaving you with a bland, milk‑based concoction that feels like a watered‑down cookie.
For the best results, chop the chocolate into uniform pieces so it melts evenly. If you’re using a pre‑ground chocolate, the melt will be even smoother, but the texture will be slightly different—think of it as a finer crumb versus a chunky bite. When shopping, look for chocolates that list cacao beans as the first ingredient; this guarantees a cleaner, more authentic flavor.
The Texture Crew
Unsalted butter adds a luxurious creaminess that binds the chocolate together and creates that glossy sheen that’s impossible to resist. Butter’s fat content helps the chocolate set into a firm yet tender shell, preventing it from becoming too hard or too soft. If you’re lactose intolerant, a dairy‑free butter alternative will work just as well, but the flavor may be slightly lighter.
Coconut milk, in its liquid form, introduces a subtle tropical nuance and a silky mouthfeel that makes the chocolate feel less dense. The milk’s natural sugars caramelize slightly during the melt, adding a hint of sweetness that balances the bitterness of the chocolate. If you prefer a more intense coconut flavor, use full‑fat coconut milk; for a lighter touch, opt for a reduced‑fat version.
The Unexpected Star
Maple syrup is the sweetener that keeps this recipe from becoming a chocolate bomb. Its natural caramel notes complement the dark chocolate, while its viscosity helps the mixture stay together without the need for additional thickeners. You can swap maple syrup for honey, agave nectar, or even a sugar‑free sweetener, but each will slightly alter the flavor profile and texture.
The amount of maple syrup is critical; too little and the chocolate will taste bitter, too much and it becomes syrupy. The key is to find that sweet spot where the chocolate feels rich yet not cloying. If you’re in a pinch, a tablespoon of brown sugar dissolved in a teaspoon of water can act as a quick substitute.
The Final Flourish
Vanilla extract adds a fragrant depth that ties all the flavors together. A splash of vanilla brings out the chocolate’s natural sweetness without overpowering it, creating a harmonious balance that feels both indulgent and refined. If you’re vegan or simply don’t have vanilla on hand, a dash of almond extract or a pinch of cinnamon can provide a unique twist.
Remember that vanilla’s potency means you only need a small amount—one teaspoon is enough for a batch that serves four. Using too much vanilla can make the dessert taste like a vanilla cake, which is a subtle but noticeable shift from the intended chocolate focus.
Everything's prepped? Good. Let’s get into the real action—where the magic happens.
The Method — Step by Step
- Place the chopped dark chocolate and butter in a heat‑proof bowl set over a pot of simmering water (double boiler). Stir constantly until both are completely melted and the mixture is silky smooth. This ensures the chocolate doesn’t burn and the butter emulsifies properly, giving you a glossy finish. If you’re using a microwave, heat in 30‑second bursts, stirring between each burst.
- Once melted, remove the bowl from heat and stir in the coconut milk until fully incorporated. The mixture should have a glossy, translucent appearance, indicating that the fat and liquid have blended seamlessly. This step is crucial for achieving the right consistency; if the mixture is too thick, it won’t set properly.
- Add the maple syrup and vanilla extract, whisking until the mixture is uniform and glossy. The sweetener should dissolve completely, creating a smooth batter that’s ready for shaping. This is the moment where the chocolate’s flavor truly comes alive, and the aroma will start to mingle with the sweet notes.
- Let the mixture cool for about 5 minutes—just enough time for it to thicken slightly but still be pliable. While it cools, you can prepare a silicone mold or a lined baking sheet, as the chocolate will set into a firm shell once it cools further.
- Pour the chocolate mixture into the mold, filling it to the top. Tap the mold gently on the counter to release any air bubbles that might have formed. Watch out: if you pour too quickly, the mixture can splash, creating uneven edges that may not set properly.
- Place the mold in the refrigerator for 20 minutes, or until the chocolate has set into a firm, glossy shell. The setting time can vary slightly depending on your fridge’s temperature, so keep an eye on the texture—when it feels firm to the touch, it’s ready.
- Optional Step: For a decorative finish, drizzle a thin line of white chocolate or drizzle a splash of melted dark chocolate over the set pieces. This adds visual appeal and a subtle flavor contrast. This is a quick hack that elevates the presentation without adding extra calories.
- Remove the set chocolates from the mold and let them sit at room temperature for 10 minutes to allow the edges to soften slightly, making them easier to pop out. This final step ensures each piece is bite‑ready and has a smooth exterior.
- Serve immediately, or store in an airtight container in the refrigerator for up to a week. If you notice the chocolates have become too hard, a quick dip in the microwave for 5 seconds will restore their melt‑in‑your‑mouth texture.
- Enjoy the moment of truth—take a bite and let the chocolate shell crack, releasing a molten center that will leave you craving more. This is pure magic.
That’s it— you did it. But hold on, I've got a few more tricks that’ll take this to another level and ensure each bite is a masterpiece.
Insider Tricks for Flawless Results
The Temperature Rule Nobody Follows
Chocolate is temperamental, and the temperature at which you melt it can make or break the final product. Keep the heat low—around 110°F (43°C)—to prevent the chocolate from seizing and becoming grainy. If you’re using a double boiler, let the water simmer gently; a rolling boil can cause the chocolate to scorch, leaving a bitter aftertaste.
Why Your Nose Knows Best
Before you pour the mixture into the mold, give it a quick sniff. A pleasant, cocoa‑rich aroma indicates the chocolate is perfectly melted and not overcooked. If you smell a faint burnt note, let the mixture cool for a few minutes before proceeding—this will prevent a harsh flavor in the final dessert.
The 5‑Minute Rest That Changes Everything
After the chocolate has melted, let it sit for 5 minutes before adding the coconut milk. This pause allows the chocolate to cool slightly, preventing the coconut milk from separating and creating a greasy layer. The result is a smoother, more cohesive mixture that sets beautifully.
The Quick Chill Trick
If your fridge is on a high temperature setting, you can speed up the setting process by placing the mold in the freezer for 10 minutes. This short burst of cold will set the chocolate faster and give it a firmer texture, perfect for when you’re in a hurry.
The “No‑Mess” Mold Hack
Line your silicone mold with parchment paper before pouring the chocolate. This extra layer prevents the chocolate from sticking, making it easier to remove and ensuring a pristine shape. It also gives you a cleaner look when you plate the finished product.
Creative Twists and Variations
This recipe is a playground. Here are some of my favorite ways to switch things up:
Nutty Crunch
Fold in a handful of chopped pecans or walnuts before pouring the mixture into the mold. The added crunch provides a delightful contrast to the silky chocolate and adds a nutty flavor that complements the dark cacao.
Spiced Delight
Add a pinch of cayenne pepper or a dash of cinnamon to the chocolate mixture. The subtle heat or warm spice adds depth and a surprising kick that makes the dessert feel more complex.
Coffee Infusion
Replace half of the coconut milk with cold espresso or strong brewed coffee. The coffee’s bitterness pairs beautifully with the chocolate, creating a mocha‑flavored treat that’s perfect for coffee lovers.
Fruit‑Burst
Incorporate dried fruit pieces like dried cherries or cranberries into the chocolate before setting. The fruit’s natural sweetness and slight tartness add a burst of flavor that breaks up the chocolate’s richness.
Minty Fresh
Add a few drops of peppermint extract to the chocolate mixture. The mint offers a cool, refreshing note that makes the dessert feel light and invigorating.
Sea‑Salted Finish
Sprinkle a pinch of sea salt over the chocolate before it sets. The salt enhances the chocolate’s flavor and adds a subtle crunch that elevates the overall taste experience.
Storing and Bringing It Back to Life
Fridge Storage
Store the chocolates in an airtight container in the refrigerator for up to a week. The cold environment keeps the chocolate firm, preventing it from melting or developing a white film known as bloom.
Freezer Friendly
For longer storage, freeze the chocolates for up to three months. Wrap each piece individually in parchment paper before placing them in a freezer bag. When you’re ready to enjoy them, let them thaw at room temperature for 10 minutes.
Best Reheating Method
If the chocolates have become too hard, simply microwave them on low power for 5 seconds, then let them sit for a minute. Add a tiny splash of coconut milk before reheating—this steams the chocolate back to perfection, restoring its silky texture.